The Honeycomb Hearth Fingerless Gloves: A Free Knitting Pattern for Cozy, Textured Hand Warmers
Introduction: Wrap Your Hands in Honeycomb Warmth
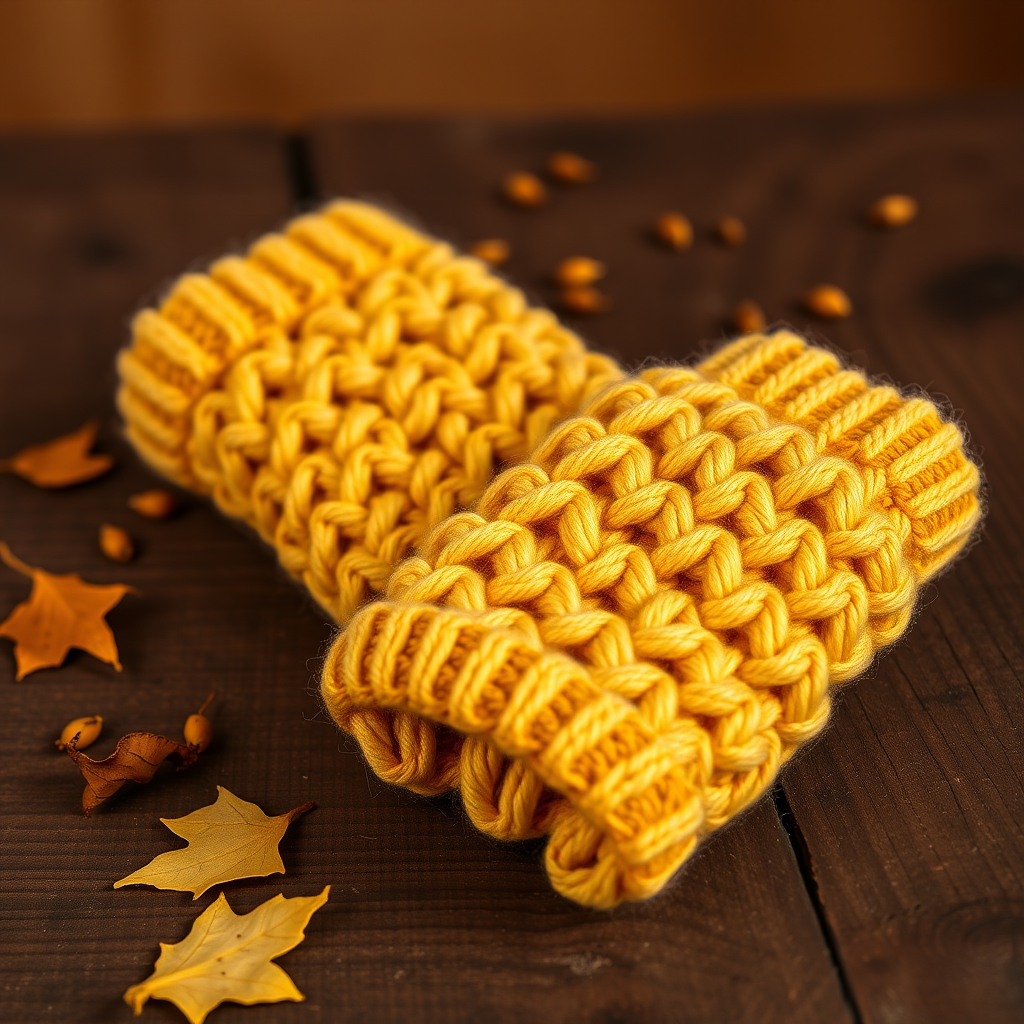
There's something magical about a stitch pattern that looks far more complex than it actually is. The Honeycomb Hearth Fingerless Gloves deliver exactly that—a stunning, dimensional honeycomb texture that feels like a warm hug for your hands. Created using clever slipped stitches, this pattern produces a fabric that's thick, cozy, and visually captivating, perfect for crisp autumn days or chilly winter evenings.
Whether you're a confident beginner looking to try something new or an experienced knitter wanting a quick, satisfying project, these gloves are a joy to make. The pattern is worked in the round from the cuff up, with a seamlessly integrated thumb gusset. The sample shown uses a warm golden yellow and cream combination, but feel free to choose your own favorite worsted weight yarns. Let's get started!
Materials Needed
Before you begin, gather the following supplies. The exact amounts and tools are based on the pattern specifications.
- Yarn: Worsted weight yarn (approx 150–200 yards total). The sample uses Lion Brand Wool-Ease in 'Honey' (golden yellow) and 'Oatmeal' (cream). You can use any worsted weight yarn you like—solid or variegated both work beautifully.
- Needles: US 7 (4.5 mm) knitting needles. You'll need a set of double-pointed needles (DPNs) or a circular needle long enough for the magic loop method (e.g., 32-inch circular).
- Notions: Stitch markers (at least 2), stitch holder or waste yarn, tapestry needle for weaving in ends, scissors.
- Gauge: 20 stitches and 28 rows = 4 inches in honeycomb stitch pattern (blocked). Achieving the correct gauge is important for a good fit.
Step-by-Step Instructions: The Honeycomb Hearth Fingerless Gloves
These instructions are written for both gloves, worked identically. Read through all notes before starting.
Pattern Notes
- The honeycomb stitch is worked over a multiple of 4 stitches + 2. For this pattern, we cast on 36 stitches (which is a multiple of 4 + 0, but the pattern adjusts for the round).
- sl1 wyib = slip 1 stitch purlwise with yarn in back. This means you insert the right needle as if to purl, but simply slide the stitch from the left needle to the right needle without knitting it, while keeping the working yarn at the back of the work.
- The gloves are worked in the round from the cuff up. Join carefully to avoid twisting.
Cuff (Both Gloves Alike)
- Cast on 36 stitches using your preferred method. Distribute stitches evenly across your DPNs or prepare for magic loop.
- Join to work in the round, being careful not to twist the cast-on edge. Place a stitch marker to mark the beginning of the round.
- Work in k2, p2 ribbing for 1.5 inches (about 10 rounds). This creates a snug, stretchy cuff.
Hand (Worked in Honeycomb Stitch Pattern)
The honeycomb pattern is a 4-round repeat. Repeat these 4 rounds until the piece measures 3 inches from the cast-on edge (about 5 pattern repeats).
- Round 1: *K2, sl1 wyib, k1* repeat to end of round.
- Round 2: *K2, sl1 wyib, k1* repeat to end of round.
- Round 3: *Sl1 wyib, k3* repeat to end of round.
- Round 4: *Sl1 wyib, k3* repeat to end of round.
Tip: After a few repeats, you'll see the honeycomb pattern emerging. The slipped stitches create the "cells" of the honeycomb.
Thumb Gusset
Now we'll create the thumb opening using increases. Follow these steps carefully.
- Set-up round: Work in pattern for 18 stitches (half the round), place a marker (this is your thumb gusset marker), then work the remaining 18 stitches in pattern. You now have two markers: one for the beginning of the round and one for the thumb gusset.
- Increase Round 1: Work in pattern to 1 stitch before the thumb gusset marker. Make one right (M1R) by lifting the bar between stitches from back to front and knitting it through the front loop. K1 (the stitch before the marker). Slip the marker. K1 (the stitch after the marker). Make one left (M1L) by lifting the bar between stitches from front to back and knitting it through the back loop. Work in pattern to end of round.
- Even Round: Work all stitches in pattern (no increases). This means you work the honeycomb pattern across all stitches, including the new stitches between the markers.
- Repeat the Increase Round and Even Round until you have 12 stitches between the thumb gusset markers (you will have completed 6 increase rounds total). The thumb gusset is now complete.
Separate Thumb
- Work in pattern to the thumb gusset marker. Slip the next 12 stitches (the stitches between the markers) onto a stitch holder or waste yarn. These are the thumb stitches.
- Using the backward loop method, cast on 2 stitches onto your right needle. Then continue working in pattern across the remaining stitches of the round.
- You now have 38 stitches total (36 original + 2 cast-on). Work even in pattern for 2 more inches (about 4 pattern repeats).
Top Edge
- Work 2 rounds in k2, p2 ribbing. This matches the cuff and gives a neat finish.
- Bind off loosely in pattern (knit the knits and purl the purls as you bind off). Be careful not to bind off too tightly, or the top edge will be too snug.
Thumb
- Transfer the 12 thumb stitches from the holder back to your needles. Distribute them as needed.
- Pick up and knit 2 stitches from the cast-on edge (the 2 stitches you added when separating the thumb). You now have 14 stitches for the thumb.
- Work in k2, p2 ribbing for 4 rounds. This creates a short, stretchy thumb opening.
- Bind off loosely in pattern.
Finishing
- Weave in all ends using a tapestry needle. Be sure to secure the yarn at the thumb gusset and cast-on edges.
- Block the gloves gently. Wet block or steam block according to your yarn's care instructions. Blocking opens up the honeycomb texture and evens out the stitches.
- Repeat the entire process for the second glove. Both gloves are worked identically—there is no left or right hand difference.
Congratulations! You've just created a pair of beautifully textured Honeycomb Hearth Fingerless Gloves. Slip them on, feel the cozy honeycomb warmth, and enjoy the compliments that are sure to come your way. Happy knitting!


