Free Pattern: Copper Leaf Twisted Trim Knit Tee

Free Pattern: Copper Leaf Twisted Trim Knit Tee
Introduction
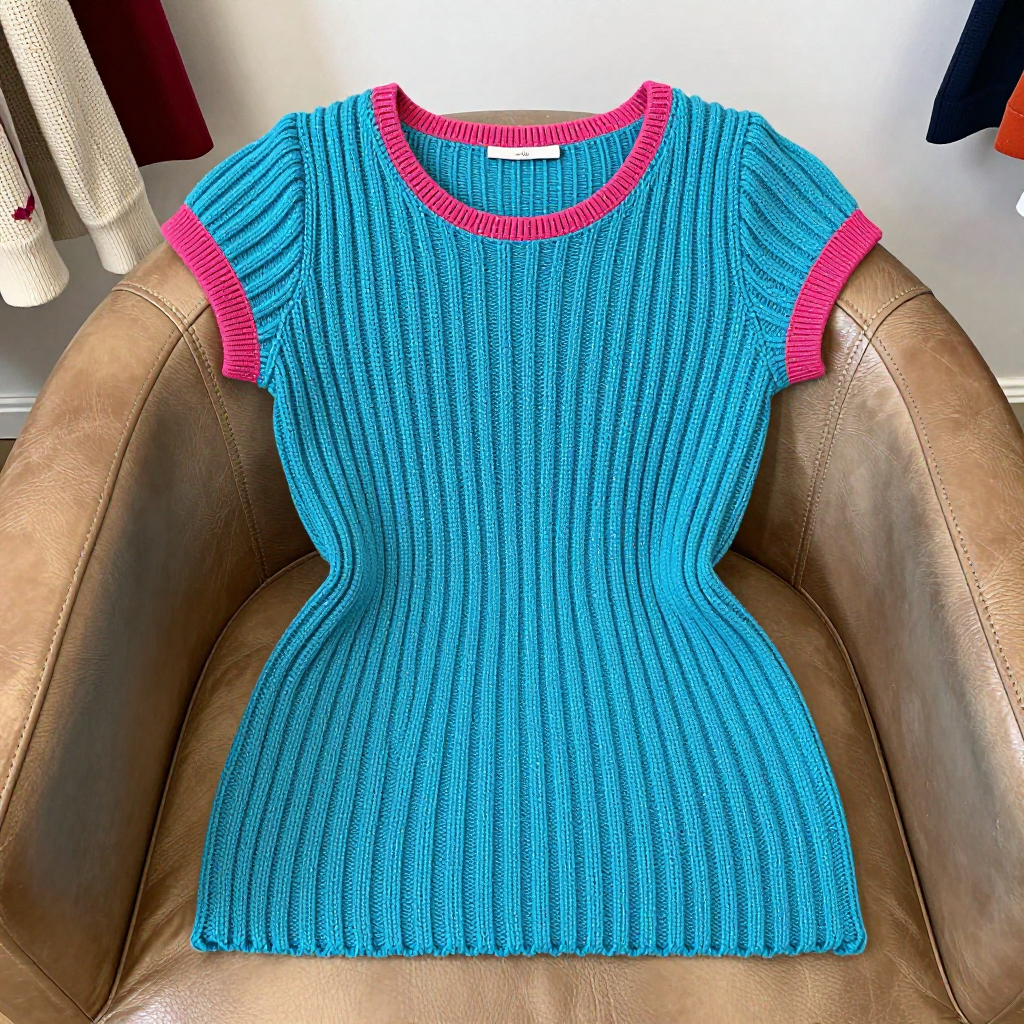
Welcome to your very first knitted garment! The Copper Leaf Twisted Trim Knit Tee is a straight-body, short-sleeve tee that looks far more complicated than it actually is. It is knit almost entirely in the round in plain stockinette stitch, which means you mostly knit every stitch and never have to purl a long, boring row. The magic comes from the forest-green twisted-rib bands at the hem, cuffs, and neckband, plus one small twisted-leaf cable appliqué that you knit separately and sew onto the left chest. The finished tee is soft, warm, and slightly fuzzy, with a boxy, bohemian feel and a beautiful contrast between the warm rust body and the deep green trim. If you can knit, purl, and follow a simple repeat, you can absolutely make this.
Materials Needed
- Yarn (Main Color, MC): Aran-weight wool blend, rust, approx. 180 m / 197 yds per 100 g skein. You need approx. 500 (550, 600, 650, 700) g — that is about 5 (6, 6, 7, 7) skeins.
- Yarn (Contrast Color, CC): Same yarn in forest green, approx. 50 g (1 skein) for all trim and the appliqué.
- Main needles: US 7 (4.5 mm) circular needle, 24–32 in / 60–80 cm long.
- Small-circumference needles: Set of 4 US 7 (4.5 mm) double-pointed needles (DPNs) for the sleeves.
- Ribbing needles: US 6 (4.0 mm) circular needle, 16 in / 40 cm, for the neckband (and a US 6 circular or DPNs for hem and cuffs).
- Cable needle (CN): A short, extra needle used to hold stitches while you make a cable.
- Stitch markers: At least 4, to mark the beginning of the round and important spots.
- Stitch holders or waste yarn: To hold stitches you are not working yet.
- Tapestry needle: A big blunt needle for sewing seams and weaving in ends.
- Scissors and a tape measure.
- Finished size / dimensions: Sizes XS (S, M, L, XL, 2XL). Finished chest circumference: 36 (40, 44, 48, 52, 56) in / 91 (102, 112, 122, 132, 142) cm. Designed to be worn with 2–4 in / 5–10 cm of positive ease (ease means extra room beyond your body measurement). Sample shown in size M.
Abbreviations and Beginner Glossary
- st(s) – stitch(es). One loop on your needle.
- rnd(s) – round(s). One complete circle of knitting when working in the round.
- RS – right side. The side of the fabric that faces out when worn.
- WS – wrong side. The inside of the fabric.
- K / knit – insert the right needle into the front of the stitch from left to right, wrap yarn around, pull a loop through, and slide the old stitch off.
- P / purl – insert the right needle into the front of the stitch from right to left, wrap yarn around the front, pull a loop through, and slide the old stitch off.
- K1tbl – knit 1 through the back loop. Knit into the back of the stitch instead of the front; this twists the stitch and makes a tight, raised column.
- k2tog – knit 2 stitches together. Insert your needle into two stitches at once and knit them as one. This decreases by 1 stitch and leans to the right.
- ssk – slip, slip, knit. Slip 2 stitches one at a time from the left needle to the right needle as if to knit, then knit both together through the back loops. This decreases by 1 stitch and leans to the left.
- sl1-k2tog-psso – slip 1 stitch, knit 2 together, pass the slipped stitch over. Slip 1 stitch, knit the next 2 together, then lift the slipped stitch over the knit stitch and off the needle. This decreases by 2 stitches and makes a centered decrease.
- yo – yarn over. Wrap the yarn over the right needle to create an extra loop. This makes an increase and a small hole (a decorative eyelet).
- PM – place marker. Put a stitch marker on your needle to mark a spot.
- MC / CC – main color / contrast color.
- CN – cable needle.
- Stockinette stitch – when working in the round, knit every round. The fabric looks smooth on the outside.
- Twisted rib – a rib pattern of knit-through-back-loop and purl stitches that makes a dense, textured band.
- Bind off – the way to finish an edge so stitches do not unravel. Knit 2 stitches, then lift the first over the second and off the needle; repeat across.
- Cast on – the way to put the very first stitches onto your needle.
- Pick up and knit – insert your needle into an edge stitch, wrap yarn, and pull up a loop, creating a new stitch along an existing edge.
Gauge
18 sts and 24 rnds = 4 in / 10 cm in stockinette stitch on US 7 (4.5 mm) needles, after blocking.
Gauge matters because it tells you how big your stitches are. If your stitches are bigger than the pattern expects, your tee will come out too large; if smaller, too small. To check gauge, cast on about 30 stitches on your US 7 needle, knit in stockinette (knit one row, purl one row) for about 5 inches, and bind off. Lay the swatch flat, gently stretch it, and count how many stitches fit across 4 inches and how many rows fit in 4 inches. If you have more stitches than 18, go up a needle size; if fewer, go down. Always check gauge before you start the real tee.
Beginner Tips Before You Start
- Use stitch markers. Place one at the beginning of every round so you always know where you are. Add markers every 20 stitches if you tend to lose count.
- Do not pull your yarn too tight. Keep an even, relaxed tension. Tight stitches make the fabric stiff and make it hard to slide stitches on the needle.
- Count your stitches at the end of every shaping row. The stitch counts in parentheses are your safety net — if they match, you are on track.
- Try on as you go. Because the body is knit in the round, you can slip the live stitches onto a long circular needle or waste yarn and try the tee on to check length before you divide for the front and back.
- Knit the appliqué first as practice. The little leaf is a perfect, low-pressure way to learn yarn overs and decreases before you tackle the main body.
- Keep your working yarn behind the work for knit rows and in front for purl rows. This prevents accidental extra loops.
Step-by-Step Instructions
Body
With the US 6 (4.0 mm) circular needle and CC (forest green), cast on 160 (180, 196, 216, 232, 252) sts. Place a marker (PM) for the beginning of the round and join to work in the round, being careful not to twist the stitches.
Rnds 1–12: Work in Twisted Rib (that is: *K1tbl, p1; repeat from * to end of round). This makes a band about 2 in / 5 cm tall. (160 (180, 196, 216, 232, 252) sts)
Change to the US 7 (4.5 mm) circular needle and MC (rust). Knit every round (stockinette in the round) until the piece measures 15 (15, 15.5, 16, 16, 16.5) in / 38 (38, 39.5, 40.5, 40.5, 42) cm from the cast-on edge, or your desired length to the underarm. (160 (180, 196, 216, 232, 252) sts)
Divide for Front and Back
Next rnd: Knit 80 (90, 98, 108, 116, 126) sts for the front, then place the remaining 80 (90, 98, 108, 116, 126) sts on a stitch holder or waste yarn for the back. You will now work the front back and forth in rows (turning your work at the end of each row).
Front
Row 1 (RS): Knit. (80 (90, 98, 108, 116, 126) sts)
Row 2 (WS): Purl. (80 (90, 98, 108, 116, 126) sts)
Row 3 (RS): Bind off 4 (5, 5, 6, 6, 7) sts, knit to end. (76 (85, 93, 102, 110, 119) sts)
Row 4 (WS): Bind off 4 (5, 5, 6, 6, 7) sts, purl to end. (72 (80, 88, 96, 104, 112) sts)
Row 5 (RS): K1, ssk, knit to last 3 sts, k2tog, k1. (70 (78, 86, 94, 102, 110) sts)
Row 6 (WS): Purl. (70 (78, 86, 94, 102, 110) sts)
Rows 7–12: Repeat Rows 5–6 three more times. (64 (72, 80, 88, 96, 104) sts)
Work even in stockinette (knit on RS rows, purl on WS rows) until the armhole measures 6.5 (7, 7.5, 8, 8.5, 9) in / 16.5 (18, 19, 20.5, 21.5, 23) cm, ending with a WS row. (64 (72, 80, 88, 96, 104) sts)
Shape neck — Next row (RS): K20 (23, 26, 29, 32, 35) sts, bind off the next 24 (26, 28, 30, 32, 34) sts, knit to end. (20 (23, 26, 29, 32, 35) sts on each side)
Place the left-side stitches on a holder. Work the right side only:
Row 1 (WS): Purl. (20 (23, 26, 29, 32, 35) sts)
Row 2 (RS): Knit to last 3 sts, k2tog, k1. (19 (22, 25, 28, 31, 34) sts)
Row 3 (WS): Purl. (19 (22, 25, 28, 31, 34) sts)
Rows 4–7: Repeat Rows 2–3 two more times. (17 (20, 23, 26, 29, 32) sts)
Work even until the armhole measures 8 (8.5, 9, 9.5, 10, 10.5) in / 20.5 (21.5, 23, 24, 25.5, 26.5) cm. Bind off all stitches. (17 (20, 23, 26, 29, 32) sts)
Return the held left-side stitches to the needle and work to match, reversing the shaping (work ssk at the neck edge on RS rows instead of k2tog).
Back
Return the 80 (90, 98, 108, 116, 126) back sts to the US 7 needle. Work as for the front, including the armhole shaping, until the armhole measures 7.5 (8, 8.5, 9, 9.5, 10) in / 19 (20.5, 21.5, 23, 24, 25.5) cm, ending with a WS row. (64 (72, 80, 88, 96, 104) sts)
Shape back neck — Next row (RS): K20 (23, 26, 29, 32, 35) sts, bind off the next 24 (26, 28, 30, 32, 34) sts, knit to end. (20 (23, 26, 29, 32, 35) sts on each side)
Work each side even for 0.5 in / 1.5 cm. Bind off all stitches.
Sleeves (make 2)
With the US 6 (4.0 mm) double-pointed needles and CC, cast on 40 (44, 48, 52, 56, 60) sts. Join to work in the round.
Rnds 1–9: Work in Twisted Rib (*K1tbl, p1; repeat from * to end). This makes a cuff about 1.5 in / 4 cm tall. (40 (44, 48, 52, 56, 60) sts)
Change to the US 7 (4.5 mm) double-pointed needles and MC. Knit every round, increasing 1 st at the beginning and end of every 6th round 4 times. (48 (52, 56, 60, 64, 68) sts)
Work even until the sleeve measures 6 (6, 6.5, 6.5, 7, 7) in / 15 (15, 16.5, 16.5, 18, 18) cm from the cast-on edge. (48 (52, 56, 60, 64, 68) sts)
Shape sleeve cap — Next rnd: Bind off 4 (5, 5, 6, 6, 7) sts, knit to end. (44 (47, 51, 54, 58, 61) sts)
Next rnd: Bind off 4 (5, 5, 6, 6, 7) sts, knit to end. (40 (42, 46, 48, 52, 54) sts)
Now work back and forth in rows:
Row 1 (RS): K1, ssk, knit to last 3 sts, k2tog, k1. (38 (40, 44, 46, 50, 52) sts)
Row 2 (WS): Purl. (38 (40, 44, 46, 50, 52) sts)
Rows 3–14: Repeat Rows 1–2 six more times. (26 (28, 32, 34, 38, 40) sts)
Bind off all stitches.
Neckband
With the US 6 (4.0 mm) circular needle and CC, pick up and knit approx. 88 (92, 96, 100, 104, 108) sts evenly around the neck opening. PM and join to work in the round.
Rnds 1–6: Work in Twisted Rib (*K1tbl, p1; repeat from * to end). This makes a band about 1 in / 2.5 cm tall. (88 (92, 96, 100, 104, 108) sts)
Bind off loosely in pattern.
Twisted Leaf Appliqué
With the US 7 (4.5 mm) needles and CC, cast on 11 sts. Work Rows 1–27 of the Twisted Leaf Cable as follows:
Row 1 (RS): P1, k2tog, k3, yo, k1, yo, k3, ssk, p1. (11 sts)
Row 2 (WS): Purl all sts. (11 sts)
Row 3: P1, k2tog, k2, yo, k3, yo, k2, ssk, p1. (11 sts)
Row 4: Purl. (11 sts)
Row 5: P1, k2tog, k1, yo, k5, yo, k1, ssk, p1. (11 sts)
Row 6: Purl. (11 sts)
Row 7: P1, k2tog, yo, k7, yo, ssk, p1. (11 sts)
Row 8: Purl. (11 sts)
Row 9: P1, k1, yo, k2, ssk, k1, k2tog, k2, yo, k1, p1. (11 sts)
Row 10: Purl. (11 sts)
Row 11: P1, k2, yo, k1, ssk, k1, k2tog, k1, yo, k2, p1. (11 sts)
Row 12: Purl. (11 sts)
Row 13: P1, k3, yo, ssk, k1, k2tog, yo, k3, p1. (11 sts)
Row 14: Purl. (11 sts)
Row 15: P1, k4, yo, sl1-k2tog-psso, yo, k4, p1. (11 sts)
Row 16: Purl. (11 sts)
Row 17: P1, k2tog, k7, ssk, p1. (9 sts)
Row 18: Purl. (9 sts)
Row 19: P1, k2tog, k5, ssk, p1. (7 sts)
Row 20: Purl. (7 sts)
Row 21: P1, k2tog, k3, ssk, p1. (5 sts)
Row 22: Purl. (5 sts)
Row 23: P1, k2tog, k1, ssk, p1. (3 sts)
Row 24: Purl. (3 sts)
Row 25: P1, sl1-k2tog-psso, p1. (3 sts)
Row 26: Purl. (3 sts)
Row 27: P1, k1, p1. (3 sts)
Bind off the remaining 3 sts.
Assembly and Finishing
Sew the sleeve caps into the armholes. Thread your tapestry needle with MC yarn. Match the center of each sleeve cap to the shoulder seam, pin the sleeve in place with the right sides facing out, and sew with a simple whip stitch (small stitches over the edge) all the way around. Remove the pins as you go.
Sew the side seams if needed. The body is knit in the round, so there are no side seams to sew — only the sleeve seams where you joined the sleeves to the body.
Attach the appliqué. Block the leaf lightly first. Pin it to the left chest of the tee, about 3 in / 7.5 cm below the neckband and 3 in / 7.5 cm from the center front. Sew it in place with matching CC yarn and your tapestry needle, using small stitches around the edge.
Weave in all ends. Turn the tee inside out and thread each loose yarn tail onto the tapestry needle. Weave it back and forth through the wrong side of the fabric for about 2 inches, then trim close to the fabric.
Block the tee. Soak it in cool water for 15 minutes. Gently squeeze out the excess water — do not wring or twist. Lay it flat on a towel, shape it to the finished measurements, and let it dry completely. This relaxes the stitches and makes the fabric even.
Pro Tips and Variations
- Change the colors. Swap the rust and forest green for any two colors you love — a cream body with a terracotta trim, or a navy body with a mustard trim, both look beautiful.
- Adjust the length. Because the body is knit in the round before you divide for the front and back, simply knit more or fewer rounds before the underarm to make the tee longer or shorter. Add or remove rounds in multiples of 2 to keep the stitch pattern even.
- Substitute yarn. Any Aran-weight yarn that gives you the correct gauge will work. A wool-cotton blend makes a lighter summer tee; a pure wool makes a warmer one. Always knit a gauge swatch with your substitute yarn first.
- Make it a tank or a long-sleeve tee. Skip the sleeves entirely and finish the armholes with a Twisted Rib band for a tank top, or keep knitting the sleeves longer before the cap shaping for a long-sleeve version.