Solar Flare Poncho Free Pattern – A Knitted Gradient Sunset Wrap
Wrap Yourself in a Sunset: The Solar Flare Poncho
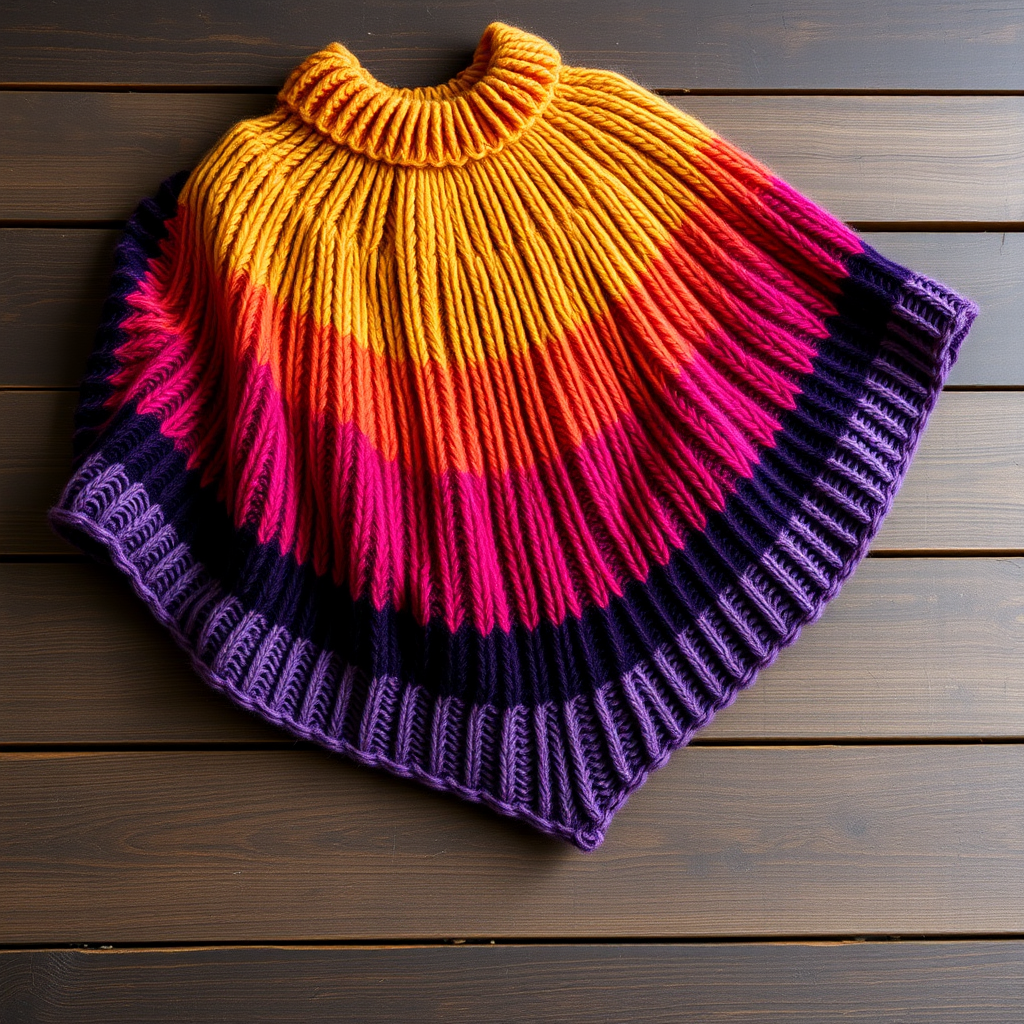
Imagine draping the warm, vibrant colors of a setting sun over your shoulders. That's the magic of the Solar Flare Poncho—a stunning, seamless knit that transitions from fiery coral to deep twilight purple. This isn't just a cozy accessory; it's a wearable piece of art. The textured ribbed panels and flowing A-line silhouette make it a statement piece for cool evenings, whether you're curled up with a book or stepping out for a crisp autumn walk. Best of all, this free knitting pattern is designed to be approachable, guiding you from a simple neck opening to a beautiful, finished cape. Let's cast on and create something radiant together.
Materials Needed: Gathering Your Palette
Before you begin, assemble your materials. This project is a wonderful way to play with color, and the worsted weight yarn ensures a quick, satisfying knit.
- Yarn: Worsted weight yarn in 5 colors (approx. 400g total):
- Color A: Coral
- Color B: Amber
- Color C: Gold
- Color D: Magenta
- Color E: Deep Purple
- Needles: US 9 (5.5 mm) circular knitting needles with a 32-inch cable. The long cable is essential to accommodate the increasing number of stitches as the poncho grows.
- Notions: Stitch markers (at least 8), a tapestry needle for weaving in ends, and scissors.
Step-by-Step Instructions: Knitting Your Masterpiece
This poncho is knitted top-down in one piece, starting with a simple neck opening and increasing outward to form a flowing cape. Follow these detailed instructions, and you'll be amazed at what you create. Don't forget to check your gauge first!
Abbreviations
- CO: Cast on
- K: Knit
- P: Purl
- K1f/b: Knit front and back (increases 1 stitch)
- PM: Place marker
- SM: Slip marker
- St(s): Stitch(es)
Part 1: The Neck Opening
We'll start with a comfortable, stretchy ribbed neckline.
- With Color A (Coral), CO 80 sts. Join in the round, being careful not to twist your stitches. PM at the beginning of the round to mark the start.
- Work K1, P1 ribbing for 2 inches (approx. 12 rounds). This creates a neat, flexible edge that will sit comfortably around your neck.
Part 2: The Increase Section
Now we'll shape the poncho by adding stitches at regular intervals, creating the gentle flare of the cape.
- Set-up Round: *K10, PM, K10, PM*; repeat from * to * around. You will now have 8 markers, each placed after every 10 stitches.
- Increase Round: *K to 1 st before marker, K1f/b, SM, K1f/b*; repeat from * to * around. This adds 16 stitches per increase round (2 at each of the 8 markers).
- Even Rounds: Work 3 rounds even in stockinette (knit all stitches). This creates a smooth fabric and gives the increases a subtle, radiating look.
- Repeat steps 4 and 5 until you have 240 sts total. This will be after 10 increase rounds. Your poncho should now have a beautiful, circular shape forming.
Part 3: The Color Gradient
Time for the magic! We'll now transition through your sunset palette, working in even sections to create a seamless gradient.
- Switch to Color B (Amber). Work 10 rounds even in stockinette.
- Switch to Color C (Gold). Work 10 rounds even.
- Switch to Color D (Magenta). Work 10 rounds even.
- Switch to Color E (Deep Purple). Work 10 rounds even.
Part 4: Body Expansion
With the main colors in place, we'll continue to add length and width for a flowing, dramatic silhouette.
- Continuing with Color E, work an Increase Round: *K to 1 st before marker, K1f/b, SM, K1f/b*; repeat from * to * around.
- Work 5 rounds even in stockinette.
- Repeat steps 11 and 12 until the poncho measures 18 inches from the neck opening. This will give you a lovely, cape-like length.
Part 5: The Ribbed Border
A wide ribbed border adds weight and a polished finish, helping the poncho drape beautifully.
- Work K1, P1 ribbing for 3 inches (approx. 18 rounds).
- Bind off loosely in pattern. A loose bind-off is crucial here to ensure the bottom edge remains stretchy and doesn't pull in.
Part 6: Finishing Touches
- Weave in all ends securely with your tapestry needle.
- Block gently to shape. Lay the poncho flat, gently pat it into the desired shape, and allow it to dry completely. This will even out the stitches and allow the poncho to drape naturally.
Congratulations! You've just knitted a stunning Solar Flare Poncho. It's a beautiful testament to your skill and a cozy, artistic addition to your wardrobe. Wear it with pride, and enjoy the warmth of your handmade sunset.