Ember Dune Poncho Free Pattern – Cozy Knit with Woven Texture
Ember Dune Poncho Free Pattern – Cozy Knit with Woven Texture
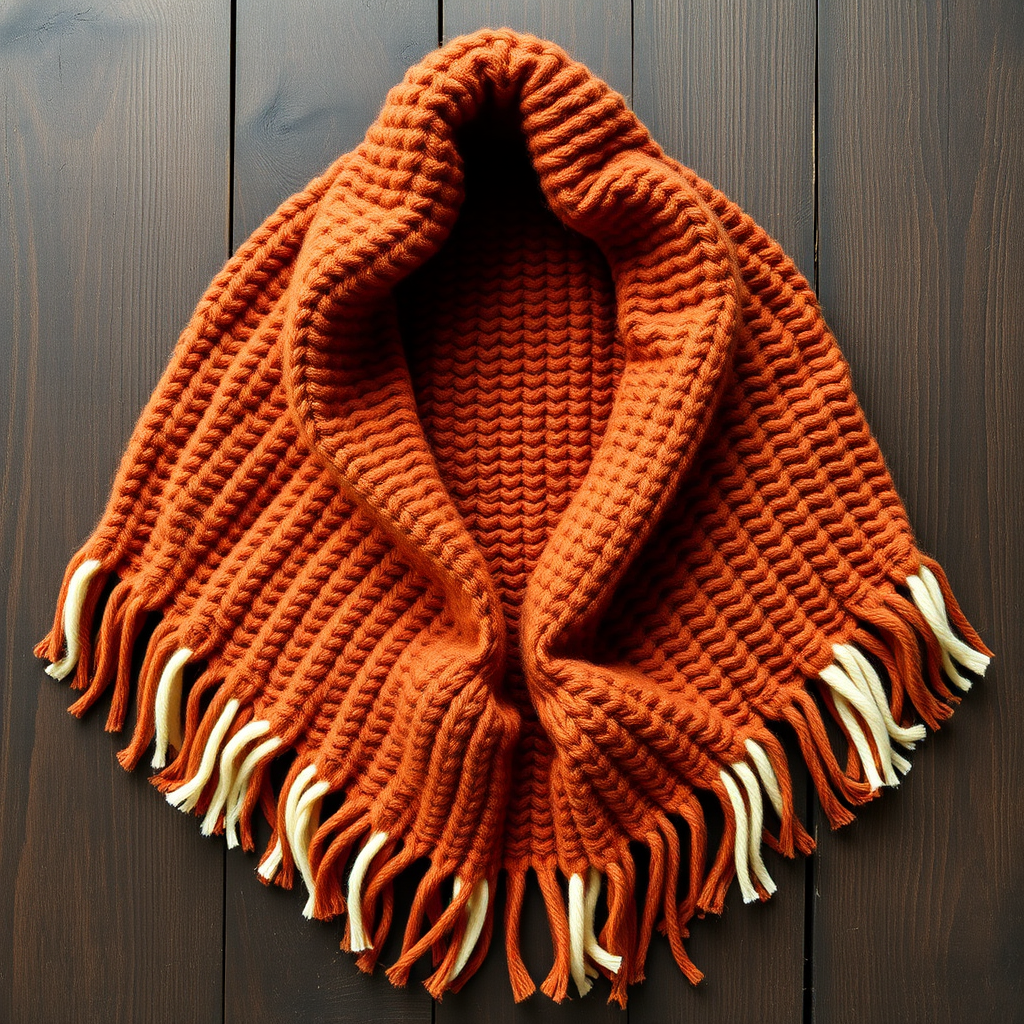
Wrap yourself in the warm, earthy embrace of the Ember Dune Poncho, a modern knit that blends rustic charm with contemporary comfort. This free pattern features a unique woven-like stitch texture and a rich terracotta palette, perfect for layering on crisp days. Whether you're curled up by the fire or stepping out for a fall stroll, this poncho is designed to become your go-to cozy companion. The relaxed, rectangular silhouette drapes beautifully over the shoulders, while the cream fringe adds a subtle bohemian touch that elevates the entire piece.
This pattern is beginner-friendly yet yields a sophisticated result. The woven texture is achieved through simple knit and purl combinations, making it an excellent project for knitters looking to expand their skills beyond basic stockinette. The one-piece construction means no seaming—just cast on, knit in the round, and shape the neckline. Let's dive into creating this stunning, textured garment.
Materials Needed
Before you begin, gather the following materials to ensure a smooth knitting experience:
- Yarn: Worsted weight yarn in terracotta (MC) and cream (CC). You will need approximately 800g of the main color (terracotta) and 200g of the contrast color (cream). Choose a soft, durable wool blend for the best drape and warmth.
- Needles: US 9 (5.5mm) circular knitting needles with a 32-inch cable. The long cable is essential for accommodating the large number of stitches in the round.
- Notions: Stitch markers (at least one), a tapestry needle for weaving in ends, and a crochet hook (optional, for adding fringe).
- Gauge: 18 stitches and 24 rows = 4 inches in stockinette stitch. Always knit a gauge swatch first to ensure your finished poncho matches the intended measurements.
Step-by-Step Instructions
This poncho is worked in one piece from the bottom up, in the round. Follow these detailed instructions carefully, and you'll have a beautiful, textured garment in no time.
Poncho Body (Worked in One Piece from the Bottom Up)
Foundation
With your main color (MC) yarn, cast on 180 stitches using the long-tail method or your preferred cast-on technique. Join in the round, being extremely careful not to twist the stitches. Place a stitch marker at the beginning of the round to mark your starting point. This marker will stay in place throughout the entire project.
Ribbed Hem
Work in K2, P2 ribbing for 2 inches. This creates a neat, stretchy hem that will anchor the poncho nicely. To do this, repeat the following sequence around: Knit 2 stitches, then purl 2 stitches. Continue this pattern for the full 2 inches, maintaining the ribbing pattern consistently.
Woven Texture Pattern
Now you'll begin the signature woven texture. This pattern alternates between knit and purl stitches to create a dense, fabric-like appearance. Follow these 12 rounds carefully:
- Round 1: *K1, P1* repeat to end of round.
- Round 2: *P1, K1* repeat to end of round.
- Round 3: *K1, P1* repeat to end of round.
- Round 4: *P1, K1* repeat to end of round.
- Rounds 5-8: Repeat Rounds 1-4 exactly as written.
- Round 9: *K2, P2* repeat to end of round.
- Round 10: *P2, K2* repeat to end of round.
- Round 11: *K2, P2* repeat to end of round.
- Round 12: *P2, K2* repeat to end of round.
Repeat these 12 rounds until the piece measures 12 inches from the cast-on edge. This will create the main body of the poncho with its beautiful, woven-like texture. Remember to keep your tension even throughout—not too tight, not too loose—for a consistent fabric.
Neck Shaping
Once your piece reaches 12 inches, it's time to shape the neckline. This will create a comfortable opening that drapes softly over your shoulders.
- Next Round: *K2tog, K1* repeat to end of round. This will decrease your stitch count from 180 to 120 stitches. The K2tog (knit two together) is a right-leaning decrease that will gently taper the fabric.
- Work in K2, P2 ribbing for 1 inch. This creates a structured band around the neckline.
- Next Round: *K2tog* repeat to end of round. This will decrease your stitch count from 120 to 60 stitches. You'll notice the fabric beginning to gather inward, forming the neck opening.
- Work in K1, P1 ribbing for 1 inch. This finer ribbing will create a neat, finished edge at the neck.
- Bind off loosely in pattern. To bind off in pattern, knit the knit stitches and purl the purl stitches as you bind off, keeping the tension loose so the edge remains stretchy and comfortable.
Finishing
Weave in all loose ends using your tapestry needle. Take your time to secure the yarn tails neatly on the wrong side of the fabric. Block the poncho gently to shape. To block, soak the garment in lukewarm water with a mild wool wash, gently squeeze out excess water (never wring), and lay flat to dry on a towel, shaping it to the desired dimensions. This will even out the stitches and enhance the woven texture.
Optional Fringe
For a bohemian touch, add cream fringe to the bottom hem. Cut 12-inch strands of your contrast color (CC) yarn. For each fringe, fold a strand in half, insert a crochet hook through the bottom edge of the poncho, pull the folded loop through, and pull the ends through the loop. Pull tight to secure. Space the fringe every 2 inches around the entire hem. This will add movement and visual interest to your finished poncho.
Your Ember Dune Poncho is now complete! The rich terracotta body with its woven texture and cream fringe accents creates a stunning, handcrafted piece that's both stylish and functional. This poncho makes a wonderful gift or a special treat for yourself. Enjoy wearing your beautiful, cozy creation!