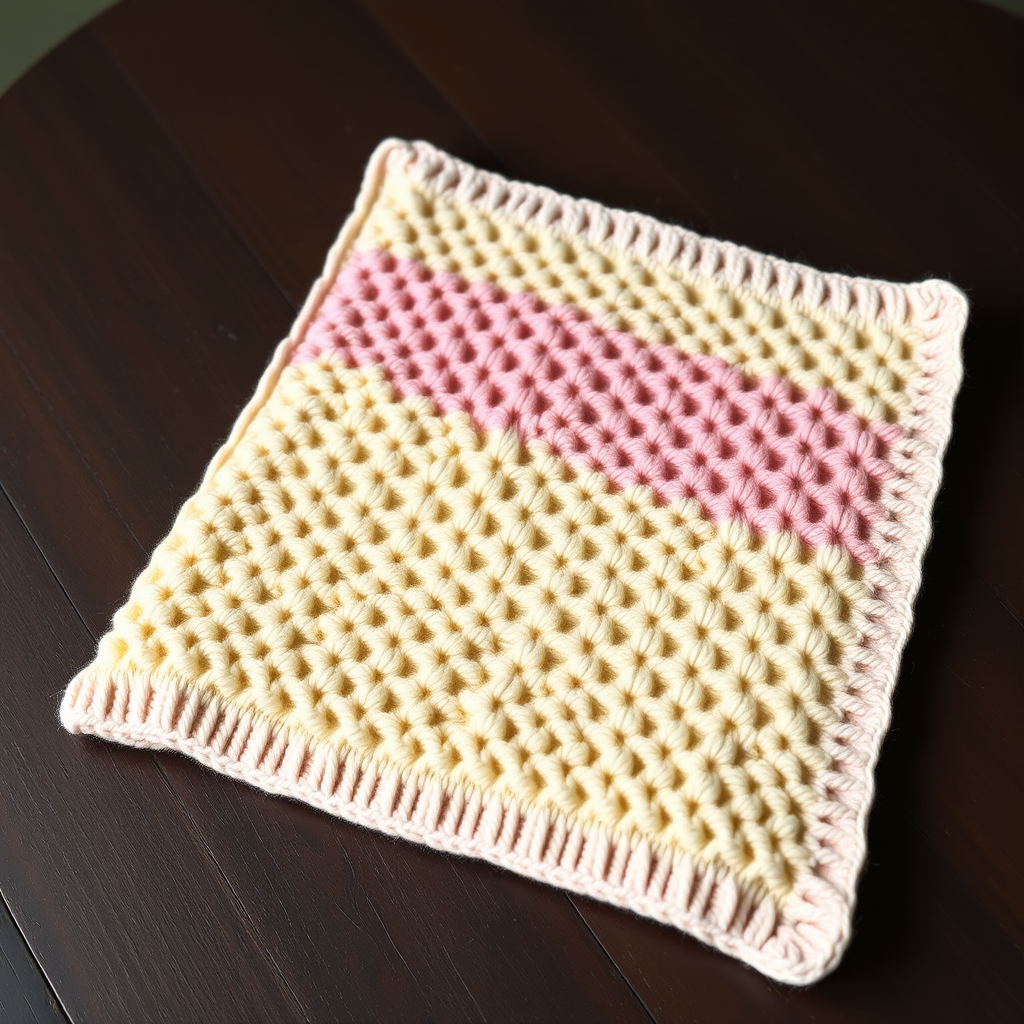
Heirloom Honeycomb Shell Baby Blanket Free Pattern – Knit a Vintage-Inspired Cloud

A Timeless Treasure: Knit the Heirloom Honeycomb Shell Baby Blanket
There are certain projects that transcend mere craft and become cherished family heirlooms. The Heirloom Honeycomb Shell Baby Blanket is exactly that—a vintage-inspired masterpiece designed to wrap your little one in a cloud of softness and nostalgia. With its intricate honeycomb texture and delicate shell stitches, this blanket looks far more complex than it actually is. In fact, it's a surprisingly beginner-friendly pattern that uses simple knits, purls, and yarn overs to create a stunning, woven effect.
Reimagined in a modern, soothing palette of buttermilk cream and sage green, this blanket is the perfect gift for a baby shower, a new arrival, or a special little one in your life. The result is a timeless, heirloom-quality piece you'll be proud to pass down for generations. Let's dive into this free knitting pattern and create something truly magical.
Materials Needed: Gathering Your Supplies
Before you begin, ensure you have all the necessary materials on hand. This pattern calls for soft, breathable cotton, making it ideal for sensitive baby skin.
- Yarn: Worsted weight (100% cotton or cotton blend, e.g., Lion Brand Comfy Cotton Blend) in two colors:
- Main Color (MC) - Buttermilk: 1200 yards
- Contrast Color (CC) - Sage: 400 yards
- Needles: US 7 (4.5 mm) circular knitting needles with a 32-inch cable (to accommodate the large number of stitches).
- Notions: Stitch markers (at least 4), tapestry needle for weaving in ends.
- Gauge: 18 stitches and 24 rows = 4 inches in Stockinette stitch (after blocking). Always knit a gauge swatch to ensure your blanket matches the intended size.
Step-by-Step Instructions: Knitting Your Heirloom Blanket
This pattern is worked flat from the bottom up, then finished with a beautiful honeycomb border worked in the round. The final blanket measures approximately 30 x 36 inches—perfect for a crib or stroller.
Special Stitches You'll Need to Know
Master these two simple techniques, and you'll be amazed at the intricate texture you can create.
- Shell Stitch (worked over 6 stitches): In the same stitch, knit (k1, yo, k1, yo, k1) to create 5 stitches from 1. On the following row, purl these 5 stitches together (p5tog) to form a beautiful, dimensional shell.
- Honeycomb Lattice: This is a simple 4-row repeat that uses knits, purls, and yarn overs to create a woven honeycomb effect. The instructions below guide you through it seamlessly.
Part 1: The Foundation
With your Main Color (MC), cast on 150 stitches loosely. A loose cast-on ensures your edge remains stretchy and doesn't pucker. Work 6 rows in garter stitch (knit every row) to create a sturdy, non-curling edge for your blanket.
Part 2: The Main Honeycomb Pattern
Now, you'll begin the main body of the blanket. Repeat these 8 rows until your work measures 34 inches from the cast-on edge, always ending with Row 8 to keep the pattern balanced.
- Row 1 (RS): With MC, knit all stitches.
- Row 2 (WS): With MC, purl all stitches.
- Row 3: Switch to Contrast Color (CC). K3, *work Shell Stitch in the next stitch, k5; repeat from * to the last 3 stitches, k3.
- Row 4: With CC, purl all stitches. (This is the row where you will p5tog the shells from the previous row).
- Row 5: Switch back to MC. Knit all stitches.
- Row 6: With MC, purl all stitches.
- Row 7: With MC, k6, *work Shell Stitch in the next stitch, k5; repeat from * to the last 6 stitches, k6. (This offsets the shells to create the honeycomb lattice effect).
- Row 8: With MC, purl all stitches. (Remember to p5tog the shells from Row 7).
Part 3: The Honeycomb Border (Worked in the Round)
Once your main body is complete, you'll add a beautiful, cohesive border. With the Right Side (RS) facing and using MC, pick up and knit stitches evenly around all four edges. You should have approximately 150 stitches on the top and bottom, and 180 stitches on the sides. Place a stitch marker at each of the four corners.
- Round 1: Knit all stitches, increasing 1 stitch at each corner (kfb) to turn the corners neatly. (4 increases total).
- Round 2: Purl all stitches.
- Round 3: Switch to CC. *K2tog, yo; repeat from * around the entire border, working a kfb at each corner marker.
- Round 4: Purl all stitches.
- Round 5: Switch back to MC. Knit all stitches, increasing 1 stitch at each corner (kfb).
- Round 6: Bind off all stitches loosely in knit. A loose bind-off is crucial for a stretchy, scalloped edge.
Finishing Touches: Bringing It All Together
Your blanket is almost complete! Now for the final, satisfying steps.
- Weave in all ends: Use your tapestry needle to carefully weave in all loose yarn tails on the wrong side of the blanket.
- Block the blanket: This step is essential to open up the shell stitches and even out the honeycomb texture. Gently soak the blanket in lukewarm water with a mild soap, then press out excess water (do not wring). Lay it flat on a clean towel, shape it to the correct dimensions (30x36 inches), and pin if necessary. Allow it to dry completely.
Once dry, your Heirloom Honeycomb Shell Baby Blanket is ready to be loved. The soft cotton, the intricate texture, and the timeless design make it a gift that will be treasured for years to come. Happy knitting!