Heirloom Honeycomb Vintage Nursery Blanket Free Knitting Pattern
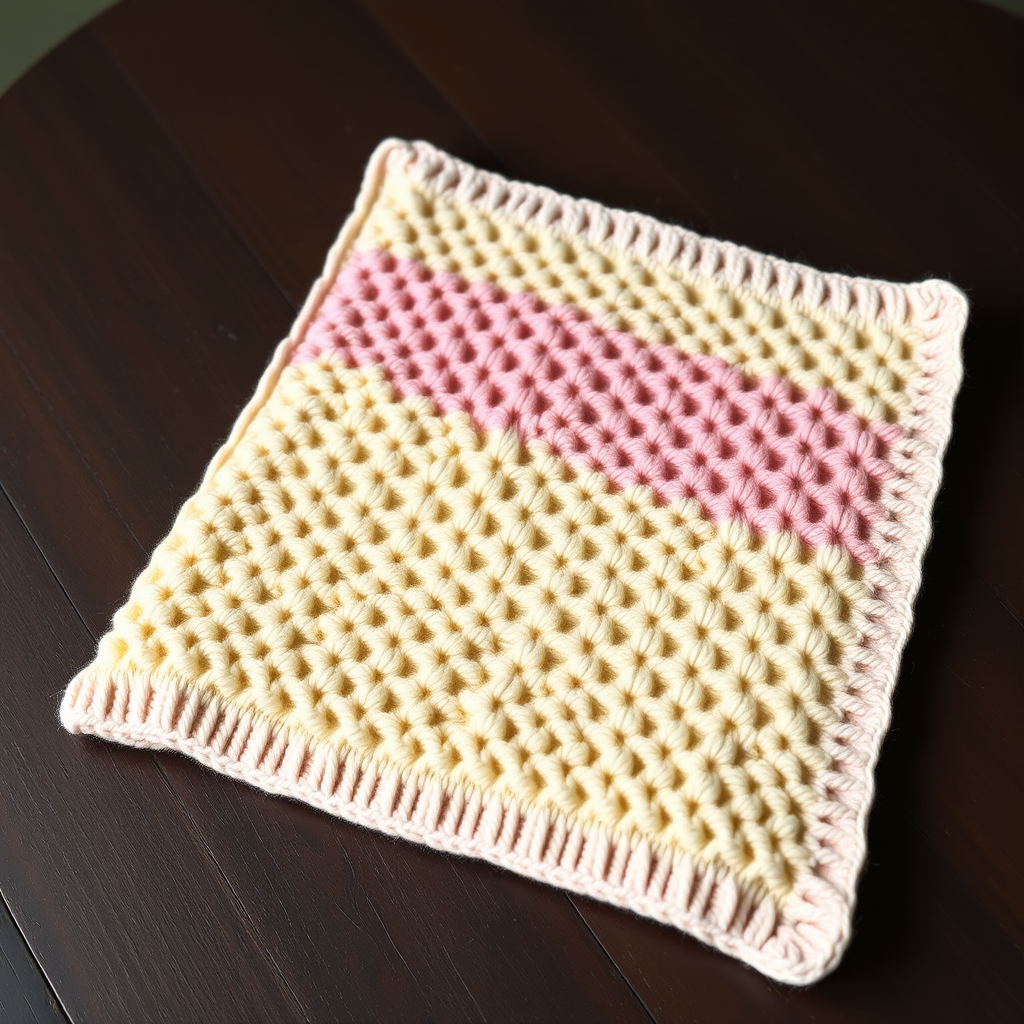
Heirloom Honeycomb Vintage Nursery Blanket: A Free Knitting Pattern
There's something truly magical about creating a handmade heirloom for a little one. This Heirloom Honeycomb Vintage Nursery Blanket combines timeless charm with a surprisingly accessible stitch pattern, making it the perfect project for knitters ready to move beyond the basics. The textured honeycomb stitch, worked in soft, creamy pastels, evokes a classic nursery aesthetic that will be cherished for generations. Despite its intricate appearance, this pattern is easier than it looks, relying on simple slipped stitches and yarn overs to create that stunning three-dimensional honeycomb effect. Let's dive into creating this beautiful, textured treasure.
Materials Needed
Before you begin, gather the following materials to ensure a smooth and enjoyable knitting experience:
- Yarn: Worsted weight cotton or cotton-blend yarn in three pastel shades (e.g., blush pink, sage green, butter yellow) - approximately 1200 yards total. A cotton blend offers excellent stitch definition and a soft, cozy drape.
- Needles: US 7 (4.5 mm) knitting needles. Straight or circular (for larger projects, circular needles can be easier on the wrists).
- Notions: Tapestry needle for weaving in ends, scissors, and stitch markers (optional, but helpful for keeping track of pattern repeats).
Gauge: 20 stitches and 28 rows = 4 inches in honeycomb stitch pattern (blocked). Always knit a gauge swatch to ensure your finished blanket matches the intended dimensions.
Step-by-Step Instructions
This blanket is knit flat in one piece using a simple slip-stitch honeycomb pattern. The color changes create soft, vintage stripes that are both soothing and visually appealing. Follow these detailed instructions carefully, and you'll have a beautiful heirloom in no time.
Abbreviations
- k = knit
- p = purl
- sl = slip stitch purlwise
- yo = yarn over
- k2tog = knit two together
- rep = repeat
- RS = right side
- WS = wrong side
Pattern Notes
- The honeycomb stitch is worked over a multiple of 6 stitches + 2.
- Always slip stitches purlwise with yarn in back (wyib) unless noted.
- Change colors at the end of a row, leaving a 6-inch tail to weave in later.
Cast On
With Color A (blush pink), cast on 122 stitches loosely. A long-tail cast-on works beautifully here, providing a stretchy yet sturdy edge.
Border (Garter Stitch)
Knit 6 rows in garter stitch (knit every row) with Color A. This creates a neat, non-curling border that frames the honeycomb pattern beautifully.
Honeycomb Pattern
Now we begin the main pattern. Pay close attention to the color changes and stitch sequences.
Row 1 (RS): With Color A, knit all stitches.
Row 2 (WS): With Color A, purl all stitches.
Row 3 (RS): Change to Color B (sage green). K1, *sl 1 wyib, k1, yo, k2tog, sl 1 wyib, k1; rep from * to last stitch, k1.
Row 4 (WS): With Color B, purl all stitches.
Row 5 (RS): Change to Color A. K1, *k1, sl 1 wyib, k1, yo, k2tog, sl 1 wyib; rep from * to last stitch, k1.
Row 6 (WS): With Color A, purl all stitches.
Row 7 (RS): Change to Color C (butter yellow). K1, *yo, k2tog, sl 1 wyib, k1, sl 1 wyib, k1; rep from * to last stitch, k1.
Row 8 (WS): With Color C, purl all stitches.
Row 9 (RS): Change to Color A. K1, *k1, yo, k2tog, sl 1 wyib, k1, sl 1 wyib; rep from * to last stitch, k1.
Row 10 (WS): With Color A, purl all stitches.
Repeat Rows 3-10 for the honeycomb pattern, changing colors every two rows (Rows 3-4 with Color B, Rows 5-6 with Color A, Rows 7-8 with Color C, Rows 9-10 with Color A). Continue until the blanket measures approximately 36 inches from the cast-on edge, ending with a Row 10. This ensures your color sequence is complete and symmetrical.
Border (Garter Stitch)
With Color A, knit 6 rows in garter stitch. This mirrors the bottom border and completes the frame.
Bind Off
Bind off loosely in knit on the RS. A loose bind-off is crucial here to prevent the edge from pulling in. Consider using a larger needle or a stretchy bind-off method if needed.
Finishing
Weave in all ends with a tapestry needle. Take your time to weave securely, as cotton yarn can be slippery.
Blocking
Blocking is essential for this pattern. Soak the blanket in lukewarm water with a mild soap, gently squeeze out excess water (never wring), and lay flat to dry, pinning to shape if desired. This will even out the stitches, open up the honeycomb texture, and give your blanket that professional, polished finish.
Your Heirloom Honeycomb Vintage Nursery Blanket is now complete! The soft pastel stripes and intricate texture make it a stunning gift for a baby shower or a beautiful addition to your own nursery. This pattern is a joy to knit, and the result is a timeless piece that will be treasured for years to come. Happy knitting!


