Emberfall Drift Poncho Free Pattern – A Cozy Knit Waterfall Wrap

The Emberfall Drift Poncho: A Free Knitting Pattern for a Cozy Waterfall Wrap
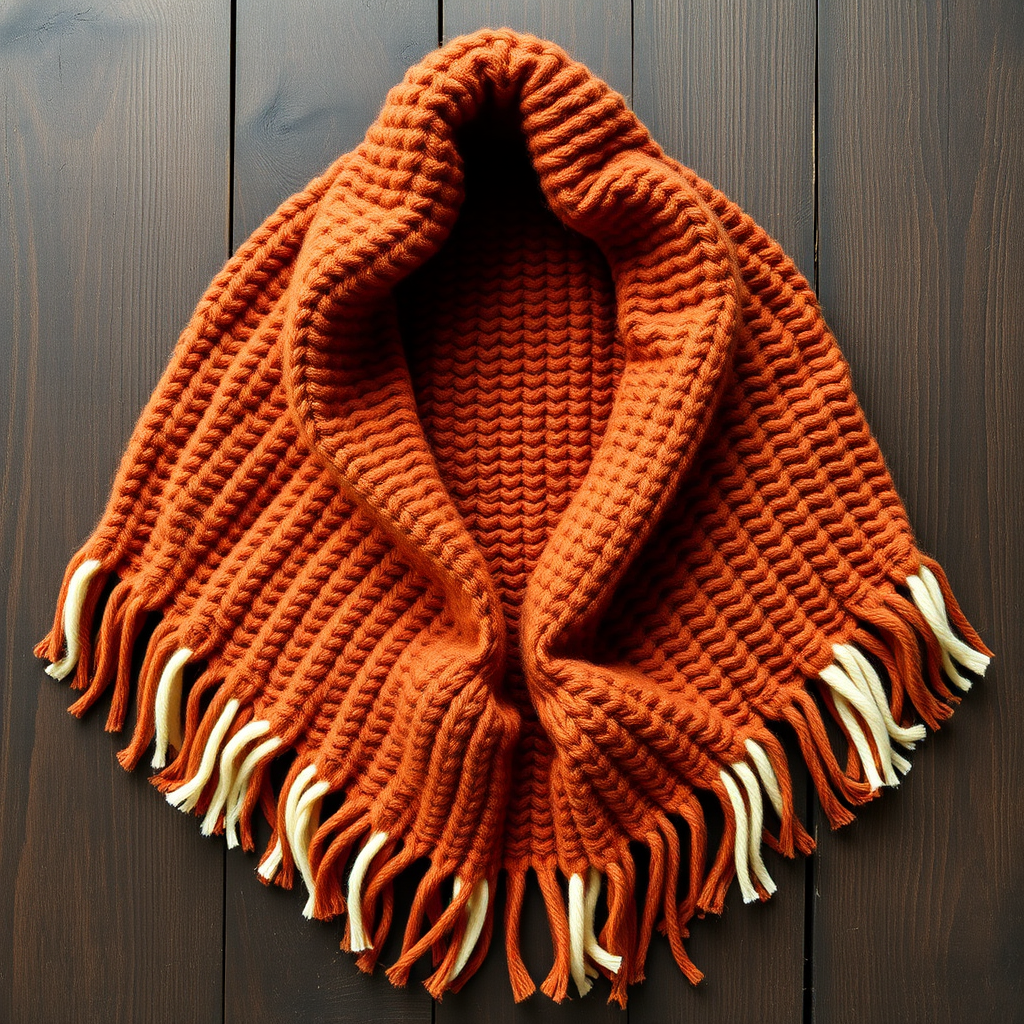
Wrap yourself in the warm, organic drape of the Emberfall Drift Poncho, a knitted waterfall silhouette with a rich gradient of burnt sienna, deep rust, and soft cream. This free pattern uses simple stitches and clever shaping to create a modern, cozy layering piece that feels like a gentle hug. Perfect for crisp autumn evenings or chilly winter mornings, this poncho is beginner-friendly yet yields a sophisticated, bohemian look that evokes autumn leaves and warm fires.
In this comprehensive guide, I'll walk you through every step—from gathering your materials to binding off and finishing. By the end, you'll have a stunning, hand-knit waterfall poncho that drapes beautifully and showcases your crafting skills.
Materials Needed
Before you begin, gather the following supplies. Having everything ready ensures a smooth, uninterrupted knitting session.
Yarn
- Worsted weight yarn in three colors:
- Color A (Burnt Sienna): 300g (approximately 600 yards)
- Color B (Deep Rust): 250g (approximately 500 yards)
- Color C (Soft Cream): 200g (approximately 400 yards)
- Suggested yarn: Lion Brand Wool-Ease Worsted or any similar worsted weight yarn that gives good stitch definition and a soft, pliable drape.
Needles & Notions
- US Size 9 (5.5 mm) circular knitting needle, 32-inch length (or longer for magic loop technique)
- Stitch markers (at least 4)
- Tapestry needle for weaving in ends and seaming
- Scissors
- Measuring tape
Gauge
16 stitches and 22 rows = 4 inches in stockinette stitch (knit one row, purl one row). Always knit a gauge swatch before starting to ensure your poncho matches the intended dimensions. If your gauge is off, adjust your needle size accordingly.
Step-by-Step Instructions
This poncho is knitted flat in two identical panels, then seamed at the shoulders, leaving a wide neck opening. The waterfall effect is achieved by casting on more stitches at the bottom edge and decreasing gradually toward the top. Follow these instructions carefully, and you'll have a beautiful poncho in no time.
Panel 1 (Make 2)
Cast On
With Color A (Burnt Sienna), cast on 80 stitches using your preferred method (long-tail cast on works well). Place a stitch marker after every 20 stitches to help you keep track of the color blocks later.
Stockinette Foundation
Row 1 (RS - Right Side): Knit all stitches.
Row 2 (WS - Wrong Side): Purl all stitches.
Rows 3-10: Repeat Rows 1-2 four more times. You should have a total of 10 rows of stockinette stitch. This creates a clean, solid base for the gradient stripes.
Begin Gradient Stripes
Now we'll introduce the beautiful color blocks. Remember to carry the yarn loosely up the side when switching colors—do not cut the yarn between stripes, as you'll be using them again.
Row 11 (RS): With Color A, knit 20 stitches. Switch to Color B (Deep Rust), knit 40 stitches. Switch to Color C (Soft Cream), knit 20 stitches. (Total: 80 stitches)
Row 12 (WS): With Color C, purl 20 stitches. Switch to Color B, purl 40 stitches. Switch to Color A, purl 20 stitches. (Notice the color blocks mirror on the wrong side.)
Rows 13-20: Continue in stockinette stitch, maintaining the color blocks exactly as established:
- RS rows: A (20 sts) – B (40 sts) – C (20 sts)
- WS rows: C (20 sts) – B (40 sts) – A (20 sts)
Row 21 (RS): With Color A, knit 20. With Color B, knit 40. With Color C, knit 20. (Color blocks remain unchanged.)
Row 22 (WS): Purl across, maintaining color blocks.
Rows 23-30: Repeat Rows 21-22 four more times. You've now completed 30 rows total.
Begin Decreases (To Shape the Shoulder)
Now we'll start shaping the poncho by decreasing stitches. This creates the tapered, waterfall silhouette. The decreases are placed within each color block to maintain the stripe pattern.
Row 31 (RS):
- With Color A: k2tog (knit 2 together), knit 18. (19 stitches in Color A section)
- With Color B: k2tog, knit 38. (39 stitches in Color B section)
- With Color C: k2tog, knit 18. (19 stitches in Color C section)
Row 32 (WS): Purl across, maintaining color blocks (C-B-A).
Row 33 (RS): With Color A, knit 19. With Color B, knit 39. With Color C, knit 19. (No decrease this row.)
Row 34 (WS): Purl across.
Row 35 (RS):
- With Color A: k2tog, knit 17. (18 stitches)
- With Color B: k2tog, knit 37. (38 stitches)
- With Color C: k2tog, knit 17. (18 stitches)
Row 36 (WS): Purl across.
Row 37 (RS): With Color A, knit 18. With Color B, knit 38. With Color C, knit 18. (No decrease.)
Row 38 (WS): Purl across.
Row 39 (RS):
- With Color A: k2tog, knit 16. (17 stitches)
- With Color B: k2tog, knit 36. (37 stitches)
- With Color C: k2tog, knit 16. (17 stitches)
Row 40 (WS): Purl across.
Continue Decreasing
Continue decreasing in this manner every 4th row (i.e., on rows 43, 47, 51, 55, 59, 63, 67, and so on). Each decrease row will reduce your stitch count by 3 (one in each color block).
Decrease row pattern (RS):
- With Color A: k2tog, knit to end of A section (one stitch less than the previous row)
- With Color B: k2tog, knit to end of B section (one stitch less than the previous row)
- With Color C: k2tog, knit to end of C section (one stitch less than the previous row)
Non-decrease rows: Simply knit across on RS and purl across on WS, maintaining color blocks.
Continue this pattern until you have 50 stitches remaining (approximately 10 decrease rows total). Here's a quick reference for your stitch counts after each decrease row:
- After Row 31: 77 stitches
- After Row 35: 74 stitches
- After Row 39: 71 stitches
- After Row 43: 68 stitches
- After Row 47: 65 stitches
- After Row 51: 62 stitches
- After Row 55: 59 stitches
- After Row 59: 56 stitches
- After Row 63: 53 stitches
- After Row 67: 50 stitches
Once you reach 50 stitches, work even in stockinette stitch for 10 more rows (no decreases). This creates a nice, straight section at the top for the shoulder seam.
Bind Off
Bind off all stitches loosely. To ensure a stretchy bind-off that won't pull the neckline, use a larger needle (US 10.5 or 11) or use a stretchy bind-off method like the "Jeny's Surprisingly Stretchy Bind-Off."
Congratulations! Panel 1 is complete. Repeat the entire process to make Panel 2.
Finishing
Now that both panels are complete, it's time to assemble your poncho.
Seaming
- Lay both panels flat with right sides facing up. The cast-on edge is the bottom of the poncho (the waterfall hem).
- Identify the bind-off edges at the top. These will form the shoulders and neck opening.
- Using your tapestry needle and a length of Color A yarn, seam the top edges together for about 6 inches from the bind-off edge on each side. This means you'll sew from the outer edge inward, leaving a 10-inch opening in the center for the neck.
- Use a mattress stitch or whip stitch for a clean, invisible seam. Make sure your seaming is secure but not too tight.
Weaving in Ends
Weave in all loose ends with your tapestry needle. Take care to weave them in along the color blocks so they blend seamlessly into the fabric. Trim any excess yarn.
Optional: Crochet Edging
For a polished, professional finish, add a simple crochet edging around the neck opening:
- With Color C (Soft Cream), attach yarn at one shoulder seam.
- Round 1: Single crochet in each stitch around the entire neck opening. Join with a slip stitch to the first single crochet.
- Round 2: Chain 1, single crochet in each stitch around. Join with a slip stitch.
- Fasten off and weave in the end.
This neat trim adds structure to the neckline and prevents stretching.
Blocking
Blocking is essential for this poncho to achieve its beautiful drape and even stitches:
- Fill a basin with lukewarm water and a gentle wool wash.
- Submerge the poncho and let it soak for 15-20 minutes. Do not agitate.
- Gently squeeze out excess water (never wring).
- Lay the poncho flat on a clean towel, roll it up to remove more water.
- Place the poncho on a blocking mat or dry towel, shape it to the desired dimensions, and pin if necessary.
- Let it dry completely flat, away from direct sunlight.
Wearing Your Emberfall Drift Poncho
Once dry, your poncho is ready to wear! The waterfall silhouette drapes asymmetrically over the shoulders, creating a flattering, cape-like body that falls to mid-hip. The gradient stripes—from burnt sienna through deep rust to soft cream—create a modern, artistic look that pairs beautifully with jeans, leggings, or boots.
This poncho makes a thoughtful handmade gift or a luxurious treat for yourself. The simple stockinette stitch and straightforward shaping make it an excellent project for beginners looking to expand their skills, while the striking color palette keeps it interesting for more experienced knitters.
Happy knitting! I'd love to see your finished Emberfall Drift Poncho—share your photos and tag your creations so our crafting community can celebrate your beautiful work.