Whispering Willow Buttoned Pillow Free Pattern – Knit a Textured Heirloom Cushion
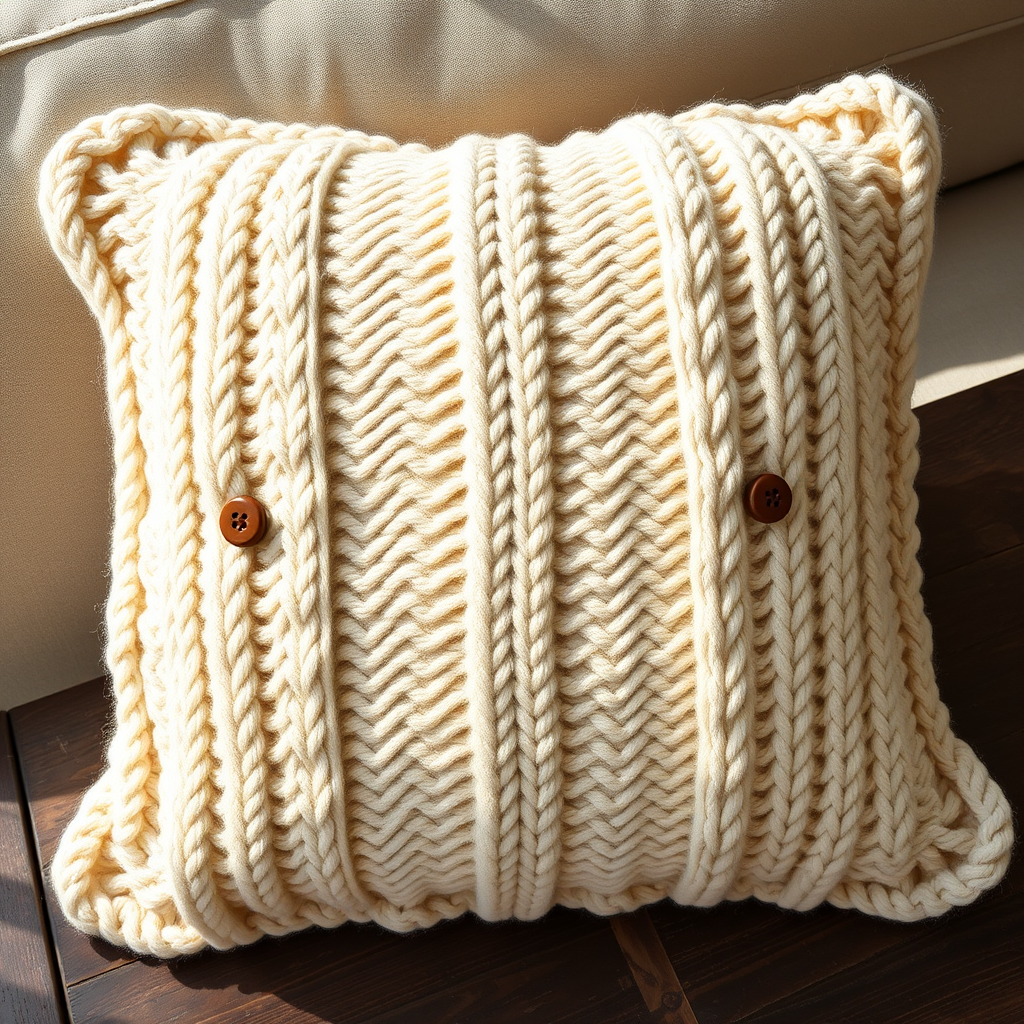
Whispering Willow Buttoned Pillow: A Timeless Heirloom Knit
There's something deeply satisfying about creating a piece for your home that feels both modern and timeless. The Whispering Willow Buttoned Pillow is exactly that—a beautifully textured cushion that combines delicate cables with the classic rhythm of seed stitch. Knitted in soft worsted yarn, this 16-inch square pillow brings a handcrafted warmth to any reading nook, bed, or favorite armchair. Whether you're an experienced knitter looking for a rewarding project or a confident beginner ready to tackle cables for the first time, this pattern offers clear guidance and a stunning result. The buttoned overlap on the back adds a practical, charming finish that makes this piece feel truly heirloom-worthy.
Materials Needed
Before you begin, gather your supplies. This project uses simple, readily available materials:
- Yarn: Worsted weight yarn (e.g., Lion Brand Wool-Ease) in cream or ivory – 450 yards. The soft, warm cream color enhances the embossed texture and gives the pillow its heirloom feel.
- Needles: US 7 (4.5 mm) knitting needles (straight or circular for comfort).
- Extras: Cable needle, stitch markers, tapestry needle for weaving in ends, and 4 buttons (1 inch in diameter) for the closure.
- Pillow Form: A 16-inch square pillow insert.
Gauge: 20 stitches and 28 rows = 4 inches in stockinette stitch. Always check your gauge to ensure your finished pillow measures correctly.
Step-by-Step Instructions
This pattern is worked flat in two panels: a front with a beautiful cable and seed stitch pattern, and a back with a buttonhole overlap. Don't be intimidated by the cables—the chart is simple to follow, and the repetition makes it meditative.
Abbreviations
- CO: Cast on
- K: Knit
- P: Purl
- K2tog: Knit two stitches together (decrease)
- SSK: Slip, slip, knit (a left-leaning decrease)
- C4F: Slip 2 stitches to cable needle, hold in front, knit 2, knit 2 from cable needle
- C4B: Slip 2 stitches to cable needle, hold in back, knit 2, knit 2 from cable needle
- RS: Right side
- WS: Wrong side
Pattern Notes
- The pillow is worked flat in two identical panels (front and back), then seamed together and finished with a buttoned overlap.
- Each panel measures 16 inches wide and 16 inches tall before seaming.
- The garter stitch border (knitting every row) creates a neat, non-curling edge.
Front Panel
Cast On: CO 80 stitches.
Rows 1-6 (Garter Border): Knit all stitches. This creates a sturdy, textured edge.
Row 7 (RS): K4 (garter edge), place marker, work Row 1 of chart across next 72 stitches, place marker, K4 (garter edge).
Chart Pattern (Repeat of 18 stitches + 2 edge stitches)
This is the heart of the design. The pattern alternates between cable twists and seed stitch sections to create the embossed, textured look. Follow these 8 rows, repeating them until your piece measures 15 inches from the cast-on edge, ending with a WS row.
- Row 1 (RS): K2, P2, C4F, P2, K2, P2, C4B, P2
- Row 2 (WS): P2, K2, P4, K2, P2, K2, P4, K2
- Row 3 (RS): K2, P2, K4, P2, K2, P2, K4, P2
- Row 4 (WS): P2, K2, P4, K2, P2, K2, P4, K2
- Row 5 (RS): K2, P2, C4B, P2, K2, P2, C4F, P2
- Row 6 (WS): P2, K2, P4, K2, P2, K2, P4, K2
- Row 7 (RS): K2, P2, K4, P2, K2, P2, K4, P2
- Row 8 (WS): P2, K2, P4, K2, P2, K2, P4, K2
Finishing the Front: Once your piece measures 15 inches, work Rows 1-6 of garter stitch (knit all stitches). Bind off loosely. Weave in all ends with your tapestry needle.
Back Panel (With Buttonhole Overlap)
Cast On: CO 80 stitches.
Garter Border: Work Rows 1-6 as you did for the front (knit all stitches).
Body: Now work in stockinette stitch (knit on RS, purl on WS) until the piece measures 12 inches from the cast-on edge, ending with a WS row. This creates a smooth, clean surface for the buttonhole flap.
Buttonhole Row (RS): K4, *K2tog, YO, K10; repeat from * to last 6 stitches, K2tog, YO, K4. This creates 4 evenly spaced buttonholes. The YO (yarn over) makes the hole, and the K2tog closes the gap.
Continue: Work in stockinette for 3 more inches, ending with a WS row. This creates the overlap flap.
Garter Border: Work 6 rows of garter stitch. Bind off loosely. Weave in ends.
Finishing: Assembly and Buttons
This is where your pillow comes together. Take your time to ensure a neat, professional finish.
- Blocking: Block both panels to 16 inches square. This is crucial for even seams and a polished look. Wet block by soaking in lukewarm water, gently squeezing out excess, and pinning to size on a towel until dry.
- Seaming: Place the front panel and back panel with right sides (RS) together. Using your tapestry needle and yarn, sew around three sides using a mattress stitch or whip stitch. Leave one side open.
- Turn and Insert: Turn the pillow cover right side out. Insert the 16-inch pillow form through the open side.
- Close the Fourth Side: Sew the fourth side closed using a whip stitch, tucking the raw edges inward for a clean finish.
- Button Closure: Overlap the buttonhole flap over the front panel. Align the buttons with the buttonholes. Sew the buttons onto the front panel, going through both layers of fabric to secure the overlap. This creates the signature buttoned look and keeps the pillow form snug.
Care Instructions
To keep your Whispering Willow Pillow looking its best, hand wash it in cold water with a gentle detergent. Lay it flat to dry, reshaping as needed. Avoid wringing or machine drying to preserve the cable definition.
Enjoy your beautiful, handcrafted pillow! It's a piece you'll cherish for years, and it makes a thoughtful, personalized gift for any home.


