The Frosted Briar Boot Cuffs: A Free Knitting Pattern for Textured, Fur-Trimmed Winter Warmers
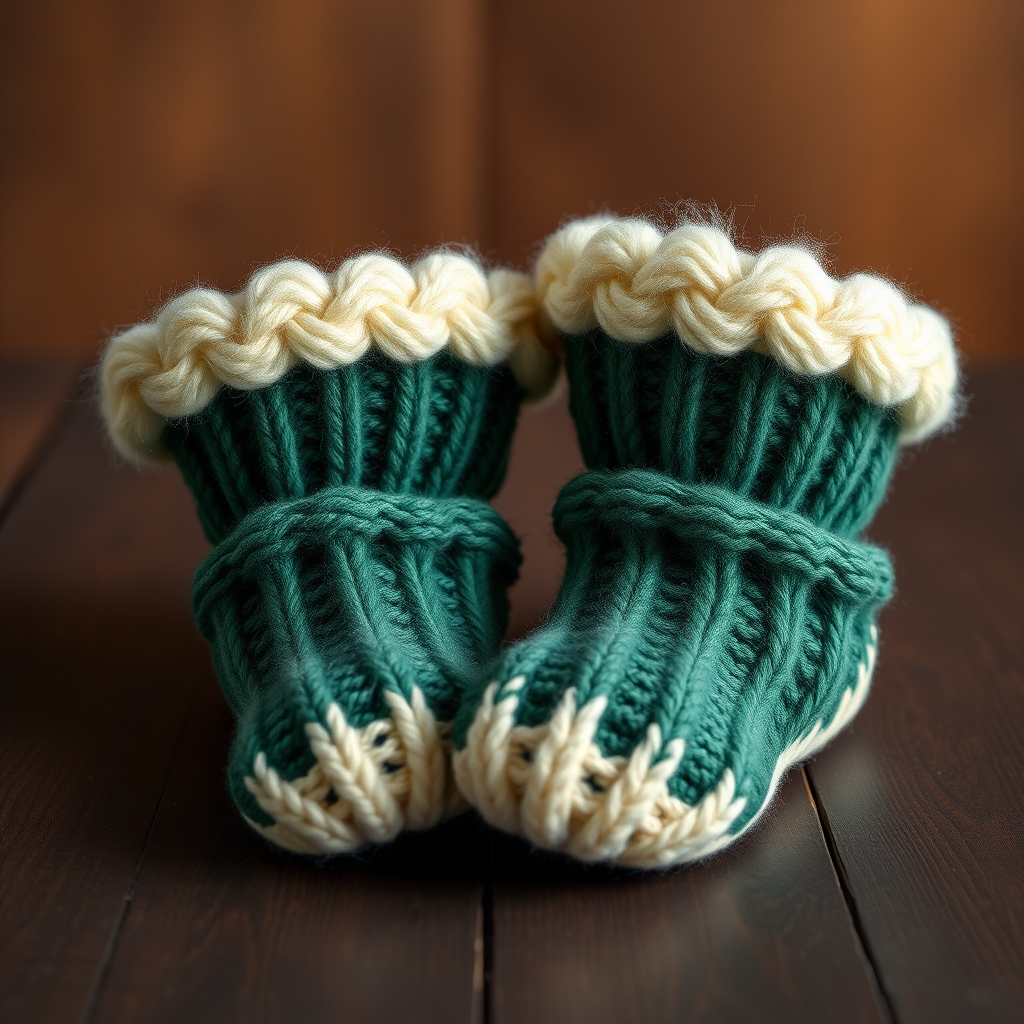
Cozy Up with The Frosted Briar Boot Cuffs
Wrap your ankles in the cozy luxury of these knitted boot cuffs, featuring a rich, textured brioche stitch and a detachable faux fur trim. This pattern offers a modern, sophisticated twist on a classic winter accessory, perfect for adding a touch of alpine elegance to any outfit. Whether you're a seasoned knitter or a confident beginner looking for a rewarding project, these boot cuffs are a delightful way to practice the brioche stitch while creating a stylish, functional accessory. The combination of a deep, textured main color and a fluffy faux fur trim creates a look that is both rustic and refined, reminiscent of a frosty winter morning.
Materials Needed
To create your own Frosted Briar Boot Cuffs, gather the following materials. The pattern is designed for one size that fits most (approx 8-9 inches tall, 10-12 inches circumference). To adjust the size, simply increase or decrease the cast-on in multiples of 2.
Yarn
- Main Color (MC): Worsted weight yarn (e.g., Lion Brand Wool-Ease Thick & Quick) - 100g (approx 120 yds). A deep forest green is shown, but any color works.
- Contrast Color (CC): Worsted weight yarn (e.g., Lion Brand Wool-Ease Thick & Quick) - 50g (approx 60 yds). A warm cream is shown.
- Faux Fur Yarn: For the trim (e.g., Lion Brand Go For Faux) - 50g (approx 30 yds). A cream or white color is recommended for a snowy accent.
Needles & Notions
- Needles: US 10 (6.0 mm) circular knitting needles (16-inch length) or double-pointed needles for small circumference.
- Other: Tapestry needle for weaving ends, stitch markers (optional), small buttons (optional for detachable trim), matching thread and sewing needle (if attaching trim permanently).
Gauge
14 stitches and 20 rows = 4 inches in brioche stitch (after blocking). It is essential to check your gauge to ensure the correct fit. If your gauge is off, adjust your needle size accordingly.
Step-by-Step Instructions
Follow these detailed instructions to create your boot cuffs. The pattern uses a two-color brioche stitch, which creates a plush, reversible fabric. Take your time with the first few rounds to get comfortable with the technique.
Abbreviations
- CO: Cast on
- K: Knit
- P: Purl
- sl1yo: Slip 1 stitch purlwise with yarn over (bring yarn to front, slip stitch, then bring yarn over needle to back)
- brk: Brioche knit (knit the slipped stitch together with its yarn over)
- brp: Brioche purl (purl the slipped stitch together with its yarn over)
- k2tog: Knit two together
- p2tog: Purl two together
- BO: Bind off
Cuff Body (Worked in the Round)
Step 1: Cast On and Join
With Main Color (MC), CO 40 stitches. Join in the round, being careful not to twist the stitches. Place a stitch marker to indicate the beginning of the round if desired.
Step 2: Establish Brioche Pattern
Round 1 (Setup): *K1, sl1yo* repeat from * to end of round. This sets up the alternating knit and slipped stitches.
Step 3: Brioche Rounds
Round 2: *brk, sl1yo* repeat from * to end. (Note: The brk is worked into the stitch that was slipped in the previous round, knitting it together with its yarn over.)
Round 3: *sl1yo, brp* repeat from * to end. (Note: The brp is worked into the stitch that was slipped in the previous round, purling it together with its yarn over.)
Step 4: Repeat for Length
Repeat Rounds 2-3 until the piece measures 6 inches from the cast-on edge, ending with a Round 2. This creates the main body of the boot cuff.
Step 5: Decrease for Ankle
Next Round (Decrease): *k2tog, sl1yo* repeat from * to end. (30 stitches remain). This decreases the circumference to fit snugly around the ankle.
Step 6: Continue Brioche on Decreased Stitches
Next Round: *brk, sl1yo* repeat from * to end.
Next Round: *sl1yo, brp* repeat from * to end.
Repeat these two rounds until the piece measures 8 inches from the cast-on edge, ending with a Round 2.
Step 7: Stretchy Bind Off
Bind Off: *k2tog, return the resulting stitch to the left needle* repeat from * until 1 stitch remains. Cut the yarn, leaving a 6-inch tail, and pull it through the last stitch to secure. This creates a stretchy edge that will easily fit over your foot.
Faux Fur Trim (Worked Flat)
Step 1: Cast On
With faux fur yarn, CO 10 stitches. Use a simple long-tail cast-on.
Step 2: Knit the Trim
Row 1: K all stitches.
Row 2: P all stitches.
Repeat Rows 1-2 until the trim measures 10 inches (or desired length to wrap around the top of the boot cuff). The trim should be long enough to wrap comfortably around the top edge of the cuff.
Step 3: Bind Off
BO all stitches loosely. Cut yarn and pull through the last stitch.
Finishing
Step 1: Weave in Ends
Using a tapestry needle, weave in all yarn ends on the inside of the boot cuffs. Be careful not to pull too tightly, as this can distort the fabric.
Step 2: Block the Cuffs
Gently block the boot cuffs to open up the brioche texture and even out the stitches. Wet block by soaking in lukewarm water for 15 minutes, then gently squeeze out excess water (do not wring). Lay flat on a towel, shape to the correct dimensions, and allow to dry completely.
Step 3: Attach the Faux Fur Trim
You have two options for attaching the trim:
Option 1 (Permanent): Using a tapestry needle and matching thread, sew the faux fur trim to the top edge of the boot cuff. Align the trim so that the cast-on and bind-off edges meet neatly.
Option 2 (Detachable): Sew small buttons onto the boot cuff and create buttonholes in the faux fur trim, or use small snaps. This allows you to remove the trim for washing or to change the look.
Step 4: Repeat for Second Cuff
Follow all instructions to create a second matching boot cuff.
Your Frosted Briar Boot Cuffs are now complete! Slip them on over your boots and enjoy the cozy, textured warmth they provide. The brioche stitch will keep your ankles toasty, while the faux fur trim adds a touch of alpine elegance to any outfit.


