Spice Market Catnip Kicker: Free Crochet Tube Pattern with Post-Stitch Ribbing

Introduction
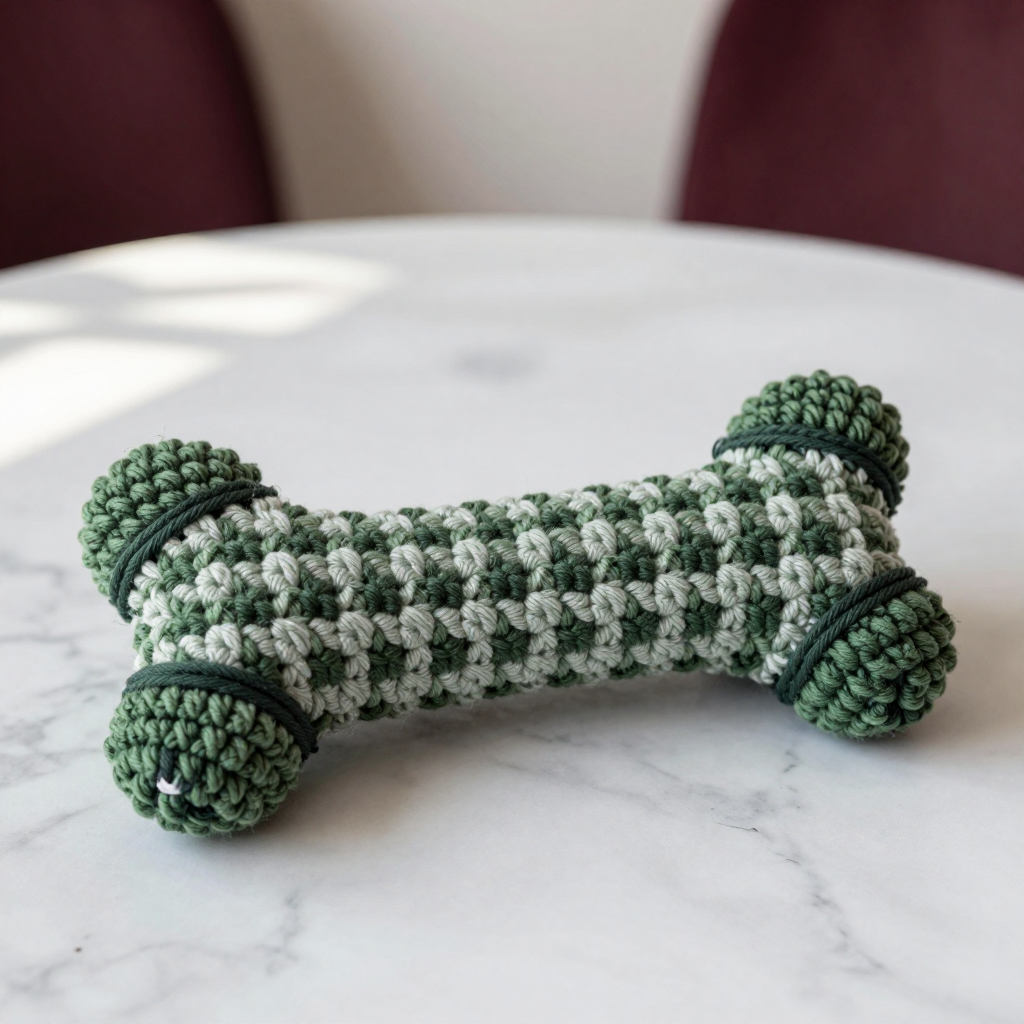
If you have ever wanted to make something with your own hands that a pet will actually love, this Spice Market Catnip Kicker is the perfect first project. It is a simple straight tube worked in warm paprika, saffron, and olive tones, lightly stuffed with cotton and catnip, and closed with two little domed caps. The alternating front and back post stitches create a raised, spiraled ribbing that looks like the ridges on a spice jar and feels wonderful under a cat's paws and teeth. Because it is worked in continuous rounds with only a few basic stitches, it is wonderfully forgiving for a complete beginner. The finished toy is about 8 inches long, soft but springy, and small enough to bat, kick, and carry around the house.
Materials Needed
- Yarn: Worsted weight (category 4) cotton yarn, approx. 60–70 yd total: 40 yd paprika/terracotta (A), 12 yd saffron/golden yellow (B), 8 yd deep olive green (C).
- Hook: Size G/6 (4.0 mm) crochet hook, or the size needed to match gauge.
- Stitch markers: At least 2, to mark the first stitch of each round.
- Tapestry needle: A blunt-tipped yarn needle for seaming and weaving in ends.
- Scissors: Sharp craft scissors for trimming yarn.
- Stuffing: Cotton batting or polyester fiberfill, plus 1–2 tsp dried catnip.
- Finished size: Length approx. 8 in (20 cm) including caps; circumference approx. 5 in (12.5 cm); diameter approx. 1.6 in (4 cm).
Abbreviations and Beginner Glossary
- ch – chain: yarn over the hook and pull it through the loop on your hook to make one chain.
- sl st – slip stitch: insert hook into the stitch, yarn over, and pull through both the stitch and the loop on your hook at once.
- sc – single crochet: insert hook into stitch, yarn over, pull up a loop, yarn over, pull through both loops.
- hdc – half double crochet: yarn over, insert hook into stitch, yarn over, pull up a loop (3 loops on hook), yarn over, pull through all 3 loops.
- dc – double crochet: yarn over, insert hook into stitch, yarn over, pull up a loop (3 loops on hook), yarn over, pull through 2 loops, yarn over, pull through last 2 loops.
- FPdc – front post double crochet: work a double crochet around the post (the vertical body) of the indicated stitch from the front, inserting the hook from front to back to front.
- BPdc – back post double crochet: work a double crochet around the post of the indicated stitch from the back, inserting the hook from back to front to back.
- sc2tog – single crochet two together (a decrease): insert hook into first stitch, pull up a loop, insert hook into next stitch, pull up a loop, yarn over, pull through all 3 loops.
- st(s) – stitch(es).
- rnd – round: one complete circle of stitches worked around the tube.
- rep – repeat.
- magic ring – an adjustable loop that you crochet into, then pull tight to close the center hole.
Gauge
16 sts and 16 rnds = 4 in (10 cm) in front/back post half double crochet ribbing, worked in the round and lightly stretched.
Gauge matters because it tells you whether your toy will come out the right size. If your stitches are too loose, the tube will be floppy and the caps will not fit; if too tight, the tube will be stiff and small. To make a gauge swatch, chain 20, work a few rounds of the post-stitch ribbing as described in the pattern, then measure a 4-inch section in the middle. If you have more stitches than 16, try a larger hook; if fewer, try a smaller hook.
Beginner Tips Before You Start
- Mark your first stitch. Place a stitch marker in the first stitch of each round so you always know where the round begins.
- Do not pull the yarn too tight. Keep your tension relaxed so the post stitches stay soft and the tube stays flexible.
- Work in continuous rounds. Do not turn your work between rounds; keep going in the same direction to build the spiral ribbing.
- Count your stitches. Check that each round has 24 stitches before moving on.
- Keep catnip away from the open ends. Place it in the center of the tube so it does not shed while you seam.
- Stuff lightly. A soft, flexible toy is safer and more fun for kicking than a firm one.
Step-by-Step Instructions
Tube Body (make 1, with color A)
With A, make a magic ring.
Rnd 1: Ch 2 (does not count as a st here), work 8 hdc into the ring. Join with sl st to first hdc. (8 sts)
Rnd 2: Ch 2, 2 hdc in each st around. Join with sl st to first hdc. (16 sts)
Rnd 3: Ch 2, *2 hdc in next st, hdc in next st; rep from * around. Join with sl st to first hdc. (24 sts)
Rnd 4: Ch 2, hdc in each st around. Join with sl st to first hdc. (24 sts) This is the base round for the ribbing.
Rnd 5: Ch 2, *FPdc around next st, BPdc around next st; rep from * around. Join with sl st to first st. (24 sts)
Rnds 6–30: Rep Rnd 5, always working FPdc around the posts of the previous round's FPdc and BPdc around the posts of the previous round's BPdc, maintaining the alternating rib. Do not turn; continue in the same direction. (24 sts each rnd)
After Rnd 30, fasten off A, leaving a 6 in (15 cm) tail. The tube should measure approx. 7 in (18 cm) long before caps.
Color Bands (optional accent, worked over the ribbing)
If desired, change to B for Rnds 12–14 and to C for Rnds 22–24, carrying colors loosely along the inside. If not using bands, work all body rounds in A.
Caps (make 2, one in B and one in C)
With B (or C), make a magic ring.
Rnd 1: Ch 1, work 6 sc into the ring. Join with sl st to first sc. (6 sts)
Rnd 2: Ch 1, 2 sc in each st around. Join with sl st to first sc. (12 sts)
Rnd 3: Ch 1, *2 sc in next st, sc in next st; rep from * around. Join with sl st to first sc. (18 sts)
Rnd 4: Ch 1, sc in each st around. Join with sl st to first sc. (18 sts)
Rnd 5: Ch 1, *sc2tog over next 2 sts, sc in next st; rep from * around. Join with sl st to first sc. (12 sts)
Fasten off, leaving a 10 in (25 cm) tail for seaming. Make a second cap in the other color.
Stuffing
Lightly stuff the tube with cotton batting, leaving it soft and flexible rather than firm. Add 1–2 tsp of dried catnip distributed along the center of the tube, keeping it away from the open ends so it does not shed during seaming.
Assembly and Finishing
Step 1: Turn the tube wrong side out if desired for a neater seam, or work with right side facing for a decorative exposed seam.
Step 2: Pin one cap to each open end of the tube, matching the 12 remaining cap stitches to 12 stitches of the tube end, easing the cap edge to fit. The cap will sit slightly domed over the end.
Step 3: With the long tail and a yarn needle, whipstitch or mattress stitch the cap to the tube edge all the way around. Repeat for the second end.
Step 4: Weave in all ends securely, pulling them to the inside of the tube. Do not leave loose tails that a cat could chew.
Finishing: Gently steam or wet-block the tube to even out the ribbing, then let dry completely. Check that both caps are firmly attached and that no stuffing or catnip can escape. Trim any loose fibers.
Safety note: This toy is intended for supervised play. Inspect regularly for loose stitches, holes, or escaping stuffing and remove the toy if damaged.
Pro Tips and Variations
- Color changes: Try a solid tube in one color, or add extra bands in your cat's favorite hues by changing yarn at the start of any round.
- Size adjustments: For a longer kicker, add more rounds in multiples of 2 before fastening off; for a shorter toy, stop earlier.
- Yarn substitutions: Any worsted weight cotton works well; avoid fuzzy or loosely spun yarns that can shed.
- Texture play: Alternate FPdc and BPdc in different sequences to create zigzag or diamond patterns in the ribbing.