Meadow Breeze Shoulder Bag Free Pattern – Textured Crochet Phone Purse
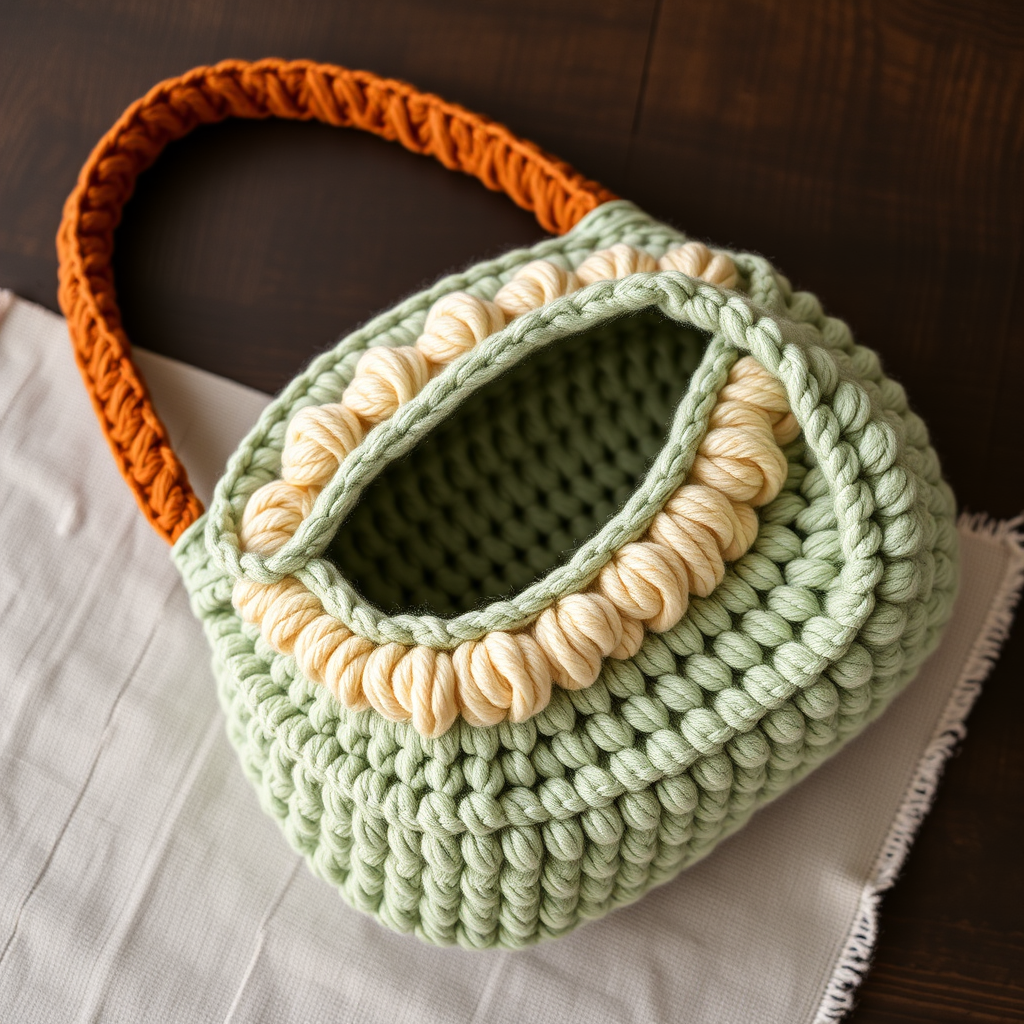
Introducing the Meadow Breeze Shoulder Bag: A Textured Crochet Phone Purse
Carry your smartphone in style with this charming crochet shoulder bag, featuring a lush textured stitch and a soft, earthy color palette. The Meadow Breeze Shoulder Bag is the perfect project for crafters seeking a quick, functional, and beautiful accessory. Whether you're heading to a farmer's market or a casual outing, this bag adds a touch of handmade elegance to any outfit. With its round bottom and structured shape, it's as practical as it is pretty—and it works up surprisingly fast!
This pattern is designed with beginners in mind, using basic stitches and simple construction techniques. The result is a sturdy, textured bag that showcases your crochet skills beautifully. Let's dive into everything you need to create your very own Meadow Breeze Shoulder Bag.
Materials Needed
Before you begin, gather the following supplies to ensure a smooth and enjoyable crochet experience:
- Yarn: Worsted weight cotton yarn (e.g., Lion Brand 24/7 Cotton) in three colors:
- Sage Green (MC) – main color for the bag body
- Cream (CC1) – for the textured band
- Terracotta (CC2) – for the strap
- Crochet Hook: 5.0 mm (H-8) crochet hook
- Yarn Needle: For weaving in ends and sewing the strap
- Scissors: For cutting yarn
- Stitch Markers (optional): Helpful for keeping track of rounds
- Button or Magnetic Snap (optional): For a closure if desired
Gauge: 16 sc x 18 rows = 4 x 4 inches (10 x 10 cm) in single crochet. Be sure to check your gauge to ensure your bag turns out the right size. If your gauge is off, adjust your hook size accordingly.
Step-by-Step Instructions
Follow these detailed instructions carefully, and you'll have a beautiful Meadow Breeze Shoulder Bag in no time. The pattern is broken down into sections for clarity.
Bag Body (Worked in Continuous Rounds)
Note: Work in continuous rounds without joining unless otherwise stated. Use a stitch marker to mark the beginning of each round.
Round 1: With MC (Sage Green), make a magic ring. Ch 1, work 6 single crochet (sc) into the ring. Pull the tail to tighten the ring closed. (6 stitches)
Round 2: Work 2 sc in each stitch around. (12 stitches)
Round 3: *Sc in the next stitch, 2 sc in the next stitch* — repeat from * to * around. (18 stitches)
Round 4: *Sc in the next 2 stitches, 2 sc in the next stitch* — repeat from * to * around. (24 stitches)
Round 5: *Sc in the next 3 stitches, 2 sc in the next stitch* — repeat from * to * around. (30 stitches)
Round 6: *Sc in the next 4 stitches, 2 sc in the next stitch* — repeat from * to * around. (36 stitches)
Round 7: *Sc in the next 5 stitches, 2 sc in the next stitch* — repeat from * to * around. (42 stitches)
Round 8: *Sc in the next 6 stitches, 2 sc in the next stitch* — repeat from * to * around. (48 stitches)
Round 9: *Sc in the next 7 stitches, 2 sc in the next stitch* — repeat from * to * around. (54 stitches)
Round 10: *Sc in the next 8 stitches, 2 sc in the next stitch* — repeat from * to * around. (60 stitches)
Round 11: *Sc in the next 9 stitches, 2 sc in the next stitch* — repeat from * to * around. (66 stitches)
Round 12: *Sc in the next 10 stitches, 2 sc in the next stitch* — repeat from * to * around. (72 stitches)
Rounds 13–30: Sc in each stitch around. (72 stitches each round) — This creates the bag body. After Round 30, fasten off MC and weave in the ends securely.
Textured Band (Worked in Rows)
This section creates the beautiful honeycomb-like relief pattern that gives the bag its distinctive texture.
Row 1: With CC1 (Cream), attach the yarn to any stitch on the top edge of the bag using a slip stitch. Ch 1, sc in the same stitch and in each stitch around the entire top edge. Join with a slip stitch to the first sc. (72 stitches)
Row 2: Ch 1, sc in the first stitch. *Skip the next stitch, work 2 double crochet (dc) in the next stitch, skip the next stitch, sc in the next stitch* — repeat from * to * around. Join with a slip stitch to the first sc. (You will have 18 groups of 2 dc)
Row 3: Ch 1, sc in the first stitch. *Skip the next 2 dc, work 2 dc in the next sc (the sc from the previous row), skip the next 2 dc, sc in the next sc* — repeat from * to * around. Join with a slip stitch to the first sc. (18 groups of 2 dc)
Row 4: Repeat Row 3. Fasten off CC1 and weave in the ends.
Top Trim
This neat trim finishes the top edge of the bag and prepares it for the strap.
Round 1: With MC (Sage Green), attach the yarn to any stitch on the top edge. Ch 1, sc in each stitch around. Join with a slip stitch to the first sc. (72 stitches)
Round 2: Ch 1, sc in each stitch around. Join with a slip stitch. Fasten off MC and weave in the ends.
Strap (Worked in Rows)
Create a sturdy, comfortable strap to carry your bag across your body or on your shoulder.
Row 1: With CC2 (Terracotta), chain 100 (or adjust for your desired strap length). Sc in the 2nd chain from the hook and in each chain across. (99 stitches)
Row 2: Ch 1, turn, sc in each stitch across. (99 stitches)
Row 3: Repeat Row 2. Fasten off, leaving a long tail (at least 12 inches) for sewing.
Finishing
Now it's time to assemble your beautiful bag!
- Using the long tail from the strap and a yarn needle, sew the ends of the strap securely to the inside of the bag at opposite sides. Make sure the strap is evenly positioned and the seams are hidden inside.
- Weave in all remaining ends with your yarn needle to keep the inside of your bag neat.
- Optionally, add a button or magnetic snap closure to the top of the bag for extra security. If using a button, sew it to the inside front of the bag and create a small loop of chain stitches on the inside back to fasten over it.
Your Meadow Breeze Shoulder Bag is now complete! This textured, earthy accessory is perfect for carrying your phone, keys, and small essentials. The soft cotton yarn and beautiful stitch definition make it a joy to use and a wonderful gift for a friend or loved one. Happy crocheting!


