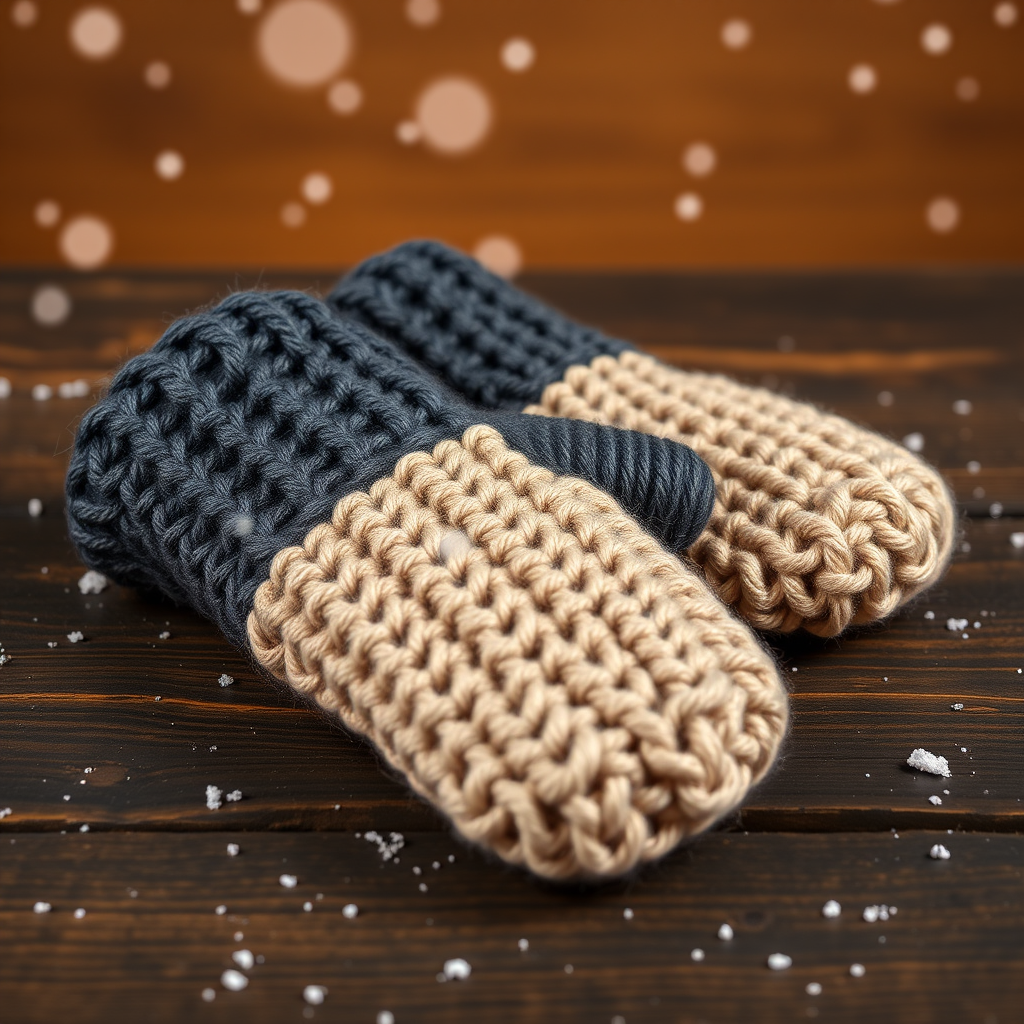
Lichen Ladder Cuff Mitts: Free Knit Eyelet Mittens Pattern for Kids

Lichen Ladder Cuff Mitts: Free Knit Eyelet Mittens Pattern for Kids
Introduction
These little mittens are the perfect first "real" project for anyone who has just learned to knit and purl and wants to make something soft, useful, and genuinely beautiful. You knit each mitten as a simple flat rectangle — no double-pointed needles, no knitting in the round, no shaping — and then you sew it into a tube with a small gap left open for the thumb. The magic is in the eyelet ladder rows: little open holes lined up across the fabric that make the mitts look far more complicated than they are. Knitted in a fluffy mohair-silk blend held double, the finished pair is cloud-soft, slightly fuzzy, and warm, with deep moss-green and pale lichen stripes that look like something from a tiny streetwear shop. If you can knit, purl, and make a yarn over, you can make these.
Materials Needed
- Yarn: Mohair-silk blend, approximately 420 m / 50 g per skein, held DOUBLE throughout (two strands of the same yarn worked together as if they were one). MC (main color) — moss (deep olive green): approx. 25 g. CC (contrast color) — lichen (pale sage grey-green): approx. 20 g. Total approx. 45 g for the pair.
- Needles: One pair of 4.0 mm (US 6) straight single-point needles, or a circular needle of the same size used flat (you knit back and forth, not in a circle).
- Extra needle: One spare 4.0 mm (US 6) needle or a stitch holder — used only to hold stitches out of the way while seaming the thumb gap.
- Tapestry needle: A large blunt needle with an eye big enough for your yarn, for seaming and weaving in ends.
- Scissors for cutting yarn.
- Stitch markers (optional but helpful): 2–4 removable markers to mark the eyelet rows and the thumb gap position.
- Finished size: Child, approx. 4–8 years. Each mitten measures 8 cm wide x 15 cm long (flat, before seaming) and fits a hand circumference of approx. 15–16 cm. You make 2 identical rectangles.
Abbreviations and Beginner Glossary
- k — knit: Insert the right needle into the front of the stitch from left to right, wrap the yarn around the needle, and pull the loop through to the front. This makes a smooth "V" shape.
- p — purl: Insert the right needle into the front of the stitch from right to left, wrap the yarn around, and pull the loop through to the back. This makes a bumpy stitch.
- yo — yarn over: Bring the yarn over the top of the right needle (from front to back) before working the next stitch. This creates an extra loop, which becomes a small open hole — the eyelet.
- k2tog — knit 2 together: Insert the needle into the next two stitches at once and knit them as one. This decreases your stitch count by one and leans the stitch to the right. In this pattern it is always paired with a yo, so the stitch count stays the same.
- st(s) — stitch(es): One loop on your needle.
- MC — main color: Moss (deep olive green).
- CC — contrast color: Lichen (pale sage grey-green).
- RS — right side: The front, public side of the fabric — the side that will face out on the finished mitten.
- WS — wrong side: The back side of the fabric.
- Stockinette stitch: Knit every stitch on RS rows and purl every stitch on WS rows. This gives the smooth "V" fabric you see on most sweaters.
- Cast on: Creating the first row of loops on your needle.
- Bind off: Securing the final row of stitches so they don't unravel.
- Long-tail cast on: A common, stretchy cast-on where you make a slip knot, hold the yarn in a "tail" and a "working" strand, and loop the needle through them. Any beginner video will show this in one minute.
- Eyelet Ladder Row: The repeating pattern row that makes the open holes (written out in full below).
Gauge
18 sts and 26 rows = 10 cm / 4 in in stockinette stitch, yarn held double, after light blocking. The eyelet rows do not change the stitch count.
Why gauge matters: Gauge is how many stitches and rows fit into a set measurement. If your stitches are bigger than the pattern expects, your mitten will come out too wide and long; if smaller, it will be too tight. Because these mittens are seamed into a tube, getting the width right is what makes the thumb gap land in the right place.
How to make a gauge swatch: With your yarn held double, cast on 24 stitches. Work 30 rows in stockinette (knit on RS, purl on WS). Bind off. Lay the swatch flat, gently press it with a warm iron held just above the fabric (never press directly onto mohair), and measure a 10 cm / 4 in square in the middle. Count the stitches across and the rows up. If you have more than 18 stitches, go up a needle size; if fewer, go down a size. Then begin the mittens.
Beginner Tips Before You Start
- Hold the yarn double from the start. Wind your moss and lichen into two separate balls, then pull one strand from each — or use two strands of the same ball if you prefer. Always work with two strands together as one.
- Count your stitches after every eyelet row. A yo adds a stitch and a k2tog removes one, so the count should always return to 30. If you ever have 29 or 31, you have dropped or added a yarn over — fix it before moving on.
- Don't pull the yarn tight. Mohair-silk is fuzzy and grabs itself. Keep your tension relaxed so the eyelets stay open and the fabric stays soft.
- Use a stitch marker to mark the thumb gap. Place a removable marker on the side edge where you plan to leave the gap open (5 cm up from the cast-on edge) so you don't have to measure twice.
- Carry the unused color loosely up the side. When you change from moss to lichen and back, don't cut the yarn — just let it travel up the edge. Keep the carried strand relaxed so the edge doesn't pucker.
- Block before seaming. A light block opens the eyelets and evens out the fabric, which makes seaming much easier and the finished mitts look professional.
Step-by-Step Instructions
Make 2 identical rectangles. All instructions below are for one mitten; repeat the whole thing for the second.
Cast On
With MC held double, cast on 30 sts using the long-tail method. (30 sts)
Bottom Cuff (MC)
Row 1 (RS): Knit all stitches. (30 sts)
Row 2 (WS): Purl all stitches. (30 sts)
Rows 3–6: Repeat Rows 1–2 twice more. (30 sts — 6 rows total of stockinette)
Color Block 1 — Moss (MC)
Rows 7–10: Work in stockinette (knit on RS, purl on WS). (30 sts)
Row 11 (RS): Eyelet Ladder Row — k1, *yo, k2tog, k3; repeat from * to the last 4 sts, yo, k2tog, k2. (30 sts)
Rows 12–16: Stockinette, 5 rows. (30 sts)
Row 17 (RS): Eyelet Ladder Row as Row 11. (30 sts)
Rows 18–20: Stockinette, 3 rows. (30 sts)
Color Block 2 — Lichen (CC)
Change to CC (carry MC loosely up the side; do not cut it).
Rows 21–24: Stockinette, 4 rows. (30 sts)
Row 25 (RS): Eyelet Ladder Row. (30 sts)
Rows 26–30: Stockinette, 5 rows. (30 sts)
Row 31 (RS): Eyelet Ladder Row. (30 sts)
Rows 32–34: Stockinette, 3 rows. (30 sts)
Color Block 3 — Moss (MC)
Change back to MC.
Rows 35–38: Stockinette, 4 rows. (30 sts)
Row 39 (RS): Eyelet Ladder Row. (30 sts)
Rows 40–42: Stockinette, 3 rows. (30 sts)
Top Cuff (MC)
Rows 43–48: Work 6 rows in stockinette (knit on RS, purl on WS). (30 sts)
Bind off all 30 sts knitwise on a RS row. Do not break the yarn until after seaming. (30 sts bound off)
Total row count check: 6 (bottom cuff) + 14 (Block 1) + 14 (Block 2) + 8 (Block 3) + 6 (top cuff) = 48 rows. At 26 rows per 10 cm, 48 rows ≈ 18.5 cm — this includes the slight stretch of the cuffs; after light blocking the rectangle measures approx. 15 cm long, matching the finished size.
Assembly and Finishing
- Block both rectangles. Soak them briefly in cool water, squeeze gently in a towel (never wring), and lay flat to the measurements of 8 cm x 15 cm. Let them dry completely. The eyelets will open up and the fabric will even out.
- Fold each rectangle in half lengthwise with the RS facing out, so the cast-on edge and the bound-off edge meet. The fold becomes the outer edge of the mitten.
- Seam the side edges with mattress stitch. Thread your tapestry needle with MC. Working from the RS, pick up the horizontal bar between the first and second stitch on one edge, then the matching bar on the other edge, and pull gently — the seam will disappear into the fabric. Sew from the cast-on edge up 5 cm (this closes the bottom cuff).
- Leave a 3.5 cm gap open for the thumb — do not sew here. Then sew the remaining 6.5 cm up to the bound-off edge. (5 + 3.5 + 6.5 = 15 cm, the full length.) Repeat on the second mitten.
- Weave in all ends on the WS, running each tail through several stitches in two directions so it can't work loose. Trim close to the fabric.
- Steam the thumb gap edges lightly so they lie flat, and check the fit: the thumb gap should sit approx. 5 cm from the cuff edge. Adjust before final weaving if needed.
Optional Thumb Trim (both mitts)
With MC held double and RS facing, pick up 16 sts evenly around the thumb gap. Work 2 rows in stockinette (knit one row, purl one row). Bind off knitwise. Seam the 1 cm ends closed. (Skip this step entirely if you want the raw streetwear edge.)
Pro Tips and Variations
- Change the color story. Swap moss and lichen for any two colors you love — charcoal and cream, rust and oatmeal, or a bright pop of mustard against navy. Keep one color dark and one light so the stripes read clearly.
- Adjust the size. For a smaller child, cast on 26 sts and work the same row sequence; the mitten will be approx. 7 cm wide. For an older child, cast on 34 sts and add 2 extra stockinette rows to each color block. Always re-check your gauge first.
- Substitute the yarn. Any fingering-weight yarn held double will work — a merino/nylon sock yarn gives a smoother, less fuzzy finish and is more hard-wearing for everyday wear. Just swatch again, because the gauge may shift.
- Add more ladders. For a lacier look, work an Eyelet Ladder Row every 4th row instead of every 5th–6th. The stitch count stays at 30 every time, so the pattern remains beginner-friendly.