Ember Glow Striped Throw Free Pattern – A Cozy Knit Blanket
Ember Glow Striped Throw Free Pattern – A Cozy Knit Blanket
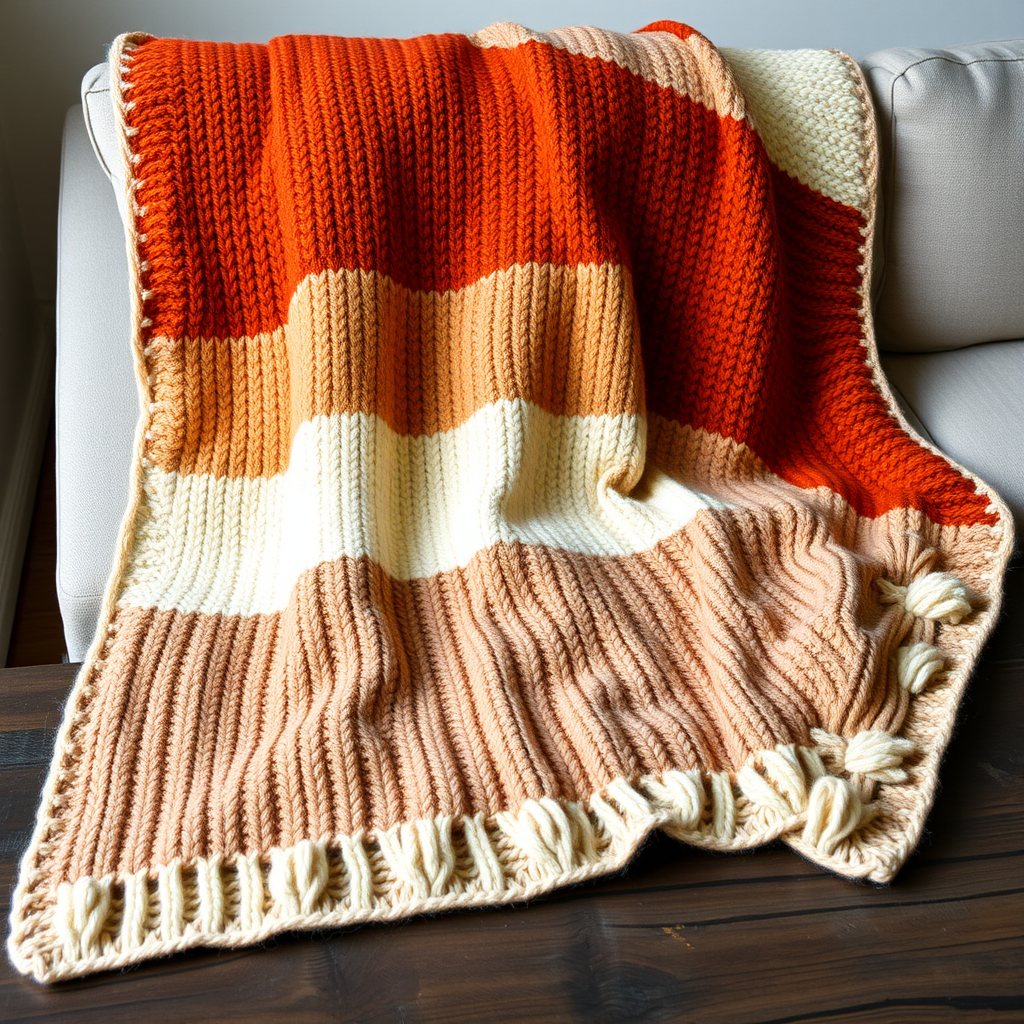
Wrap yourself in the warm, rustic charm of this burnt orange striped throw, knitted with soft worsted-weight yarn. This pattern offers a soothing, rhythmic knit that builds into a generously sized, textured blanket perfect for cool evenings. The combination of seed stitch, garter stitch, and stockinette stitch creates a visually stunning piece that adds warmth and handcrafted elegance to any living space.
Whether you're curling up with a good book or adding a pop of earthy color to your sofa, this throw is designed to be both beautiful and functional. The repetitive stripe sequence makes it an ideal project for mindful knitting—perfect for beginners looking to expand their skills or experienced knitters seeking a relaxing weekend project.
Materials Needed
Before you begin, gather the following supplies to ensure a smooth and enjoyable knitting experience:
Yarn
- Red Heart Super Saver (worsted weight, 100% acrylic, 7 oz/198 g, 364 yds/333 m per skein)
- Color A (Burnt Orange): 3 skeins
- Color B (Cream): 2 skeins
- Color C (Warm Taupe): 1 skein
Needles & Notions
- US 9 (5.5 mm) knitting needles – straight or circular (32-inch length recommended for large projects)
- Tapestry needle for weaving in ends
- Scissors
- Stitch markers (optional, for tracking stripe sections)
Gauge
18 stitches and 24 rows = 4 inches in stockinette stitch (knit on RS, purl on WS). Always knit a gauge swatch before starting to ensure your finished throw matches the intended dimensions.
Step-by-Step Instructions
Finished Size
Approximately 50 inches wide x 60 inches long (after blocking).
Stitch Patterns
Familiarize yourself with these three stitch patterns before beginning:
Seed Stitch (multiple of 2 + 1)
- Row 1 (RS): *K1, P1; repeat from * to last stitch, K1.
- Row 2 (WS): *P1, K1; repeat from * to last stitch, P1.
- Repeat these 2 rows for the pattern.
Garter Stitch
- Every row: Knit all stitches.
Stockinette Stitch
- Row 1 (RS): Knit all stitches.
- Row 2 (WS): Purl all stitches.
- Repeat these 2 rows for the pattern.
Pattern Notes
- The throw is worked in one piece from the bottom edge to the top edge—no seaming required!
- Each stripe uses a specific stitch pattern to add texture and visual interest.
- Always slip the first stitch of each row purlwise with yarn in back to create a neat, selvedge edge.
Cast On
With Color A (Burnt Orange), cast on 225 stitches loosely. Use a stretchy cast-on method (such as the long-tail or knitted cast-on) to ensure the edge remains flexible.
Stripe 1 (Color A – Burnt Orange)
Rows 1–8: Work in Seed Stitch for 8 rows.
Stripe 2 (Color B – Cream)
Rows 9–16: Work in Garter Stitch (knit every row) for 8 rows.
Stripe 3 (Color A – Burnt Orange)
Rows 17–24: Work in Stockinette Stitch (knit on RS, purl on WS) for 8 rows.
Stripe 4 (Color C – Warm Taupe)
Rows 25–32: Work in Seed Stitch for 8 rows.
Stripe 5 (Color B – Cream)
Rows 33–40: Work in Garter Stitch for 8 rows.
Stripe 6 (Color A – Burnt Orange)
Rows 41–48: Work in Stockinette Stitch for 8 rows.
Repeat the Stripe Sequence
Repeat Stripes 1–6 in order until the throw measures approximately 58 inches from the cast-on edge, ending with a complete Stripe 6 (Stockinette in Color A).
Final Stripe (Color A – Burnt Orange)
Work 8 rows in Seed Stitch (same as Stripe 1) to create a symmetrical border that mirrors the bottom edge.
Bind Off
Bind off all stitches loosely in pattern—knit the knits and purl the purls as they appear. Use a loose bind-off method (such as the stretchy bind-off) to prevent the edge from pulling.
Finishing
- Weave in all loose ends with a tapestry needle, working them invisibly into the wrong side of the fabric.
- Block the throw gently: Soak in cool water with a mild wool wash, gently squeeze out excess water (do not wring), lay flat on towels, and shape to the desired dimensions. Allow to dry completely.
- Optional fringe: Add a simple fringe along the cast-on and bind-off edges using Color A and Color B strands for a bohemian touch. Cut 10-inch strands, fold in half, and pull the loop through the edge stitch, then pull the ends through the loop and tighten.
Tips for Success
- Count your stitches at the end of each stripe to catch any accidental increases or decreases early.
- Use stitch markers at the beginning of each stripe section to easily track your progress.
- Keep your tension consistent—especially when switching between stitch patterns—to maintain an even fabric.
- Don't rush the blocking process. Proper blocking will even out your stitches and give the throw a professional, polished finish.
This Ember Glow Striped Throw is a joy to knit and a treasure to use. The rhythmic repetition of stitches makes it a perfect companion for cozy evenings, and the warm, earthy palette will complement any home décor. Happy knitting!


