Drifting Dune Market Tote Free Pattern – A Textured Crochet Carryall
Drifting Dune Market Tote Free Pattern – A Textured Crochet Carryall
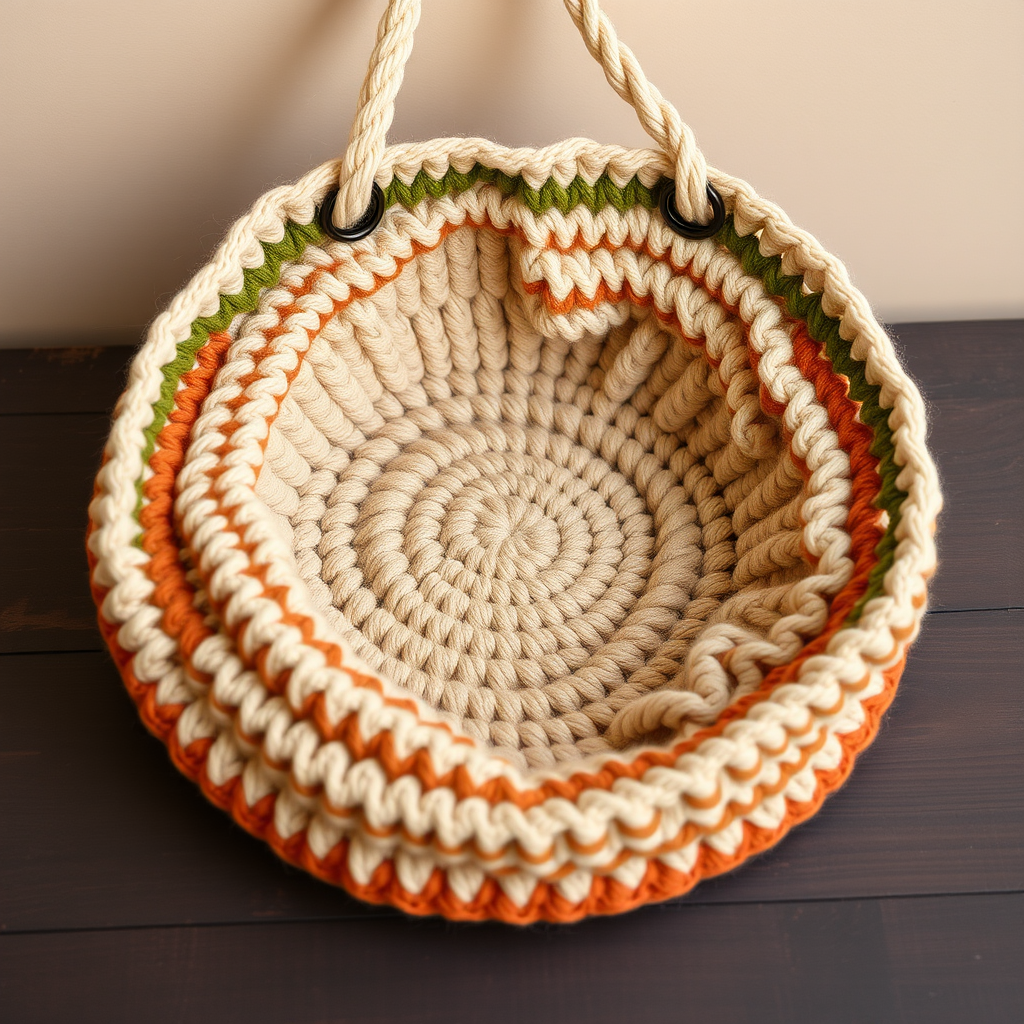
Embrace the boho-chic vibe with this stunning Drifting Dune Market Tote! Featuring a gorgeous woven-look stitch and earthy gradient stripes, this slouchy carryall is perfect for farmers markets, beach days, or everyday errands. The sturdy, single-piece construction makes it a satisfying weekend project for crocheters of all skill levels—even confident beginners will love watching this textured beauty come to life.
With its warm palette of sand, terracotta, and olive, this tote brings a natural, handcrafted feel to any outfit. Plus, the alternating front post and back post double crochets create a dense, durable fabric that holds its shape beautifully. Let's dive into this free pattern and create your new favorite accessory!
Materials Needed
Before you begin, gather the following supplies:
- Yarn: Worsted weight cotton yarn (e.g., Lion Brand 24/7 Cotton) in 3 colors:
- Color A (Sand) – approx. 100g
- Color B (Terracotta) – approx. 75g
- Color C (Olive) – approx. 75g
- Hook: 5.5 mm (I-9) crochet hook
- Notions: Stitch markers, yarn needle for weaving in ends, scissors
Gauge: 14 sc x 16 rows = 4 x 4 inches (10 x 10 cm). Be sure to check your gauge to ensure the bag comes out the right size.
Step-by-Step Instructions
Notes Before You Start
- The bag is worked from the bottom up.
- The base is worked in continuous rounds (spiral) – do not join unless stated.
- The body is worked in joined rounds – join with a slip stitch at the end of each round.
- Use a stitch marker to mark the beginning of each round.
- Abbreviations: sc = single crochet, fpdc = front post double crochet, bpdc = back post double crochet, ch = chain, sl st = slip stitch, st(s) = stitch(es).
Base (Worked in Spiral)
Start with Color A. This creates a flat, circular base for your tote.
- Round 1: Make a magic ring, work 8 sc into the ring. (8 sts)
- Round 2: 2 sc in each st around. (16 sts)
- Round 3: *Sc in next st, 2 sc in next st* repeat around. (24 sts)
- Round 4: *Sc in next 2 sts, 2 sc in next st* repeat around. (32 sts)
- Round 5: *Sc in next 3 sts, 2 sc in next st* repeat around. (40 sts)
- Round 6: *Sc in next 4 sts, 2 sc in next st* repeat around. (48 sts)
- Round 7: *Sc in next 5 sts, 2 sc in next st* repeat around. (56 sts)
- Round 8: *Sc in next 6 sts, 2 sc in next st* repeat around. (64 sts)
- Round 9: *Sc in next 7 sts, 2 sc in next st* repeat around. (72 sts)
- Round 10: *Sc in next 8 sts, 2 sc in next st* repeat around. (80 sts)
- Round 11: *Sc in next 9 sts, 2 sc in next st* repeat around. (88 sts)
- Round 12: *Sc in next 10 sts, 2 sc in next st* repeat around. (96 sts)
Your base should now measure approximately 8-9 inches in diameter. If it's curling, don't worry—the body will straighten it out.
Body (Worked in Joined Rounds)
Now we'll build the sides of the bag using the beautiful woven stitch pattern. Remember to join each round with a slip stitch.
- Round 13: Ch 1, sc in each st around, join with sl st to first sc. (96 sts)
- Round 14: Ch 1, sc in each st around, join. (96 sts)
- Round 15: Ch 1, *fpdc around next st, bpdc around next st* repeat around, join. (96 sts) – This creates the woven texture.
- Rounds 16-17: Repeat Round 15.
- Round 18: Switch to Color B. Ch 1, *fpdc around next st, bpdc around next st* repeat around, join.
- Rounds 19-20: Continue in pattern with Color B.
- Round 21: Switch to Color C. Ch 1, *fpdc around next st, bpdc around next st* repeat around, join.
- Rounds 22-23: Continue in pattern with Color C.
- Round 24: Switch to Color A. Ch 1, *fpdc around next st, bpdc around next st* repeat around, join.
- Rounds 25-26: Continue in pattern with Color A.
- Round 27: Switch to Color B. Ch 1, *fpdc around next st, bpdc around next st* repeat around, join.
- Rounds 28-29: Continue in pattern with Color B.
- Round 30: Switch to Color C. Ch 1, *fpdc around next st, bpdc around next st* repeat around, join.
- Rounds 31-32: Continue in pattern with Color C.
- Round 33: Switch to Color A. Ch 1, *fpdc around next st, bpdc around next st* repeat around, join.
- Rounds 34-35: Continue in pattern with Color A.
Pro Tip: When changing colors, join the new color with a slip stitch in the first stitch of the round, then ch 1 to begin. This keeps your color changes clean and seamless.
Top Edge
- Round 36: Ch 1, sc in each st around, join. (96 sts)
- Round 37: Ch 1, sc in each st around, join. (96 sts)
Fasten off and weave in all loose ends. Your bag body is complete!
Handles (Make 2)
These sturdy, braided-looking handles are crocheted flat and sewn on for a secure finish.
- Row 1: With Color A, ch 80, sc in 2nd ch from hook and in each ch across. (79 sts)
- Row 2: Ch 1, turn, sc in each st across. (79 sts)
- Fasten off, leaving a long tail (about 12 inches) for sewing.
Attaching the Handles
- Position each handle on the inside of the bag, about 4 inches down from the top edge.
- Space the handles approximately 6 inches apart from each other (measure from the outer edge of one handle to the outer edge of the other).
- Using the long tail and a yarn needle, sew each handle securely to the inside of the bag. Make several passes through the fabric to ensure it's sturdy enough to hold your market haul.
- Weave in all remaining ends.
Finishing Touches
Give your tote a gentle block if desired—this helps the woven stitch relax and drape beautifully. Simply mist with water and shape, then let dry flat.
Your Drifting Dune Market Tote is now ready for adventure! Whether you're strolling through a farmers market, heading to the beach, or just running errands, this textured carryall adds a touch of handmade boho charm to every outing.
Happy crocheting! We'd love to see your finished tote—share your creation on social media with the hashtag #DriftingDuneTote and inspire fellow makers!


