Blossom & Berry Crochet Garland Free Pattern
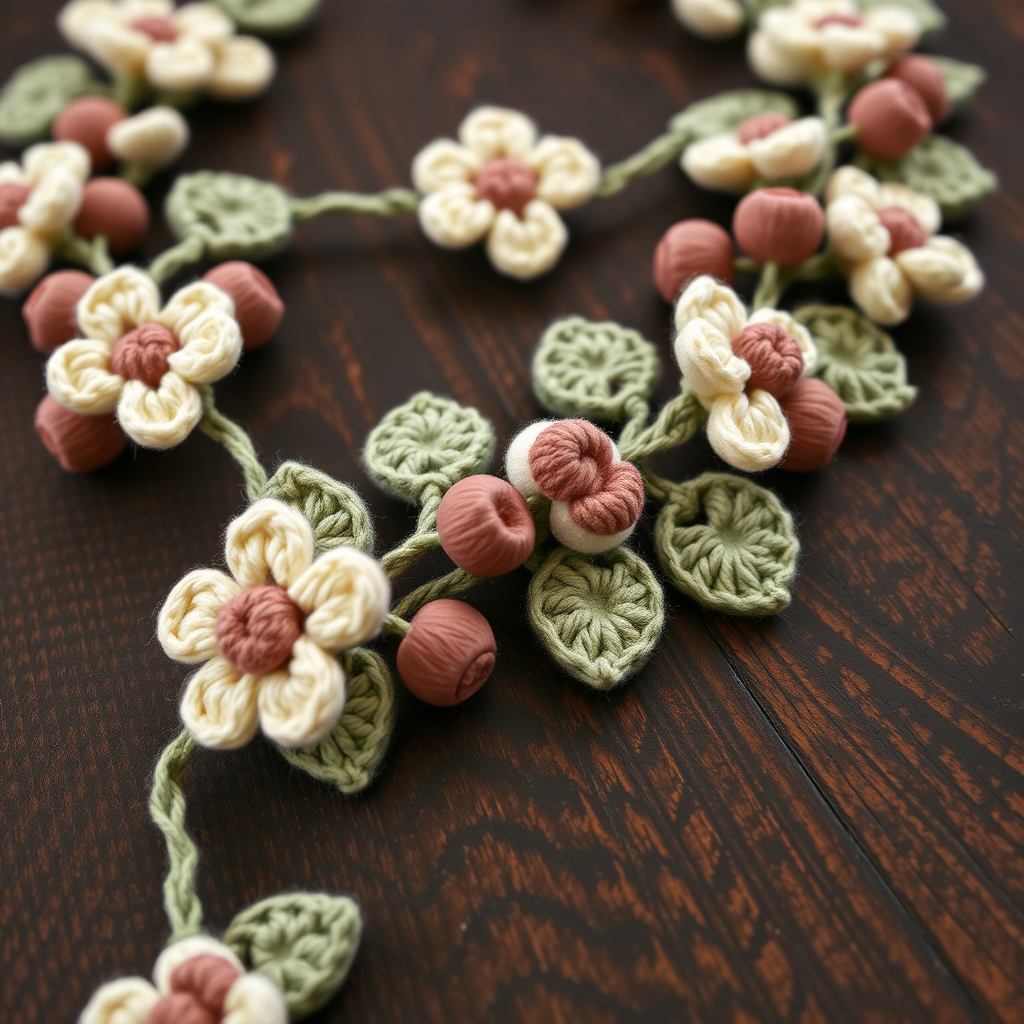
Blossom & Berry Crochet Garland: A Woodland-Inspired DIY
Bring a touch of woodland charm to your home with this delightful Blossom & Berry Crochet Garland. Featuring delicate cream blossoms, plump dusty rose berries, and soft sage green leaves, this nature-inspired decoration is perfect for mantels, doorways, or nursery walls. This is an easy, beginner-friendly pattern that creates a whimsical, organic line of handmade beauty. The muted, earthy tones and matte yarn texture give it a rustic, cozy aesthetic that will warm any space. Best of all, you can customize the length and color palette to match your own decor!
Materials Needed
Before you begin, gather the following supplies. This project is highly portable since you work each piece separately before assembly.
- Yarn: Worsted weight cotton or acrylic yarn in three colors:
- Color A (Cream): Approximately 100 yards
- Color B (Sage Green): Approximately 80 yards
- Color C (Dusty Rose): Approximately 60 yards
- Crochet Hook: Size H/8 (5 mm)
- Fiberfill: A small amount for stuffing the berries
- Yarn Needle: For weaving in ends and assembly
- Scissors
Note on Gauge: Gauge is not critical for this project. For reference, a 4-inch square of single crochet measures approximately 16 stitches and 18 rows. Just keep your tension consistent for uniform pieces.
Step-by-Step Instructions
This garland is constructed by crocheting individual flowers, berries, and leaves, then stringing them together on a crocheted chain. Work each piece separately and assemble at the end. The pattern makes 12 flowers, 10 berries, and 10 leaves.
Crochet the Flower (Make 12)
Using Color A (Cream)
- Round 1: Make a magic ring. Chain 1 (does not count as a stitch). Work 6 single crochet (sc) into the ring. Pull the tail tight to close the ring. Join with a slip stitch (sl st) to the first sc. (6 sc)
- Round 2: Chain 1. Work 2 sc into each stitch around. Join with a sl st to the first sc. (12 sc)
- Round 3 (Petals): *Chain 4, skip the next stitch, sl st into the following stitch.* Repeat from * to * around. You will create 6 chain-loops (petals). Fasten off and weave in the ends securely.
Crochet the Berry (Make 10)
Using Color C (Dusty Rose)
- Round 1: Make a magic ring. Chain 1. Work 6 sc into the ring. Pull tight, join with a sl st. (6 sc)
- Round 2: Chain 1. Work 2 sc in each stitch around. Join with a sl st. (12 sc)
- Rounds 3-4: Chain 1. Work 1 sc in each stitch around. Join with a sl st at the end of each round. (12 sc)
- Round 5 (Decrease): Chain 1. *Work a single crochet two together (sc2tog) over the next 2 stitches.* Repeat from * to * around. Join with a sl st. (6 sc)
- Finishing: Fasten off, leaving a long tail (approx. 12 inches) for sewing. Stuff the berry lightly with a small amount of fiberfill before closing the last round. Thread the tail onto a yarn needle, sew through the front loops of the remaining 6 stitches, and pull tight to cinch the opening closed. Secure with a knot.
Crochet the Leaf (Make 10)
Using Color B (Sage Green)
- Chain 6.
- Row 1: Starting in the second chain from the hook, work the following sequence: 1 sc, 1 half double crochet (hdc), 1 double crochet (dc), 1 hdc, 1 sc. This creates the pointed oval leaf shape.
- Fasten off, leaving a tail for sewing.
Garland Assembly
Now for the fun part—stringing your pieces together!
- Create the Base Chain: Using Color B (Sage Green), make a foundation chain of 80 inches (or your desired finished length). Do not fasten off.
- Attach the First Flower: Starting at the end of your chain (the end closest to your hook), insert your hook into the center of a flower. Pull a loop of the working chain through the flower's center and slip stitch to secure it onto the chain.
- Space the Pieces: Chain 5 to create a spacer segment.
- Attach a Berry: Insert your hook through the top of a berry (where you cinched it closed). Pull a loop of the chain through and slip stitch to secure the berry.
- Continue the Pattern: Chain 5. Attach a leaf by inserting your hook through the base of the leaf (the first chain stitch you made) and slip stitching it onto the chain.
- Repeat: Continue alternating flowers, berries, and leaves, spacing them with chain-5 segments, until all 12 flowers, 10 berries, and 10 leaves are used. A suggested sequence is: Flower, Berry, Leaf, Flower, Berry, Leaf, etc.
- Finish the Tail: Once all pieces are attached, end with a final chain of 5 inches to create a tail for hanging. Fasten off.
- Weave in Ends: Carefully weave in all loose ends from the individual pieces and the main chain using your yarn needle. Trim any excess yarn.
Your Blossom & Berry Crochet Garland is now complete! Drape it across a mantel, hang it in a window, or adorn a nursery wall. The soft, earthy palette and delicate handmade details are sure to bring a smile to your face. Happy crocheting!


