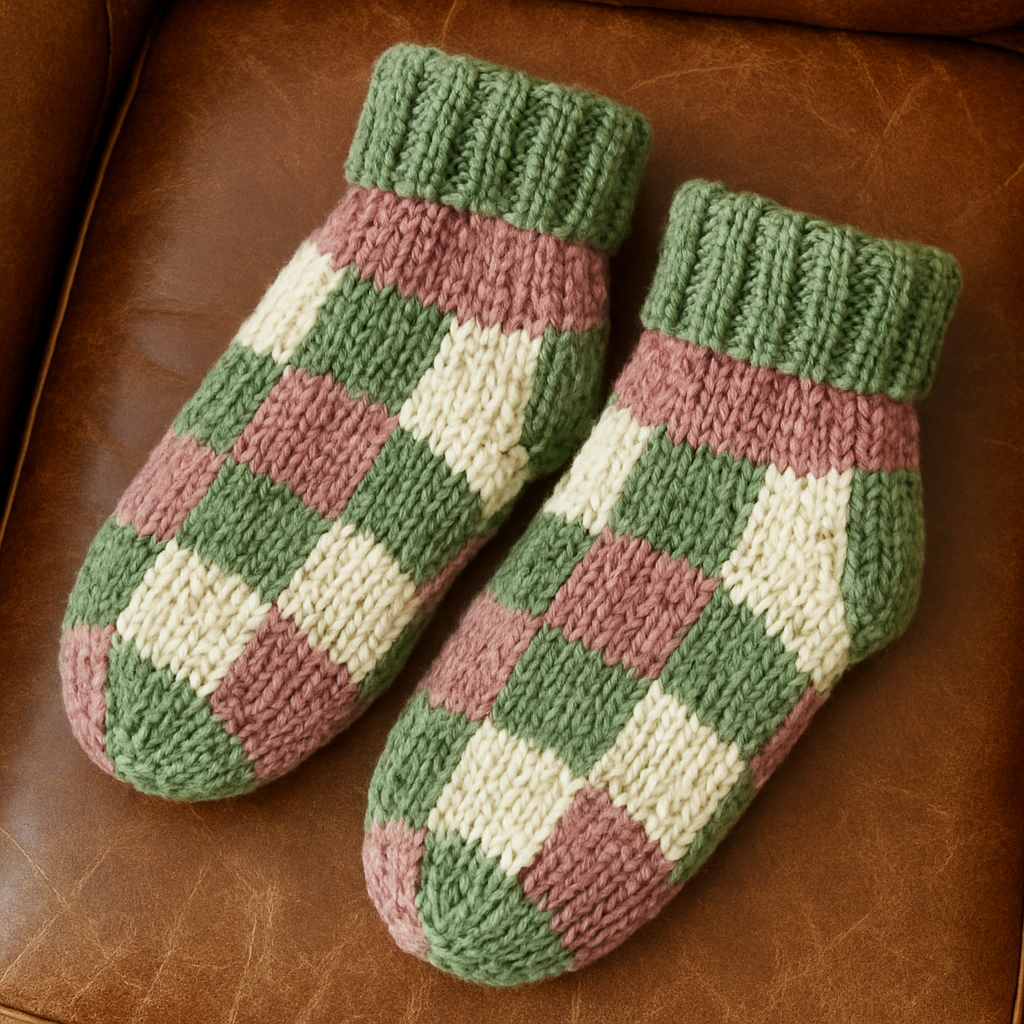
Whispering Pine Toe-Up Socks Free Pattern – Textured Forest Knit

Whispering Pine Toe-Up Socks: A Forest-Inspired Knitting Adventure
Imagine wrapping your feet in the quiet serenity of a pine forest—that's the magic of the Whispering Pine Toe-Up Socks. This free knitting pattern combines the cozy comfort of handcrafted socks with a delicate, nature-inspired lace motif that climbs gracefully from toe to cuff. The toe-up construction means you can try them on as you go, ensuring a perfectly custom fit every time. Whether you're a seasoned sock knitter or ready to tackle your first pair, this pattern offers a rewarding project that feels like a warm woodland walk for your feet.
Using deep forest green and birch white fingering weight yarn, these socks feature a subtle pine tree lace pattern that adds texture and visual interest without being overly fussy. The seamless design and reinforced heel make them durable enough for everyday wear, while the beautiful stitch pattern makes them a joy to create and show off. Let's dive into this enchanting knitting journey together!
Materials Needed
Before we begin, gather these essential supplies to ensure a smooth knitting experience:
- Yarn: Fingering weight yarn (e.g., Malabrigo Sock, 100% superwash merino, 440 yards per 100g) in two colors:
- Main Color (MC) – Deep Forest Green (approximately 350-400 yards)
- Contrast Color (CC) – Birch White (approximately 50-75 yards)
- Needles: US 1.5 (2.5 mm) circular needles, 32-inch or longer for magic loop method, OR a set of 5 double-pointed needles (DPNs)
- Notions: Stitch markers (at least 4), tapestry needle for weaving in ends, scissors
- Gauge: 32 stitches and 44 rows = 4 inches in stockinette stitch, after blocking (this gauge is crucial for proper fit!)
Pro tip: If you're between sizes or a tight knitter, consider going up a needle size to achieve the correct gauge. The fit of these socks depends on matching the specified tension.
Understanding Your Pattern
Sizes and Measurements
This pattern is written for Women's Small (Medium, Large) with foot circumferences of 7.5 (8.5, 9.5) inches. The foot length is completely adjustable—simply try on the sock as you knit to determine your perfect length. The stitch counts are given in parentheses for each size, so follow the numbers that correspond to your chosen size throughout the pattern.
Abbreviations You'll Need
Familiarize yourself with these standard knitting abbreviations before starting:
- k – knit
- p – purl
- k2tog – knit two stitches together (decrease)
- ssk – slip, slip, knit (left-leaning decrease)
- yo – yarn over (increase creating an eyelet)
- pm – place marker
- sm – slip marker
- m1l – make one left (increase)
- m1r – make one right (increase)
- st(s) – stitch(es)
- rnd(s) – round(s)
The Pine Lace Pattern
This beautiful 8-stitch repeat creates the pine tree motif that gives these socks their name. The pattern is worked over 18 rounds, with the lace forming on odd-numbered rounds and plain knit rounds in between. Here's the complete chart in written form:
Pine Lace (worked over 8 sts):
- Rnd 1: k2, yo, ssk, k4
- Rnd 2: k all
- Rnd 3: k3, yo, ssk, k3
- Rnd 4: k all
- Rnd 5: k4, yo, ssk, k2
- Rnd 6: k all
- Rnd 7: k5, yo, ssk, k1
- Rnd 8: k all
- Rnd 9: k6, yo, ssk
- Rnd 10: k all
- Rnd 11: k5, k2tog, yo, k1
- Rnd 12: k all
- Rnd 13: k4, k2tog, yo, k2
- Rnd 14: k all
- Rnd 15: k3, k2tog, yo, k3
- Rnd 16: k all
- Rnd 17: k2, k2tog, yo, k4
- Rnd 18: k all
Note: The yarn overs (yo) create the eyelet holes that form the pine tree silhouette, while the decreases (ssk and k2tog) shape the tree's edges. The plain knit rounds between lace rounds give the pattern its subtle, airy quality.
Step-by-Step Instructions
Part 1: Knitting the Toe (Worked in MC)
Step 1: Using the magic loop method or DPNs, cast on 12 stitches (6 stitches per needle if using magic loop). This will be the very tip of your toe.
Step 2: Work the toe increases as follows:
- Rnd 1: k all (12 sts)
- Rnd 2: k1, m1l, k to last st on first needle, m1r, k1; repeat on second needle (16 sts total)
- Rnd 3: k all
Step 3: Repeat Rnds 2-3 until you have 32 (36, 40) stitches total. This creates the rounded toe shape.
Step 4: Continue increasing every other round (working Rnd 2, then Rnd 3) until you have 64 (72, 80) stitches total. This gives you the full circumference needed for your foot.
Tip: Place a marker at the beginning of your round to keep track of where each round starts. This is especially helpful when working in the round.
Part 2: Knitting the Foot (MC)
Step 5: Once you have the correct number of stitches, work in stockinette stitch (knit every round) until the foot measures 1.5 inches less than your desired total foot length. For example, if your foot is 9 inches long, knit until the piece measures 7.5 inches from the toe tip.
Step 6: Try the sock on to check the fit. The fabric should be snug but not tight, with the stitches slightly stretched around your foot. This is your opportunity to adjust the length before adding the instep pattern.
Part 3: Adding the Instep Pattern (CC and MC)
Step 7: Begin the colorwork transition with these setup rounds:
- Rnd 1: With CC (Birch White), k all
- Rnd 2: With CC, k all
- Rnd 3: With MC (Deep Forest Green), k all
- Rnd 4: With MC, k all
Step 8: Now you'll establish the Pine Lace pattern on the instep (top of foot). Place a marker after 32 (36, 40) stitches. This marks the beginning of your instep section.
Step 9: Work the Pine Lace pattern over the next 8 stitches, then knit the remaining stitches on the instep. The sole stitches (the first 32 (36, 40) stitches) continue in stockinette.
Step 10: Continue in the round, working the Pine Lace over the 8 instep stitches every 4th round. This means you'll work Pine Lace Rnds 1-18, then repeat the pattern from the beginning. The sole remains in plain stockinette throughout.
Step 11: Continue until the foot measures 2 inches less than your desired total foot length. The extra inch (compared to Step 5) accounts for the heel that you'll add next.
Important: Keep your tension consistent when switching between colors. Carry the unused yarn loosely along the inside of the work to prevent puckering.
Part 4: Knitting the Heel (Worked Back and Forth)
Step 12: Place the instep stitches on hold (32 (36, 40) stitches). You can use a spare needle, stitch holder, or waste yarn for this. You'll work the heel on the remaining 32 (36, 40) sole stitches.
Step 13: Work the heel flap back and forth in rows:
- Row 1 (RS): sl1, k to end
- Row 2 (WS): sl1, p to end
Step 14: Repeat these 2 rows until the heel flap measures 2 inches, ending with a wrong-side row. The slipped stitches at the beginning of each row create a neat edge that you'll use later for picking up gusset stitches.
Part 5: Turning the Heel
Step 15: Now you'll shape the heel with short rows:
- Row 1 (RS): k18 (20, 22), ssk, k1, turn
- Row 2 (WS): sl1, p5 (7, 9), p2tog, p1, turn
- Row 3: sl1, k to 1 st before gap, ssk, k1, turn
- Row 4: sl1, p to 1 st before gap, p2tog, p1, turn
Step 16: Repeat Rows 3-4 until all heel stitches are worked, ending with a right-side row. You should have 18 (20, 22) stitches remaining on your needle.
Understanding the "gap": As you work short rows, you'll notice a small gap between the worked and unworked stitches. The instructions tell you to knit or purl to one stitch before this gap, then work a decrease. This technique creates a smooth, professional-looking heel curve.
Part 6: Creating the Gusset
Step 17: With the right side facing, pick up and knit 12 (14, 16) stitches along the first edge of the heel flap. Place a marker, then work the instep stitches in pattern (continuing the Pine Lace where you left off). Place another marker, then pick up and knit 12 (14, 16) stitches along the other edge of the heel flap.
Step 18: You now have 74 (84, 94) stitches total. Work the gusset decreases as follows:
- Rnd 1: k to 2 sts before first marker, k2tog, sm, work instep in pattern, sm, ssk, k to end
- Rnd 2: k all (working instep in pattern)
Step 19: Repeat Rnds 1-2 until you have 64 (72, 80) stitches again—the same number you had before starting the heel. This shaping creates the gusset that accommodates the natural curve of your ankle.
Part 7: Knitting the Leg (MC)
Step 20: Continue working in the round, maintaining the Pine Lace pattern on the instep stitches and stockinette on the sole stitches. Work until the leg measures 5 inches from the heel, or until it reaches your desired length. Remember that the ribbing will add about 1 inch to the total length.
Step 21: Work 1 inch of k1, p1 ribbing. This creates a neat, stretchy cuff that will help the socks stay up comfortably.
Step 22: Bind off loosely in pattern. To do this, maintain the ribbing pattern as you bind off—knit the knit stitches and purl the purl stitches. Binding off loosely is essential to ensure the cuff can stretch over your heel comfortably.
Part 8: Finishing Touches
Step 23: Weave in all loose ends using your tapestry needle. Take care to weave ends on the wrong side of the work, following the path of the yarn to keep them invisible from the right side.
Step 24: Block the socks gently to shape. For superwash merino, you can wet block by soaking the socks in lukewarm water with a drop of wool wash, gently squeezing out excess water (never wring!), and laying them flat to dry on a towel. Shape them gently to ensure the lace pattern opens up and the socks lie flat.
Step 25: Repeat the entire process for the second sock. To ensure your socks match, keep careful notes about your stitch counts and any adjustments you made for fit.
Tips for Success
- Try as you go: The beauty of toe-up socks is that you can try them on throughout the process. Don't be afraid to adjust the foot length to fit your unique feet.
- Keep your place: Use a row counter or a piece of paper to track where you are in the Pine Lace pattern. It's easy to lose your place when the pattern repeats!
- Check your gauge: Before starting, knit a swatch to ensure your gauge matches the pattern. This small investment of time will save you from disappointing results later.
- Be patient with color changes: When switching between MC and CC, give yourself a moment to adjust your tension. Consistent tension makes for a more professional finish.
As you complete your Whispering Pine socks, you'll have created not just a pair of cozy footwear, but a wearable piece of art inspired by the tranquility of the forest. The subtle pine lace pattern catches the light beautifully, and the deep green with white accents evokes the peaceful contrast of pine needles against winter snow. These socks make wonderful gifts for nature lovers, or a special treat for your own feet. Happy knitting!