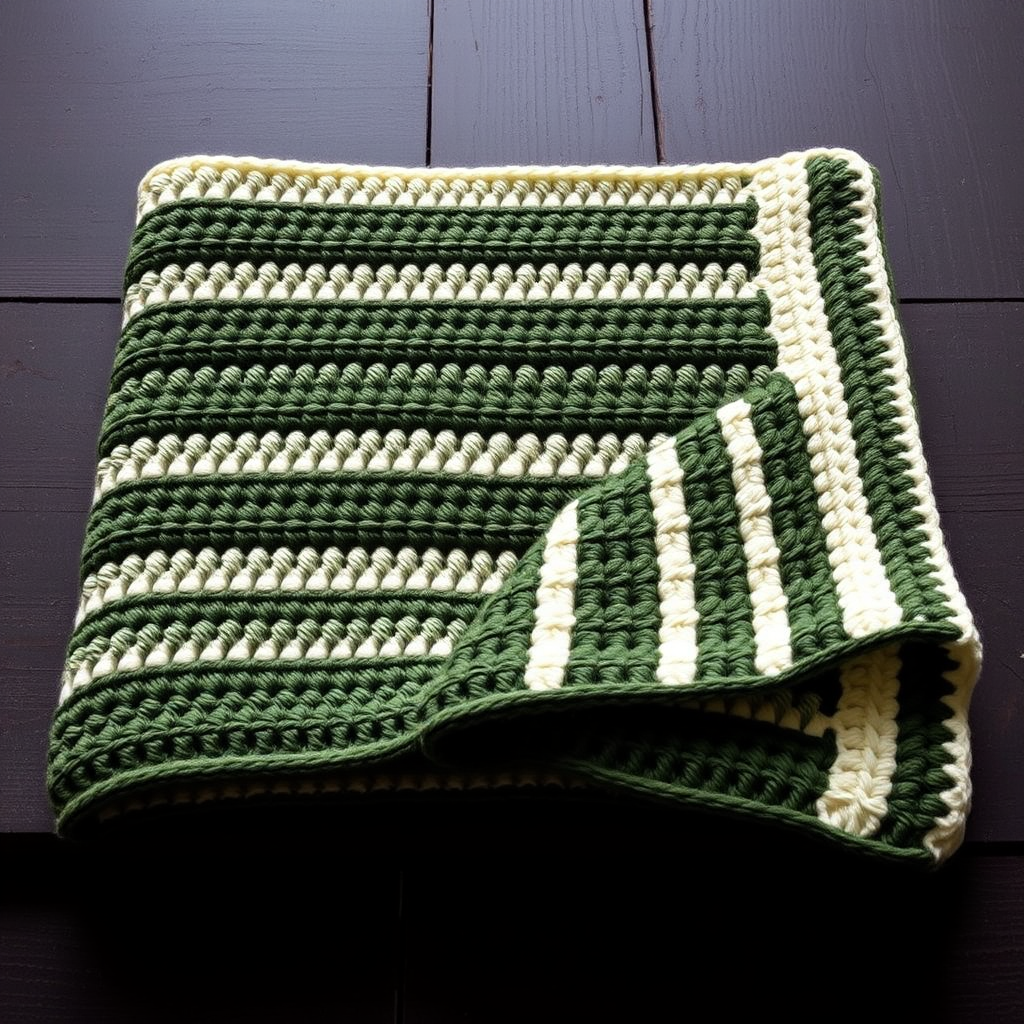
The Emberstone Throw: A Free Crochet Pattern for a Textured, Modern Blanket with a Unique Raised Stitch

Introduction: The Emberstone Throw – A Modern Textured Masterpiece
Imagine a blanket that feels like a warm, woven stone – dense, plush, and utterly captivating. The Emberstone Throw is exactly that. This free crochet pattern uses a clever combination of front-post and back-post double crochet stitches to create a stunning, raised diamond texture that mimics the look of ancient cobblestone or modern architectural stonework. The result is a sophisticated, modern throw that’s both cozy and visually striking.
Designed for adventurous beginners and intermediate crocheters, this pattern is deceptively simple. You’ll master a 4-row repeat that builds a dense, warm fabric with incredible depth. The two-tone color palette – a warm, creamy off-white paired with a deep, rich charcoal – adds a contemporary edge that will elevate any living room or bedroom. Whether you’re curling up on the couch or adding a touch of elegance to your decor, the Emberstone Throw is a project you’ll be proud to make and cherish.
Materials Needed
Before you begin, gather the following supplies. Using the exact yarn and hook size will ensure your blanket matches the sample’s gauge and texture.
- Yarn: Worsted weight (Category 4) yarn in two contrasting colors.
- Color A (Main Color): Approximately 1200 yards. Sample uses Lion Brand Wool-Ease in ‘Fisherman’ (a warm, creamy off-white).
- Color B (Contrast Color): Approximately 800 yards. Sample uses Lion Brand Wool-Ease in ‘Charcoal’ (a deep, rich gray).
- Crochet Hook: Size J-10 (6.0 mm) crochet hook, or size needed to obtain gauge.
- Other Notions: Yarn needle for weaving in ends, scissors, stitch markers (optional, for counting).
Gauge: 14 stitches and 10 rows = 4 inches in pattern stitch (after blocking). Achieving the correct gauge is crucial for the blanket to be the right size and have the proper drape. If your gauge is off, adjust your hook size accordingly.
Step-by-Step Instructions
Pattern Notes & Special Stitches
- The blanket is worked in rows from the bottom up.
- The pattern uses a 4-row repeat that creates a beautiful, raised diamond-like texture.
- Ch 2 at the beginning of a row counts as a half double crochet (hdc). This means you will work into the top of this ch-2 at the end of the row.
- Front Post Double Crochet (FPdc): Yarn over (yo), insert hook from front to back around the post of the next stitch (the vertical part of the stitch, not the top loops), yo, pull up a loop, yo, pull through 2 loops, yo, pull through remaining 2 loops.
- Back Post Double Crochet (BPdc): Yarn over (yo), insert hook from back to front around the post of the next stitch, yo, pull up a loop, yo, pull through 2 loops, yo, pull through remaining 2 loops.
Getting Started: The Foundation Chain
With Color A, chain 112. This will give you a foundation of 110 stitches after the first row. Make sure your chain is not twisted.
Row 1: Foundation Row (Right Side)
Row 1 (RS): Hdc in 3rd ch from hook (the two skipped chains count as your first hdc) and in each ch across. Turn. You should have 110 hdc stitches.
Rows 2-5: Establishing the Pattern
These four rows form the core of the texture. Pay close attention to the order of FPdc and BPdc.
Row 2 (WS): Ch 2 (counts as hdc), *FPdc in next st, BPdc in next st; repeat from * across to last st, hdc in top of turning ch (the ch-2 from the previous row). Turn.
Row 3: Ch 2, *BPdc in next st, FPdc in next st; repeat from * across to last st, hdc in top of turning ch. Turn.
Row 4: Ch 2, *FPdc in next st, BPdc in next st; repeat from * across to last st, hdc in top of turning ch. Turn.
Row 5: Ch 2, *BPdc in next st, FPdc in next st; repeat from * across to last st, hdc in top of turning ch. Turn.
Rows 6-9: Introducing the Color Change
Now you’ll start alternating colors every two rows. This creates the beautiful striped effect that enhances the texture.
Rows 6-7: Repeat Rows 2 and 3, but switch to Color B for these two rows. Fasten off Color B after Row 7, or carry it loosely up the side if you prefer.
Rows 8-9: Repeat Rows 4 and 5, switching back to Color A.
Continuing the Pattern
Repeat Rows 2-5, alternating colors every 2 rows (2 rows Color A, 2 rows Color B) until the blanket measures approximately 60 inches from the beginning. End with a Row 5 repeat (which will be a Color A row if you’re following the pattern).
Tip: To keep your edges neat, always work the last stitch of the row into the top of the turning chain from the previous row.
Finishing Row
Final Row: With Color A, ch 1, sc in each st across. Fasten off and weave in all ends using a yarn needle. This single crochet row stabilizes the edge and gives it a clean finish.
Optional Border
For a polished, professional look, add a simple border.
Border: With Color A, work a round of single crochet (sc) evenly around the entire blanket. Work 3 sc in each corner to help the border lie flat. Join with a slip stitch to the first sc. Fasten off and weave in ends.
Your Emberstone Throw is complete! Block it gently to even out the stitches and enhance the texture. Enjoy your stunning, modern, and incredibly cozy creation.