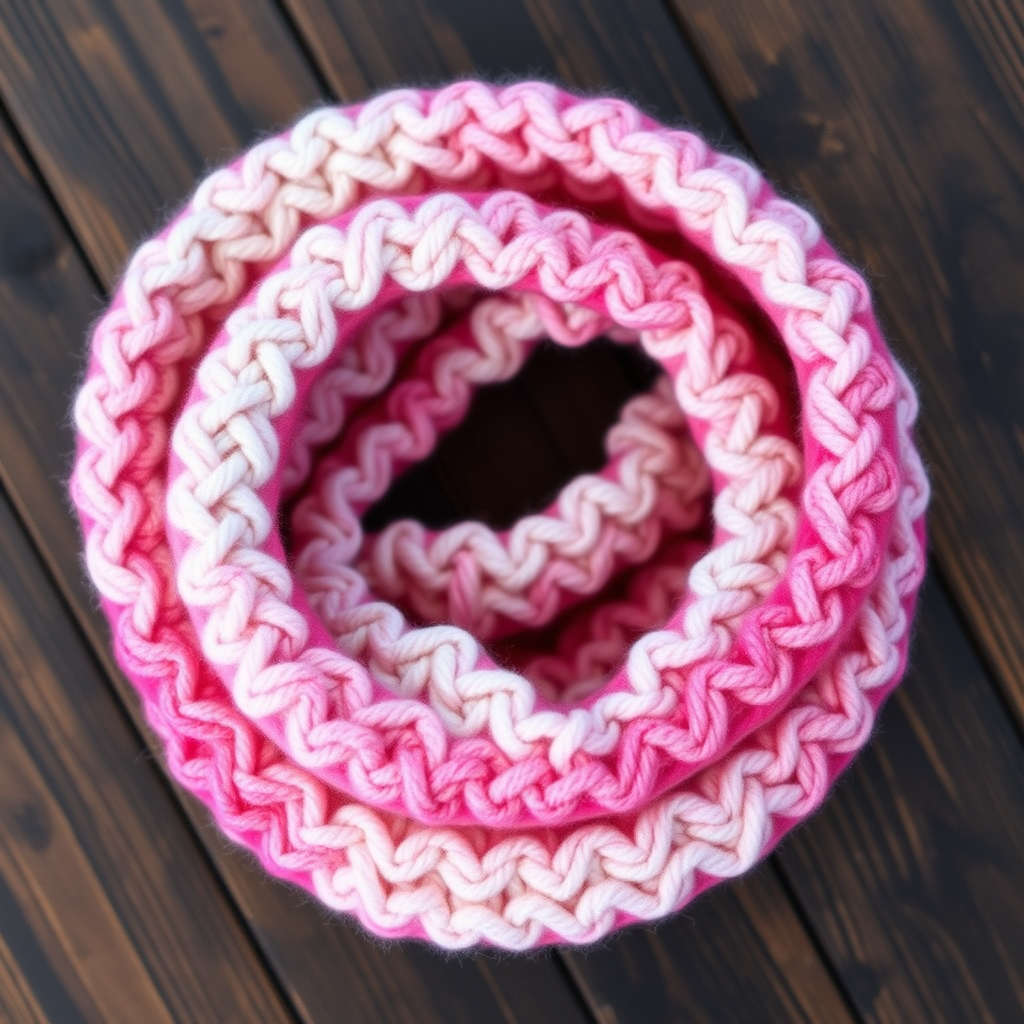
The Aurora Boreal Herringbone Cowl Free Pattern – A Knitted Gradient Wrap with a Twisted Stitch

The Aurora Boreal Herringbone Cowl: A Free Knitting Pattern for a Gradient Masterpiece
Imagine wrapping yourself in the ethereal, shifting colors of the Northern Lights. With the Aurora Boreal Herringbone Cowl, you can knit that vision into reality. This free pattern guides you through creating a uniquely textured, reversible cowl using a twisted herringbone stitch and a soft gradient yarn. The result is a dense, plush, and visually striking accessory that adds a touch of artistic flair to any winter wardrobe. Whether you're a seasoned knitter looking for a new texture or a confident beginner ready for a challenge, this pattern is designed to inspire and delight.
Materials Needed
Before you begin your knitting journey, gather the following materials to ensure a smooth and enjoyable crafting experience:
- Yarn: Worsted weight yarn in 3 colors (Color A: deep teal, Color B: soft lavender, Color C: pale mint) – approximately 200g total. Alternatively, you can use a self-striping gradient yarn for a seamless color transition.
- Needles: US 8 (5mm) 16-inch circular knitting needle. The circular needle is essential for working in the round.
- Notions: Stitch marker, tapestry needle for weaving in ends, and scissors.
- Gauge: 18 stitches and 24 rows = 4 inches in herringbone stitch pattern (blocked). Achieving the correct gauge ensures your cowl matches the finished dimensions.
Step-by-Step Instructions
Follow these detailed instructions to create your own Aurora Boreal Herringbone Cowl. The pattern is worked in the round, creating a seamless tube. Take your time, and enjoy the rhythmic, meditative quality of the twisted stitches.
Finished Dimensions & Abbreviations
Finished Dimensions: Approximately 24 inches around and 10 inches tall (adjustable).
Abbreviations:
- CO: Cast on
- K: Knit
- P: Purl
- K2tog: Knit two stitches together
- Sl1: Slip one stitch purlwise
- St(s): Stitch(es)
- Rep: Repeat
Pattern Notes
- The herringbone stitch is worked in the round, creating a beautiful V-shaped texture that twists diagonally.
- The cowl is reversible – both sides look great, so you can wear it either way.
- To adjust the height, simply work more or fewer repeats of the pattern.
Setup: Casting On and Ribbing
Step 1: With Color A (deep teal), cast on 108 stitches using your preferred method. We recommend a long-tail cast-on for a sturdy, elastic edge.
Step 2: Place a stitch marker on your right needle to mark the beginning of the round. Join in the round, being extremely careful not to twist your stitches. The cast-on edge should lie flat and smooth around the needle.
Step 3 (Ribbing): Work K1, P1 ribbing for 6 rounds. This creates a neat, structured edge that prevents the cowl from curling. To do this: *Knit 1 stitch, purl 1 stitch. Repeat from * to the end of the round. Move your marker and repeat for a total of 6 rounds.
Herringbone Pattern: The Core Stitch
Now, you'll begin the signature herringbone pattern. This two-round repeat creates the dense, twisted texture. Pay close attention to the instructions, as they are slightly unconventional but produce a stunning result.
Round 1 (Left-Leaning Twist):
- Step 1: Knit two stitches together (K2tog), but do not drop the first stitch off the left needle. You will have both stitches still on the left needle, and the new stitch on the right needle.
- Step 2: Now, knit the first stitch again (the one closest to the tip of the left needle).
- Step 3: Drop both original stitches off the left needle. You have now created two new stitches from the original two, but they are twisted together, creating a left-leaning herringbone effect.
- Repeat this sequence from * to * across the entire round.
Round 2 (Right-Leaning Twist):
- Step 1: Slip one stitch purlwise (Sl1) from the left needle to the right needle without knitting it.
- Step 2: Knit the next stitch (K1).
- Step 3: Pass the slipped stitch over the knit stitch and off the needle, just like a bind-off. This is a right-leaning decrease that creates the opposite diagonal twist.
- Repeat this sequence from * to * across the entire round.
These two rounds together form one complete herringbone pattern repeat. The combination of the left-leaning twist in Round 1 and the right-leaning twist in Round 2 creates the iconic, woven V-shape texture.
Color Changes and Length
Step 1: Work Rounds 1 and 2 with Color A for a total of 8 rounds (which equals 4 complete pattern repeats). This will form the deep teal base of your cowl.
Step 2: Switch to Color B (soft lavender). To switch colors cleanly, simply start knitting with the new yarn, leaving a 6-inch tail to weave in later. Work 8 rounds (4 repeats) with Color B.
Step 3: Switch to Color C (pale mint) and work 8 rounds (4 repeats).
Step 4: Continue alternating colors in this manner (or follow the natural progression of your gradient yarn) until the cowl measures approximately 9 inches from the cast-on edge. Remember, you can adjust this to your preferred height.
Finishing: Binding Off and Blocking
Step 1: Bind off loosely in pattern. To maintain the stretch and drape of the cowl, we highly recommend using a stretchy bind-off method like Jeny's Surprisingly Stretchy Bind-Off. This ensures the top edge is as elastic as the ribbed bottom edge.
Step 2: Cut your yarn, leaving a 6-inch tail. Pull the tail through the last loop to secure it.
Step 3: Using a tapestry needle, weave in all loose ends carefully, ensuring they are hidden within the dense fabric.
Step 4: Block the cowl gently. Wet blocking is ideal for this pattern. Soak the cowl in lukewarm water with a gentle wool wash, then gently squeeze out excess water (do not wring). Lay it flat on a towel, shape it to the correct dimensions, and allow it to dry completely. Blocking will open up the stitch pattern, making the herringbone texture more defined and the fabric more drapey.
Optional Customizations
- For a longer cowl: Work additional color repeats. You can continue alternating colors or add more colors to create a longer gradient.
- For a slouchier cowl: Cast on more stitches (e.g., 120 sts) and adjust the pattern accordingly. This will increase the circumference, creating a more relaxed, slouchy fit.
- For a different look: Try using a solid color yarn to highlight the intricate texture, or use a variegated yarn for a more spontaneous color effect.
Your Aurora Boreal Herringbone Cowl is now complete! This stunning accessory is not only a testament to your knitting skills but also a cozy, wearable piece of art. The dense, twisted fabric will keep you warm, while the gradient colors will brighten even the darkest winter day. Enjoy wearing your handcrafted masterpiece, and don't be surprised when friends and family ask where you bought it!