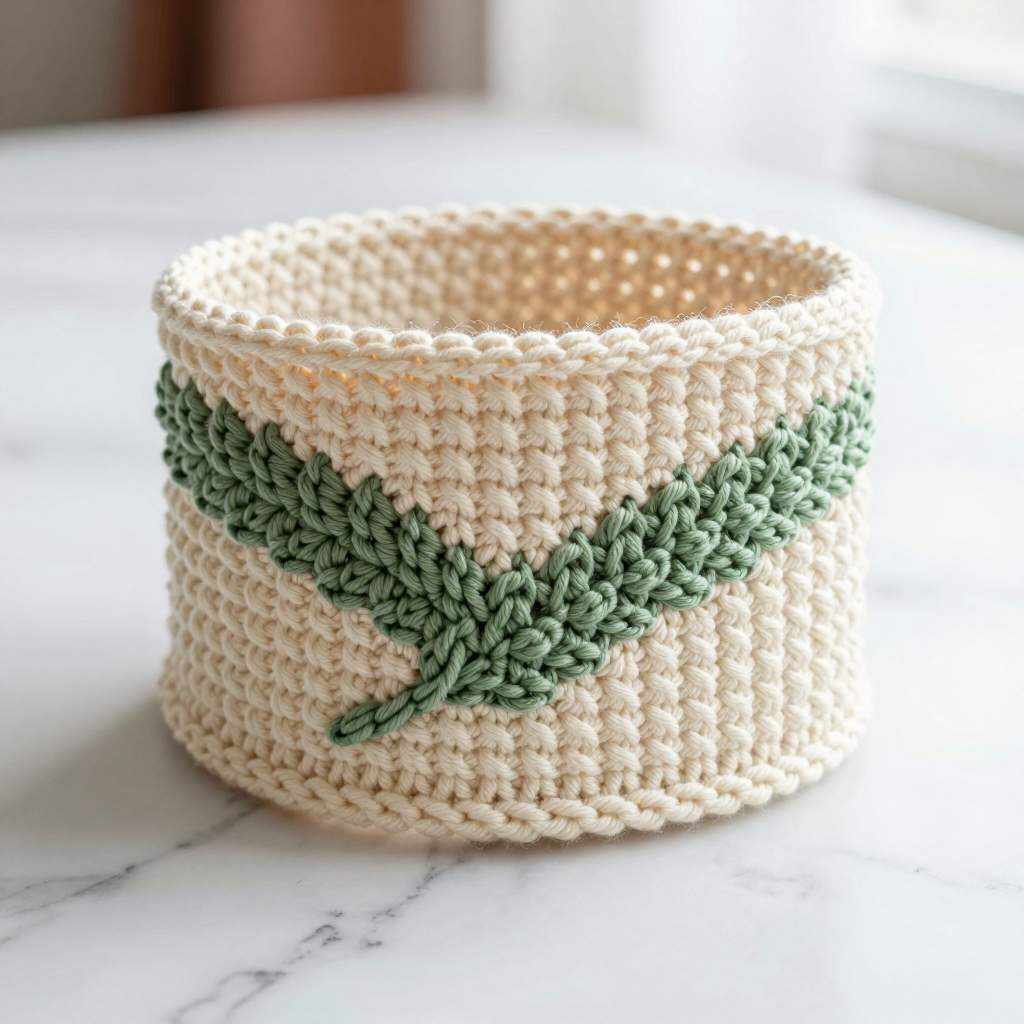
Nest Roll Jewelry Purse Free Pattern: Waffle Stitch Crochet Bowl in Super Bulky Yarn

Nest Roll Jewelry Purse: A Beginner-Friendly Waffle Stitch Crochet Bowl
Introduction
If you have ever wanted to make something beautiful with your own hands but felt intimidated by complicated patterns, this Nest Roll Jewelry Purse is the perfect first project for you. It is a small, round crochet bowl worked in soft, natural undyed super bulky yarn, with a puffy waffle-stitch texture that looks far more impressive than the simple stitches that create it. The finished piece is about 4 inches across and 2 inches tall, with a raised grid of columns across the surface and a little braided loop handle arching over the top, like a tiny nest for your rings and earrings. It works up in under an hour, uses only a handful of basic stitches, and feels cozy, rustic, and a little bit magical. Whether you are brand new to crochet or just want a quick, satisfying make, this little bowl will welcome you warmly.
Materials Needed
- Yarn: Super bulky / jumbo weight yarn (category 6), natural undyed cream or oatmeal color. You will need approximately 60–70 yards (55–65 meters) total. One standard skein is plenty.
- Crochet hook: 8.0 mm (US size L-11), or whatever size you need to match the gauge below.
- Stitch marker: 1 removable stitch marker (or a scrap of contrasting yarn) to mark the first stitch of each round.
- Tapestry needle: A large-eye yarn needle (also called a darning needle) for weaving in ends and stitching on the handle.
- Scissors: Any sharp pair for cutting yarn.
- Optional: A spray bottle of water for light blocking at the end.
Finished size: Base diameter approx. 4 in (10 cm). Bowl height approx. 2 in (5 cm). Braided handle loop approx. 3 in (7.5 cm) long.
Abbreviations and Beginner Glossary
Every abbreviation used in this pattern is listed here in plain English. Read through this list once before you begin — you do not need to memorize it.
- ch – chain. Yarn over the hook and pull that loop through the loop already on your hook. This creates a small link in a chain.
- sl st – slip stitch. Insert your hook into the stitch, yarn over, and pull the loop straight through both the stitch and the loop on your hook. It joins rounds together without adding height.
- sc – single crochet. Insert hook into stitch, yarn over, pull up a loop (2 loops on hook), yarn over, pull through both loops. One loop remains.
- dc – double crochet. Yarn over, insert hook into stitch, yarn over, pull up a loop (3 loops on hook), yarn over and pull through 2 loops, yarn over and pull through the last 2 loops.
- FPdc – front post double crochet. Yarn over, insert your hook from front to back around the vertical "post" (the body) of the indicated stitch from the round below — not into the top loops — yarn over, pull up a loop, yarn over and pull through 2 loops, yarn over and pull through the last 2 loops. This is what makes the raised waffle columns.
- st / sts – stitch / stitches.
- sp – space (the gap between stitches).
- rep – repeat. Do the instruction again the number of times stated.
- rnd – round. One complete circle of stitches worked around.
- magic ring – an adjustable loop of yarn that you crochet into, then pull tight to close the center hole. If you have never made one, you can substitute: ch 4, join with a sl st to form a ring, and work your first round into that ring.
- back loops only – Each stitch top has two loops (a front loop nearer you and a back loop farther away). Working into the back loop only means you insert your hook under just the far loop, leaving the near loop free. This makes a crisp fold line.
- yarn over – Wrap the working yarn over your hook from back to front.
- fasten off – Cut the yarn, pull the tail all the way through the last loop, and tighten.
- weave in ends – Thread a yarn tail onto a tapestry needle and run it back and forth through the fabric so it disappears.
Gauge
Gauge: 6 stitches x 3 rounds = 2 inches (5 cm) in the waffle stitch pattern (the front post double crochet / double crochet sequence), measured flat on the base.
Why gauge matters: Gauge is simply how big your stitches turn out. If your stitches are larger than the pattern expects, your bowl will be wider and floppier; if smaller, it will be tight and stiff. Because this bowl is small, even a little difference changes the finished size.
How to make a gauge swatch: Chain 14, then work 3 rounds of double crochet (2 dc in the first stitch, then 1 dc in each stitch across). Lay the swatch flat and measure across 6 stitches with a ruler. If 6 stitches measure about 2 inches, you are on track. If they measure more, switch to a smaller hook; if less, switch to a larger hook. It is fine to skip the swatch for a first small project like this — just know that your bowl may come out slightly bigger or smaller.
Beginner Tips Before You Start
- Use a stitch marker. Place it in the very first stitch of each round. Because this bowl is worked in a continuous spiral of joined rounds, it is easy to lose your place — the marker shows you exactly where each round begins and ends.
- Do not pull your yarn too tight. Super bulky yarn needs a relaxed hand. If you tug every stitch snug, the bowl will be stiff and hard to work. Let the hook do the work and keep your loops loose and even.
- Count your stitches at the end of every round. Each round in this pattern tells you the stitch count in parentheses. If your count is off by one or two, fix it before moving on — small errors grow quickly in the round.
- Watch the FPdc placement. The front post double crochet goes around the post of the stitch below, not into its top loops. If your waffle columns look flat, you are probably working into the top loops by mistake.
- Keep the base flat. Rounds 1–4 should lie perfectly flat on the table. If the circle starts to cup upward, your stitches are too tight; if it ripples, they are too loose.
- Relax and enjoy it. This is a tiny project. If a round looks messy, you can unravel it in seconds and try again — no harm done.
Step-by-Step Instructions
All instructions use US crochet terms. The bowl is worked in joined rounds: you finish each round with a slip stitch into the first stitch, then begin the next round with the stated chain.
Base (Flat Circle)
Rnd 1: Make a magic ring. Ch 2 (this does not count as a stitch). Work 8 dc into the ring. Join with a sl st to the first dc. (8 dc)
Rnd 2: Ch 2. Work 2 dc in each stitch around. Join with a sl st to the first dc. (16 dc)
Rnd 3: Ch 2. *2 dc in the next stitch, dc in the next stitch; repeat from * around. Join with a sl st to the first dc. (24 dc)
Rnd 4: Ch 2. *2 dc in the next stitch, dc in each of the next 2 stitches; repeat from * around. Join with a sl st to the first dc. (32 dc)
Your base should now measure approximately 4 inches (10 cm) across and lie flat. Do not fasten off.
Sides (Straight Bowl)
Rnd 5: Ch 2. Working into the back loops only of Rnd 4: dc in each stitch around. Join with a sl st to the first dc. (32 dc) This round creates the crisp fold where the base turns up into the sides.
Rnd 6: Ch 2, dc in the first stitch, FPdc around the post of the next stitch (the first dc of Rnd 5), *dc in each of the next 2 stitches, FPdc around the post of the next stitch; repeat from * around, ending with dc in the last stitch. Join with a sl st to the first dc. (32 sts: 21 dc, 11 FPdc)
Rnd 7: Ch 2, dc in the first stitch, FPdc around the post of the FPdc below, *dc in each of the next 2 stitches, FPdc around the post of the next FPdc below; repeat from * around, ending with dc in the last stitch. Join with a sl st to the first dc. (32 sts)
Rnds 8–10: Repeat Rnd 7 three more times. (32 sts)
Your bowl now measures approximately 2 inches (5 cm) tall from the base fold. Do not fasten off.
Edging
Rnd 11: Ch 1, sc in each stitch around (working into the top loops of the last round). Join with a sl st to the first sc. (32 sc) Fasten off, leaving a 4-inch (10 cm) tail, and weave in the ends.
Braided Yarn Loop Handle
Cut 3 strands of yarn, each approximately 12 inches (30 cm) long. Tie the three strands together at one end with a small overhand knot (a simple loop-and-pull knot). Braid the strands together snugly for approximately 3 inches (7.5 cm). Tie a second overhand knot at the other end to secure the braid. Trim the loose ends close to the knots. Using your yarn tail and tapestry needle, stitch one knotted end of the braid firmly to the inside of the bowl rim at one side, then stitch the other knotted end to the rim directly opposite, so the braid forms a loop handle arching over the bowl. Weave in all ends securely.
Assembly and Finishing
Seaming the handle: Thread the yarn tail onto your tapestry needle. Push the needle through the knotted end of the braid and then down through the rim of the bowl, coming back up about a quarter inch away. Repeat this three or four times in different directions so the braid is anchored firmly and will not wobble. Do the same at the opposite side of the rim. Pull each stitch snug but not so tight that it puckers the rim.
Weaving in ends: Thread each loose tail onto the tapestry needle and run it back and forth through the inside of the stitches for about an inch, changing direction once so it cannot work loose. Trim the yarn close to the fabric.
Shaping and blocking: Gently shape the bowl with your fingers, pressing the base flat on the table and easing the sides upright. If the sides want to flop, lightly mist the bowl with water and let it dry in shape overnight. The waffle texture should read as a raised grid of columns on the outside of the bowl.
Pro Tips and Variations
- Change colors: Work the base in one color and the sides in another for a two-tone nest. Simply fasten off after Rnd 4 and join the new color at the start of Rnd 5.
- Make it bigger or smaller: To enlarge the base, add another increase round (for example, *2 dc in the next stitch, dc in each of the next 3 stitches; repeat around = 40 sts) before beginning the sides, then keep the sides in multiples of 3 stitches. To make a tiny ring dish, stop the base after Rnd 3 (24 sts) and work only 3 side rounds.
- Substitute yarn: Any super bulky (category 6) yarn works beautifully. A fuzzy wool or alpaca blend gives a softer, more nest-like look, while a smooth cotton blend gives crisper waffle columns. Always check your gauge if you change yarn.
- Skip the handle: Leave off the braided loop for a simple trinket dish, or add a small crocheted chain loop instead if you prefer a lighter look.