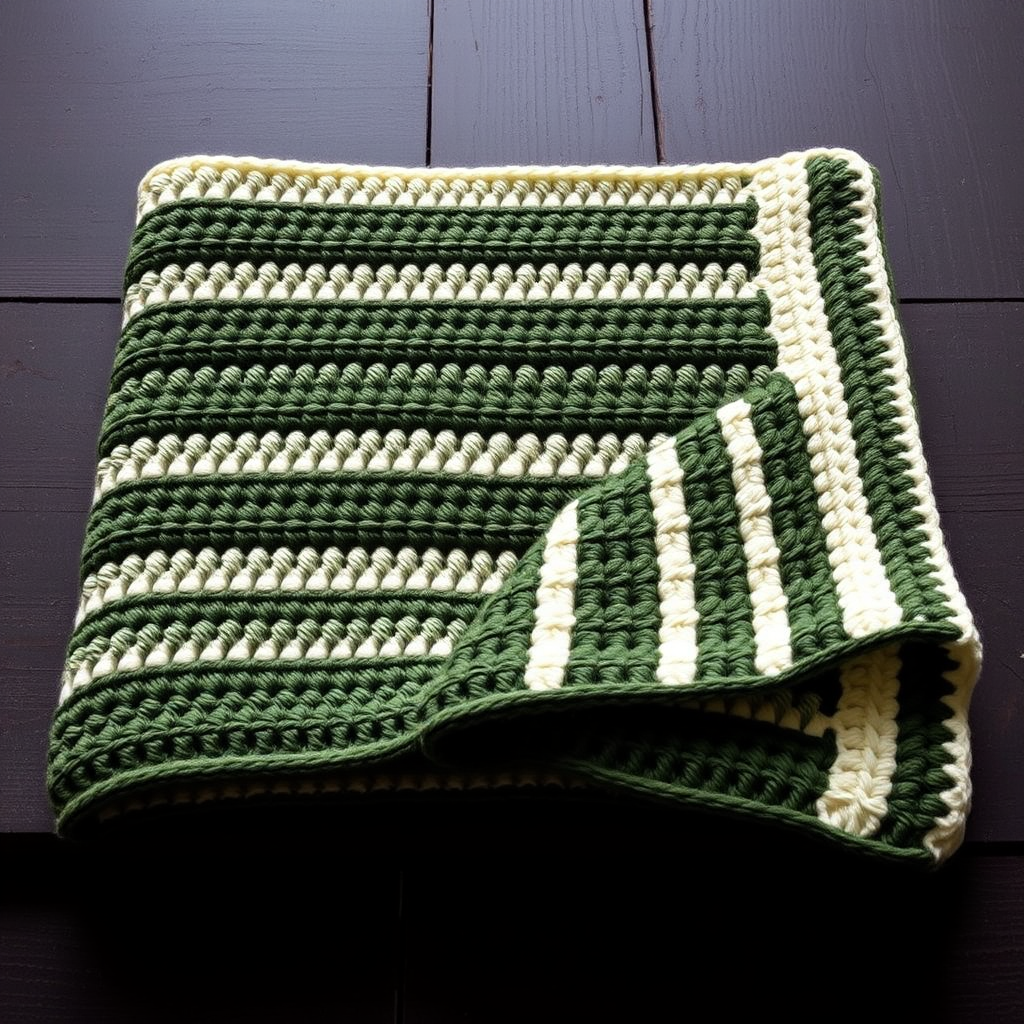
Frosted Pines Chunky Crochet Throw Free Pattern

Introducing the Frosted Pines Chunky Crochet Throw
Wrap yourself in the serene beauty of a snow-dusted forest with this luxuriously textured throw. The Frosted Pines Chunky Crochet Throw features an enchanting pattern of raised bobbles and smooth, flowing bands that mimic the look of pine cones nestled among fresh snowfall. This isn't just a blanket; it's a dimensional landscape that brings rustic, cozy charm to any living space. Whether you're curling up with a hot drink or draping it over your favorite reading chair, this throw is as stunning to display as it is snuggle-worthy. Best of all, this free pattern is designed to be accessible for confident beginners ready to tackle their first textured project.
The magic of this design lies in its clever use of color and stitch. We use three beautiful shades—snowy white, deep evergreen, and warm oatmeal—to create a subtle striped effect that feels both modern and timeless. The bobble stitches, which resemble little pine cones, pop out from the smooth half-double crochet background, giving the blanket a rich, handcrafted feel. Let's dive into how you can create this masterpiece in your own home.
Materials Needed
Before you begin, gather the following supplies to ensure a smooth and enjoyable crochet session. This project works up quickly thanks to the super bulky yarn and large hook.
- Yarn: Lion Brand Wool-Ease Thick & Quick (super bulky weight, 6). You will need the following colors:
- Color A (Fisherman): 4 skeins (approx. 400g / 320 yards)
- Color B (Forest Green): 3 skeins (approx. 300g / 240 yards)
- Color C (Oatmeal): 2 skeins (approx. 200g / 160 yards)
- Hook: Size N/P (10 mm) crochet hook
- Notions: Yarn needle for weaving in ends, scissors
Gauge: 8 stitches x 6 rows = 4 inches in half double crochet. Be sure to check your gauge to ensure your blanket matches the finished size.
Step-by-Step Instructions
This pattern is worked in rows. The finished size is approximately 50" x 60", but you can easily adjust the width by adding or subtracting multiples of 12 + 2 to your starting chain. Let's get started!
Stitches & Abbreviations
- ch = chain
- hdc = half double crochet
- fpdc = front post double crochet
- bobble = 4 dc cluster worked in the same stitch (see detailed instructions below)
- sk = skip
How to make a Bobble: Yarn over, insert hook into the designated stitch, yarn over and pull up a loop, yarn over and pull through 2 loops (2 loops left on hook). Repeat this process 3 more times in the *same stitch* (you will have 5 loops on your hook). Yarn over and pull through all 5 loops at once. This creates a lovely, puffy pine-cone effect.
Pattern Notes
- Each row begins with ch 2, which counts as your first hdc, unless otherwise stated.
- When changing colors, you can carry the unused yarn up the side of the work to minimize ends, or weave them in at the end. For a cleaner finish, weaving in ends is recommended.
Getting Started: Foundation Row
With Color A (Fisherman), chain 122 loosely. Hdc in the 3rd ch from the hook and in each ch across. Turn. (You should have 120 hdc stitches).
Row 1 (Right Side): Creating the First Bobbles
With Color A, ch 2 (counts as first hdc), hdc in the next 2 sts. *Work a bobble in the next st, hdc in the next 3 sts. Repeat from * across the row, ending with hdc in the last 2 sts. Turn. (120 sts total).
Row 2: The Smooth Base
Ch 2, hdc in each st across. Turn. This row creates a flat, smooth band that will make your bobbles stand out.
Row 3: Post Stitches for Texture
Switch to Color B (Forest Green). Ch 2, hdc in the next 2 sts. *Fpdc around the next st (this is the bobble from Row 1—insert your hook from front to back to front around the post of that stitch), hdc in the next 3 sts. Repeat from * across, ending with hdc in the last 2 sts. Turn.
Why Fpdc? This stitch is worked around the post of the bobble below, which lifts the stitch and creates a beautiful, raised cable-like ridge that defines the pine cone shape.
Row 4: Another Smooth Base
Ch 2, hdc in each st across. Turn.
Row 5: Introducing Oatmeal Bobbles
Switch to Color C (Oatmeal). Ch 2, hdc in the next 2 sts. *Work a bobble in the next st, hdc in the next 3 sts. Repeat from * across, ending with hdc in the last 2 sts. Turn.
Row 6: Smooth Base
Ch 2, hdc in each st across. Turn.
Row 7: Post Stitches for Oatmeal Bobbles
Switch back to Color A (Fisherman). Ch 2, hdc in the next 2 sts. *Fpdc around the next st (the bobble from Row 5), hdc in the next 3 sts. Repeat from * across, ending with hdc in the last 2 sts. Turn.
Row 8: Smooth Base
Ch 2, hdc in each st across. Turn.
Rows 9-16: Building the Pattern
Now you will repeat Rows 1-8, but with a specific color rhythm to create the beautiful striped effect. Here is the breakdown:
- Row 9 (Bobble Row): Use Color B (Forest Green).
- Row 10 (Plain Row): Use Color A (Fisherman).
- Row 11 (Post Row): Use Color A (Fisherman) to work the Fpdc around the Row 9 bobbles.
- Row 12 (Plain Row): Use Color A (Fisherman).
- Row 13 (Bobble Row): Use Color C (Oatmeal).
- Row 14 (Plain Row): Use Color A (Fisherman).
- Row 15 (Post Row): Use Color A (Fisherman) to work the Fpdc around the Row 13 bobbles.
- Row 16 (Plain Row): Use Color A (Fisherman).
Important: The bobble rows always alternate between Forest Green (B) and Oatmeal (C). The plain rows and the post rows are always worked in Fisherman (A). This creates the illusion of pine cones scattered across a snowy field.
Continuing the Pattern
Repeat Rows 1-16 until your piece measures approximately 58 inches from the start. It is crucial to end on a plain row (Row 8 or Row 16) to ensure your border looks clean. Once you reach the desired length, finish with 2 rows of hdc in Color A (Fisherman). Fasten off and weave in all loose ends carefully.
Adding the Border (Optional but Recommended)
A simple border gives your throw a polished, professional finish. With Color A (Fisherman), attach your yarn in any corner. Single crochet evenly around all four edges, working 3 sc in each corner to help the corners lay flat. When you return to your starting point, join with a slip stitch to the first sc. Fasten off and weave in the end.
And there you have it—your very own Frosted Pines Chunky Crochet Throw! The combination of chunky yarn, textured bobbles, and a serene color palette makes this a truly special piece. It's perfect for gifting or for adding a touch of winter magic to your own home. Happy crocheting!