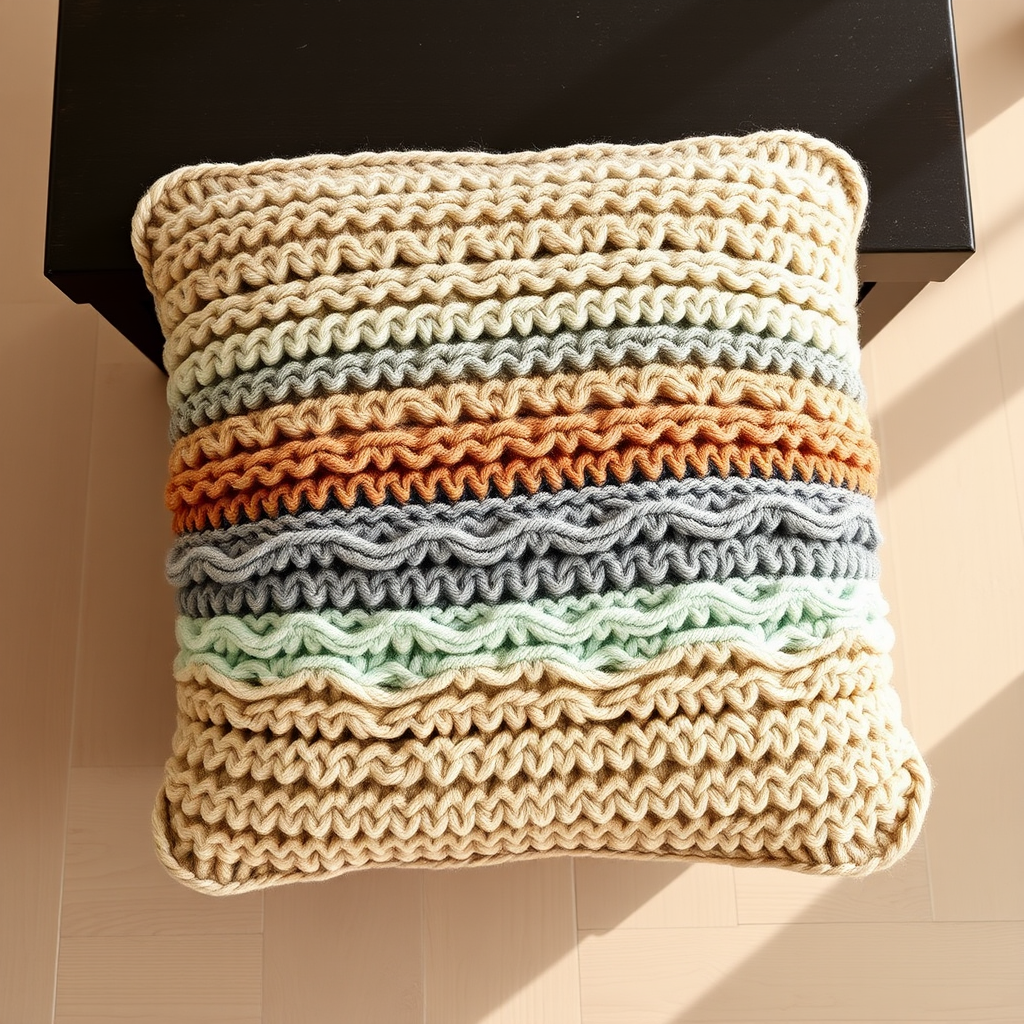
Driftwood Dune Knitted Wall Hanging Free Pattern – A Textured Coastal Tapestry

Bring the Shore Home: Introducing the Driftwood Dune Knitted Wall Hanging
Imagine the gentle rhythm of ocean waves, the warmth of sun-bleached sand, and the organic beauty of driftwood—all woven into a single, stunning piece of home decor. The Driftwood Dune Knitted Wall Hanging is a chunky, textured tapestry that captures the serene essence of the coast. With its undulating wave-like ridges and earthy palette of Sand, Driftwood, and Seafoam, this piece adds a cozy, boho-chic touch to any modern or rustic space. Best of all, it's a beginner-friendly project that works up quickly with super bulky yarn, making it the perfect weekend craft. Let's dive in and create this tactile masterpiece together.
Materials Needed
Before you begin, gather these simple supplies. The beauty of this project lies in its chunky yarn and minimal tools—perfect for a relaxing, satisfying knit.
- Yarn: Super bulky weight yarn (approx. 250-300 yards total) in three shades:
- Yarn A (Sand): A soft beige (approx. 100-120 yards)
- Yarn B (Driftwood): A muted taupe-brown (approx. 80-100 yards)
- Yarn C (Seafoam): A pale sage green with a hint of blue (approx. 80-100 yards)
- Knitting Needles: US 13 (9 mm) knitting needles
- Tapestry Needle: For weaving in ends and sewing the casing
- Wooden Dowel or Driftwood Branch: Approximately 24 inches long (a natural branch adds extra charm!)
- Hanging Cord: Yarn or twine for mounting
Gauge
8 stitches and 10 rows = 4 inches in stockinette stitch (unblocked). Gauge isn't critical for this project, but it helps ensure your finished piece is roughly 20 inches wide. If your gauge is off, simply adjust your needle size or cast on more/fewer stitches to achieve your desired width.
Step-by-Step Instructions
This wall hanging is knitted flat in one piece from the bottom up. We'll use a combination of garter stitch, stockinette, and simple yarn overs to create the wavy, dune-like texture. Don't worry—the pattern is repetitive and meditative once you get going!
Abbreviations
- K = Knit
- P = Purl
- Sl = Slip stitch purlwise with yarn in back
- K2tog = Knit two stitches together
- Yo = Yarn over
- Rep = Repeat
Getting Started: Cast On & Base
Cast on: With Yarn A (Sand), cast on 40 stitches loosely. This will give you a finished width of about 20 inches.
Rows 1-6 (Garter Stitch Base): Knit every row. This creates a sturdy, slightly curled bottom edge that mimics the natural roll of a sandy shoreline.
Wave Section 1: Sand (Rows 7-12)
Now we begin the rhythmic wave pattern that defines this piece.
- Row 7 (RS): With Yarn A, knit all stitches.
- Row 8 (WS): Purl all stitches.
- Row 9 (RS): K1, *yo, K2tog, rep from * to last stitch, K1. (This creates small decorative eyelet holes that add texture and visual interest.)
- Row 10 (WS): Purl all stitches.
- Row 11 (RS): Knit all stitches.
- Row 12 (WS): Purl all stitches.
Wave Section 2: Driftwood (Rows 13-18)
Switch to Yarn B (Driftwood) and repeat the same pattern sequence.
- Row 13 (RS): Knit all stitches.
- Row 14 (WS): Purl all stitches.
- Row 15 (RS): K1, *yo, K2tog, rep from * to last stitch, K1.
- Row 16 (WS): Purl all stitches.
- Row 17 (RS): Knit all stitches.
- Row 18 (WS): Purl all stitches.
Wave Section 3: Seafoam (Rows 19-24)
Switch to Yarn C (Seafoam) and continue the pattern.
- Row 19 (RS): Knit all stitches.
- Row 20 (WS): Purl all stitches.
- Row 21 (RS): K1, *yo, K2tog, rep from * to last stitch, K1.
- Row 22 (WS): Purl all stitches.
- Row 23 (RS): Knit all stitches.
- Row 24 (WS): Purl all stitches.
Wave Section 4: Sand (Rows 25-30)
Switch back to Yarn A (Sand) and repeat the sequence once more.
- Row 25 (RS): Knit all stitches.
- Row 26 (WS): Purl all stitches.
- Row 27 (RS): K1, *yo, K2tog, rep from * to last stitch, K1.
- Row 28 (WS): Purl all stitches.
- Row 29 (RS): Knit all stitches.
- Row 30 (WS): Purl all stitches.
Wave Section 5: Driftwood (Rows 31-36)
Switch to Yarn B (Driftwood) again.
- Row 31 (RS): Knit all stitches.
- Row 32 (WS): Purl all stitches.
- Row 33 (RS): K1, *yo, K2tog, rep from * to last stitch, K1.
- Row 34 (WS): Purl all stitches.
- Row 35 (RS): Knit all stitches.
- Row 36 (WS): Purl all stitches.
Wave Section 6: Seafoam (Rows 37-42)
Switch to Yarn C (Seafoam) for the final wave section.
- Row 37 (RS): Knit all stitches.
- Row 38 (WS): Purl all stitches.
- Row 39 (RS): K1, *yo, K2tog, rep from * to last stitch, K1.
- Row 40 (WS): Purl all stitches.
- Row 41 (RS): Knit all stitches.
- Row 42 (WS): Purl all stitches.
Wave Section 7: Sand (Rows 43-48)
Switch back to Yarn A (Sand) one last time.
- Row 43 (RS): Knit all stitches.
- Row 44 (WS): Purl all stitches.
- Row 45 (RS): K1, *yo, K2tog, rep from * to last stitch, K1.
- Row 46 (WS): Purl all stitches.
- Row 47 (RS): Knit all stitches.
- Row 48 (WS): Purl all stitches.
Top Border & Bind Off (Rows 49-54)
We'll finish the knitting with a neat garter stitch border that will form the casing for your dowel.
- Rows 49-54: With Yarn A (Sand), knit every row for 6 rows.
Bind off: Bind off all stitches loosely in knit. Tip: Use a larger needle or bind off loosely to prevent the top edge from pulling in.
Finishing Touches: From Knit to Wall Art
Your knitted panel is complete! Now let's transform it into a beautiful wall hanging.
Step 1: Weave in Ends
Using your tapestry needle, carefully weave in all loose yarn ends along the edges or into the back of the work. Make sure they're secure but not visible from the front.
Step 2: Block the Piece
Blocking is essential for this project—it evens out your stitches and really enhances the wave texture. Gently pin the knitted panel to a flat surface (like a foam mat or ironing board), shaping it to a neat rectangle. Mist it lightly with water (or use a steam iron held above the fabric—don't press down!). Allow it to dry completely before removing the pins.
Step 3: Attach the Dowel
Fold the top garter stitch border over your wooden dowel or driftwood branch. The dowel should extend slightly beyond the sides of the knitting. Using your tapestry needle and a length of Yarn A, sew the folded edge down securely with a whip stitch. This creates a neat casing that holds the dowel in place. Make sure your stitches are snug but not so tight that they pucker the fabric.
Step 4: Add the Hanging Cord
Cut a piece of yarn or twine about 24 inches long. Tie one end securely to one end of the dowel, then tie the other end to the opposite end, creating a loop for hanging. Adjust the length so the hanging sits at your desired height.
Step 5: Final Fluff
Trim any stray yarn ends and gently fluff the piece with your fingers. The bottom edge will naturally curl slightly, adding to the relaxed, organic boho aesthetic.
And there you have it—your very own Driftwood Dune Knitted Wall Hanging! This textured coastal tapestry is sure to become a cherished piece in your home, bringing a touch of the serene shoreline to your walls. Whether you hang it in your living room, bedroom, or entryway, it's a beautiful reminder of the calming power of nature. Happy knitting!