Driftwood Dune Cushion Free Pattern – Knit a Coastal Sand Pillow
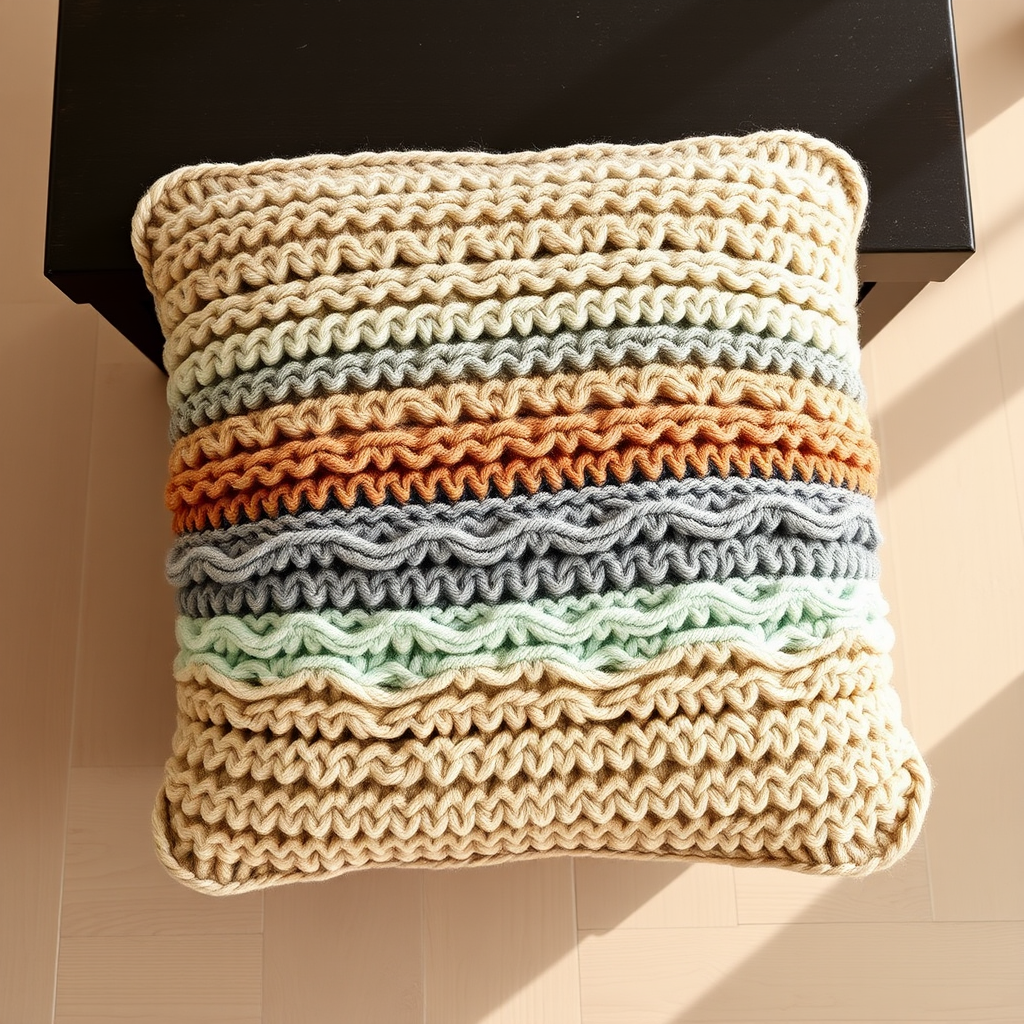
Driftwood Dune Cushion Free Pattern – Knit a Coastal Sand Pillow
Bring the serene, sun-washed shores of a quiet beach into your living room with this plush, textured cushion. Knitted in warm sand and driftwood tones, it adds a touch of coastal calm to any cozy corner. The Driftwood Dune Cushion features a beautiful wave-like eyelet pattern that mimics the ripples of sand dunes, creating a tactile, inviting piece of home decor. This free knitting pattern is perfect for intermediate beginners looking to expand their skills with lace stitches while creating a stunning statement piece for their home.
Using super bulky yarn and large needles, this project works up quickly and delivers a dramatic, chunky texture that feels as good as it looks. The alternating bands of Sand, Driftwood, and Seafoam create a subtle, natural gradient that evokes the coastline. Whether you're an experienced knitter or a confident beginner ready for a new challenge, this cushion pattern will guide you through every step to create a beautiful, functional piece of art for your living space.
Materials Needed
Before you begin, gather the following materials to ensure a smooth and enjoyable knitting experience. All items are readily available at your local yarn shop or online.
Yarn
- Super bulky weight yarn (approx. 250g in Sand, 150g in Driftwood, 100g in Seafoam)
- Suggested yarns: Lion Brand Wool-Ease Thick & Quick, Bernat Mega Bulky, or any super bulky yarn that meets gauge.
Needles & Notions
- US 13 (9mm) circular knitting needles, 24-inch cable (or straight needles if preferred)
- Tapestry needle for weaving in ends and seaming
- Stitch markers (optional, but helpful for tracking pattern repeats)
- 16-inch square cushion form (for the finished cover)
Gauge
10 stitches and 14 rows = 4 inches in stockinette stitch (knit on RS, purl on WS). Always knit a gauge swatch before starting to ensure your finished cushion is the correct size. Adjust needle size if necessary to achieve gauge.
Step-by-Step Instructions
This cushion is knitted in two identical panels and seamed together, creating a soft, textured square that mimics the ripples of sand dunes. Follow the instructions carefully, and you'll have a beautiful coastal cushion in no time.
Panel 1 (Make 2)
Cast On & Garter Stitch Border
Cast on: With Sand yarn, cast on 40 stitches using your preferred method (long-tail cast on works well).
Row 1 (RS): Knit all stitches.
Row 2 (WS): Purl all stitches.
Rows 3-6: Repeat Rows 1-2 twice more. This creates a garter stitch border (knit every row on both sides creates ridges).
Begin Dune Pattern
The Dune Pattern is a simple 8-row repeat that combines yarn overs and decreases to create an eyelet wave effect. The pattern is worked over a multiple of 10 stitches, with 5 border stitches on each side maintained in stockinette.
Row 7 (RS): Knit 5 (border), *k2tog, yo, k1, yo, ssk, k3; repeat from * to last 5 stitches, knit 5.
Explanation: k2tog = knit two together (decrease), yo = yarn over (increase), ssk = slip slip knit (left-leaning decrease). This row creates the first wave of eyelets.
Row 8 (WS): Purl all stitches.
Row 9 (RS): Knit 5, *k1, yo, ssk, k2tog, yo, k3; repeat from * to last 5 stitches, knit 5.
Explanation: This row shifts the eyelet pattern, creating the second half of the wave ripple.
Row 10 (WS): Purl all stitches.
Rows 11-18: Repeat Rows 7-10 twice more. This completes the first Sand-colored Dune Pattern section (Rows 7-18 total).
Color Changes & Pattern Repetition
Now you'll switch colors to create the beautiful horizontal bands. When changing colors, simply cut the old yarn leaving a 6-inch tail, and start knitting with the new color. Weave in ends later.
Switch to Driftwood yarn:
Rows 19-26: Repeat Rows 7-10 twice, but with Driftwood yarn.
Switch to Seafoam yarn:
Rows 27-34: Repeat Rows 7-10 twice, but with Seafoam yarn.
Switch back to Driftwood yarn:
Rows 35-42: Repeat Rows 7-10 twice, but with Driftwood yarn.
Switch back to Sand yarn:
Rows 43-50: Repeat Rows 7-10 twice, but with Sand yarn.
Final Garter Stitch Border & Bind Off
Rows 51-56: Knit all stitches. This creates the garter stitch border on the top edge, matching the bottom.
Bind off: Bind off loosely in knit. To bind off loosely, knit the first two stitches, then pass the first stitch over the second. Knit one more stitch, pass the previous over, and continue. Be careful not to pull the yarn too tight, as this will pucker the edge.
Repeat the entire process to make a second identical panel.
Finishing & Assembly
Once both panels are complete, it's time to assemble your cushion. Take your time with the seaming to ensure a professional finish.
Step 1: Weave in all loose ends
Using a tapestry needle, weave in all yarn tails on the wrong side of the fabric. Thread the needle through the purl bumps on the back of the work, following the path of the yarn for about 2 inches, then trim the excess. This prevents the ends from showing on the right side.
Step 2: Seam the panels together
Place the two panels with right sides together (the sides that will show on the outside should be facing each other). Using Sand yarn and a tapestry needle, sew around three sides using the mattress stitch. The mattress stitch creates an invisible seam that's perfect for this project.
How to do the mattress stitch: Thread your needle with a long piece of Sand yarn (about 3 times the length of the seam). Starting at the bottom corner, insert the needle from the wrong side to the right side on one panel, then do the same on the other panel. Continue zigzagging between the two panels, picking up the horizontal bars between the edge stitches. Pull the yarn gently every few stitches to close the seam. Work up one side, across the bottom, and up the other side, leaving the top edge open.
Step 3: Insert the cushion form
Turn the cover right side out. Gently insert the 16-inch square cushion form through the open top edge. Make sure the corners are pushed out fully for a crisp, square shape.
Step 4: Sew the fourth side closed
Using the same mattress stitch technique, sew the top edge closed. Start at one corner and work your way across, being careful to keep the stitches even and the seam invisible.
Step 5: Weave in final ends and block
Weave in the final ends from the seaming. To finish, gently block the cushion to even out the texture. Since this is a super bulky yarn, you can simply mist it lightly with water and pat it into shape, then let it dry completely. This will help the eyelet pattern open up and lay flat, showcasing the beautiful dune ripple effect.
Care Instructions
To keep your Driftwood Dune Cushion looking its best, spot clean with a damp cloth and mild detergent. Avoid machine washing, as the super bulky yarn may felt or lose its shape. If you need to refresh the cushion, you can gently hand wash in cool water and lay flat to dry, reshaping as needed.
Enjoy your beautiful new coastal cushion! The textured waves and soothing color palette will bring a touch of the beach into your home all year round. This pattern is also perfect for gifting – make one for a friend who loves the coast, or create a set of two for a symmetrical look on your sofa or bed.


