Whispering Willow Bookmark Free Pattern – A Crocheted Leafy Lace Keepsake
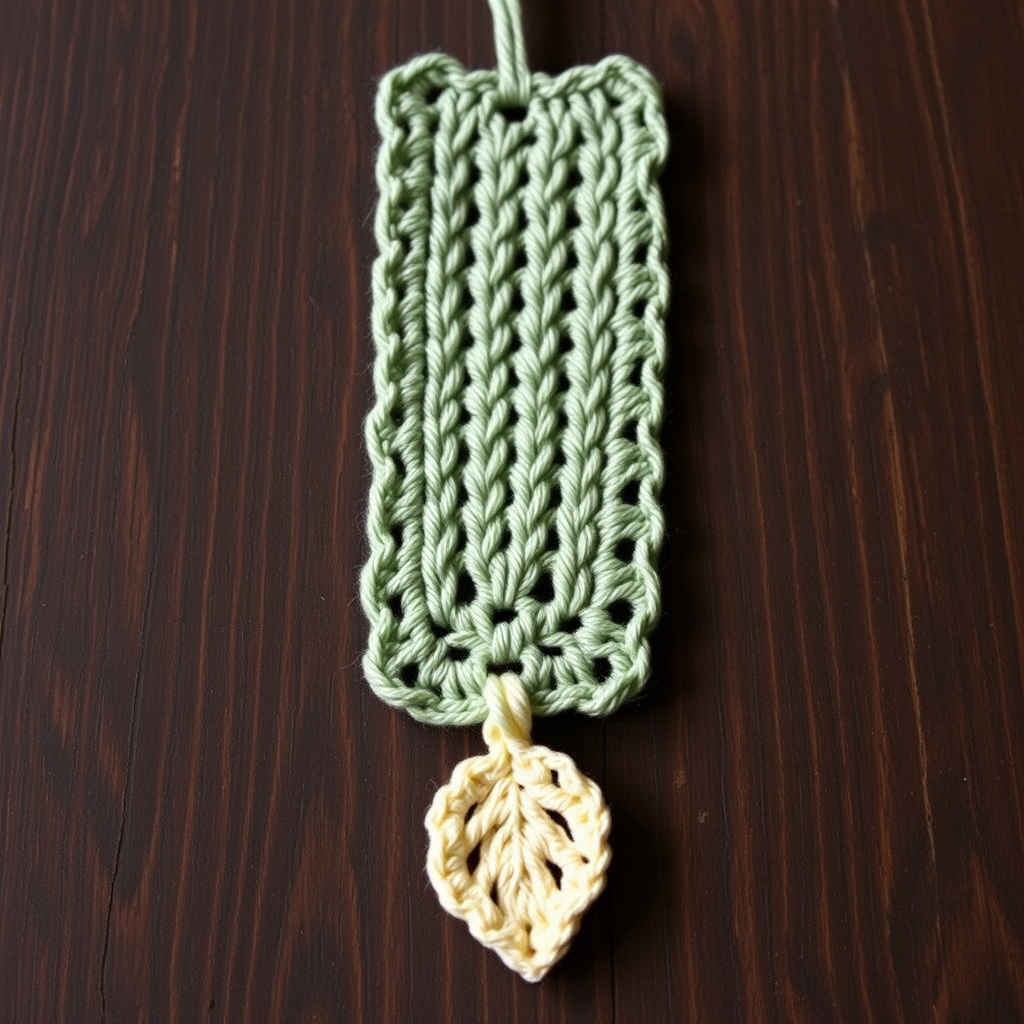
The Whispering Willow Bookmark: A Crocheted Leafy Lace Keepsake
There is something deeply soothing about combining the love of reading with the art of handmade creation. The Whispering Willow Bookmark is designed to capture the serene, gentle sway of a willow tree, translated into a delicate, airy lace pattern that feels as light as a whisper between the pages of your favorite novel. This project is wonderfully beginner-friendly, works up quickly, and is the perfect way to use up small amounts of scrap yarn from your stash. Whether you are treating yourself or crafting a thoughtful, nature-inspired gift for a book lover, this bookmark adds a touch of rustic, woodland elegance to any reading ritual.
In this comprehensive guide, we will walk you through every step, from the foundational chain to the final, charming leaf accent. You will learn how to create a light, breathable fabric using simple shell stitches and chain spaces, and finish it with a neat, professional border. Let’s pick up our hooks and bring this little piece of nature to life.
Materials Needed
Before we begin, let's gather our supplies. This project is incredibly portable and requires very little material, making it an excellent on-the-go craft.
- Yarn: Worsted weight cotton yarn in sage green (approximately 20 grams). This forms the main body of the bookmark. Cotton is ideal as it is durable, has excellent stitch definition, and lies flat.
- Contrast Yarn: A small amount of cream or off-white worsted weight cotton yarn for the decorative leaf charm.
- Crochet Hook: A 3.5mm (E) crochet hook. This size is perfect for worsted weight yarn to create a fabric that is structured but not too stiff.
- Other Tools: A yarn needle for weaving in ends and sewing the leaf charm, and a pair of scissors.
Note on Gauge: Gauge is not critical for this project, but for reference, 5 double crochet (dc) stitches equal 2.5 cm (1 inch), and 3 rows of dc equal 2.5 cm (1 inch). This is just to give you an idea of the scale.
Step-by-Step Instructions
This bookmark is constructed in two main parts: the primary lace body and a separate decorative leaf charm that is attached at the end. We will work the body first, then create the leaf, and finally assemble everything together.
Part 1: The Main Bookmark Body
We will begin by creating the foundation chain and working the simple, repetitive lace pattern that forms the body of the bookmark.
Foundation Row: Chain (ch) 21.
Row 1: Double crochet (dc) in the 4th chain from the hook. (Note: The first 3 chains count as your first double crochet.) Dc in the next 2 chains. Now, *chain 2, skip 2 chains, dc in the next 3 chains; repeat from * across the row. You should now have three groups of 3 dc stitches, with ch-2 spaces between them. Turn your work.
Row 2: Chain 3 (this counts as your first dc). Dc in the next 2 dc stitches. *Chain 2, skip the ch-2 space from the previous row, dc in the next 3 dc stitches; repeat from * across the row. Turn.
Row 3: Chain 3 (counts as first dc). Dc in the next 2 dc stitches. *Chain 2, skip the ch-2 space, dc in the next 3 dc stitches; repeat from * across the row. Turn.
Repeat Row 3 until the bookmark measures approximately 25 cm (10 inches) from the foundation edge, or until you have completed about 30 rows. The beauty of this pattern is its rhythm; you will quickly fall into a relaxing, repetitive flow. Always end with a row of double crochet to ensure a clean edge for the border.
Part 2: The Edging and Hanging Loop
Once the main body is the desired length, we will add a neat, polished border around the entire piece. This also creates a small loop at the top for hanging.
Do not turn your work at the end of the last row. We will now work a border of single crochet (sc) evenly around the entire perimeter of the bookmark.
- Top Edge: Work 3 single crochet (sc) into the space created by the foundation chain at the top corner. This cluster of 3 sc will form the base of your hanging loop.
- Side Edge: Work single crochet evenly down the side of the bookmark. A good rule of thumb is to work 1 sc into the end of each row. Continue around the bottom corner, working 3 sc into the corner space.
- Bottom Edge: Work 1 sc into each dc and 1 sc into each ch-2 space across the bottom.
- Other Side: Work 1 sc into the end of each row up the other side.
- Top Corner and Loop: When you reach the starting corner, work 3 sc into the corner. To create the hanging loop, chain 10, then slip stitch (sl st) into the first of those 3 corner sc to form a ring.
- Continue working sc across the top edge until you return to your starting point. Join with a slip stitch to the first sc of the round. Fasten off and weave in all loose ends securely.
Part 3: The Decorative Leaf Charm
Now for the charming centerpiece—a small, three-dimensional leaf in contrasting cream yarn. This is worked in the round, starting with a magic ring.
Round 1: With the cream yarn, make a magic ring. Chain 3 (counts as a dc), then work 11 double crochet (dc) into the ring. Pull the ring tight to close. Join with a slip stitch to the top of the beginning ch-3. You will have 12 dc stitches.
Round 2: Chain 1. Single crochet (sc) in the same stitch. *Chain 3, skip 1 dc, sc in the next dc; repeat from * around. You will end with a ch-3 space. Join with a slip stitch to the first sc. You should now have 6 ch-3 loops.
Round 3: Slip stitch into the first ch-3 loop. Chain 1. In each ch-3 loop around, work the following sequence: (sc, half double crochet (hdc), 3 dc, hdc, sc). This creates the scalloped, leaf-like petals. Join with a slip stitch to the first sc of the round. Fasten off, leaving a long tail (approximately 20 cm or 8 inches) for sewing.
Part 4: Finishing and Assembly
With all the pieces complete, we just need to bring them together.
- Attach the Leaf: Thread the long tail from the leaf charm onto your yarn needle. Position the leaf at the bottom center of the bookmark. Sew it on securely using small, hidden stitches, passing the needle through the back of the leaf and into the bookmark body. Make sure it is attached firmly.
- Weave in Ends: Weave in all remaining yarn tails from the main body and the leaf using your yarn needle. Ensure they are hidden within the stitches so they are not visible from the front.
- Blocking (Optional but Recommended): To open up the lace pattern and give your bookmark a professional, crisp finish, lightly block it. You can do this by pinning it to a flat surface and lightly misting it with water, then allowing it to dry completely. This will help the stitches relax and lay flat.
Your Whispering Willow Bookmark is now complete! This elegant, nature-inspired accessory is not only a beautiful marker for your current read but also a testament to the calming power of handmade craft. Its lightweight, airy texture makes it perfect for slipping into any book without causing damage. Enjoy your creation, and happy reading!


