Whimsical Woodland Hedgehog Crochet Pattern – Free Pattern
Whimsical Woodland Hedgehog Crochet Pattern – Free & Beginner-Friendly
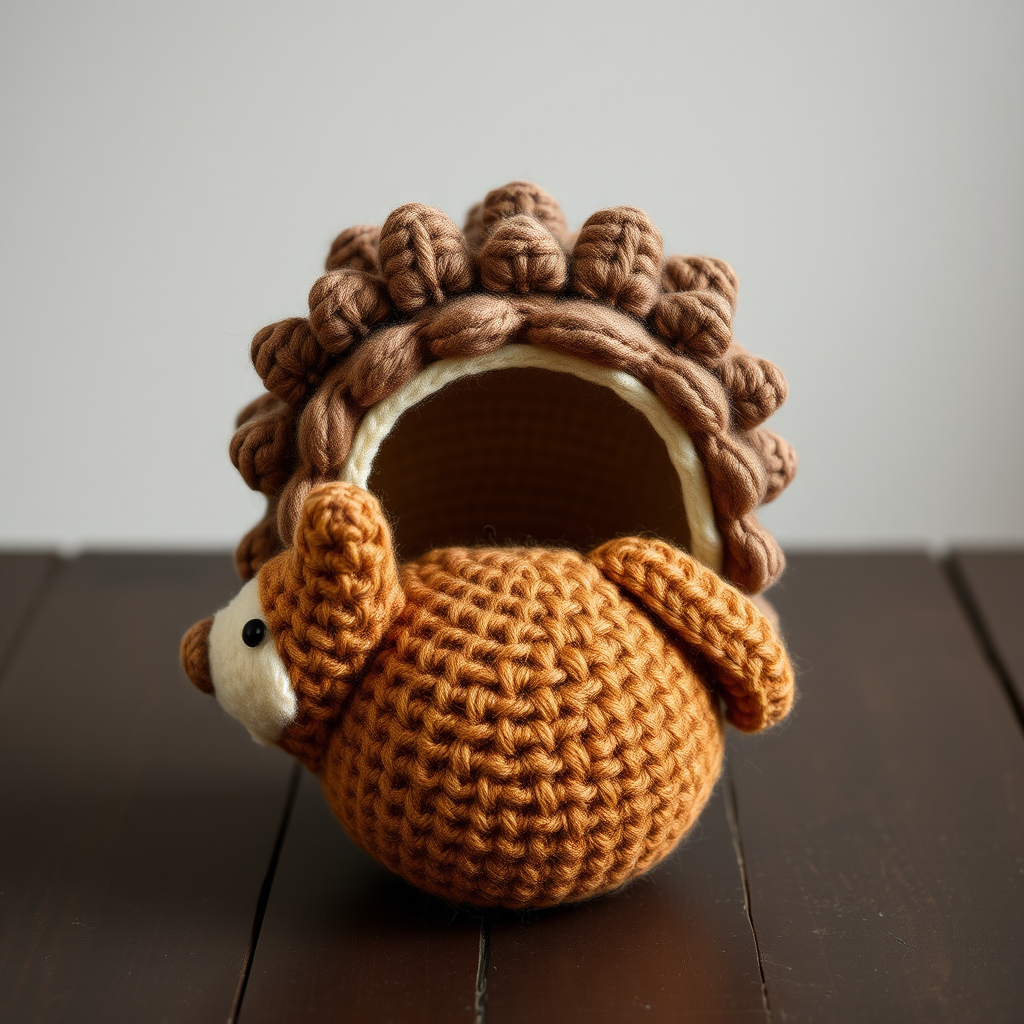
Bring a touch of the forest indoors with this adorable, textured hedgehog amigurumi! Made with chunky yarn and simple stitches, this quick project is perfect for beginners and experienced crocheters alike. The cozy, rustic charm of this little hedgehog makes it a wonderful handmade gift, nursery decoration, or snuggle companion. With its warm brown body, cream face, and scalloped spike layer, this hedgehog sits upright with a soft, huggable shape that’s full of personality.
This free pattern uses basic crochet techniques—magic ring, single crochet, increases, and decreases—so you can create a professional-looking amigurumi even if you’re just starting out. Let’s get started!
Materials Needed
Before you begin, gather these supplies:
- Yarn: Chunky weight yarn (Category 5) in three colors:
- Warm brown (for body and spikes)
- Cream (for head and ears)
- Dark brown (for embroidery details)
- Crochet Hook: 6.5 mm (K-10.5) hook
- Stuffing: Polyester fiberfill or any soft stuffing material
- Yarn needle: For sewing pieces together and weaving in ends
- Scissors
- Stitch marker (optional, but helpful for keeping track of rounds)
Gauge: Not critical for amigurumi, but aim for tight stitches to prevent stuffing from showing. Approximately 4 sc x 4 rows = 2 inches.
Step-by-Step Instructions
Head
Worked in continuous rounds with cream yarn. Use a stitch marker to keep track of your rounds.
- Round 1: Make a magic ring, work 6 sc into the ring. (6 stitches)
- Round 2: Increase in each sc around. (12 stitches)
- Round 3: (Sc in next sc, inc) around. (18 stitches)
- Round 4: (Sc in next 2 sc, inc) around. (24 stitches)
- Rounds 5-7: Sc in each sc around. (24 stitches)
- Round 8: (Sc in next 2 sc, dec) around. (18 stitches)
- Round 9: (Sc in next sc, dec) around. (12 stitches)
Stuff the head firmly with fiberfill. Fasten off, leaving a long tail (about 12 inches) for sewing to the body.
Body (Worked in One Piece from Bottom Up)
Switch to warm brown yarn. This creates the rounded, sitting body of the hedgehog.
- Round 1: Make a magic ring, work 6 sc into the ring. (6 stitches)
- Round 2: Increase in each sc around. (12 stitches)
- Round 3: (Sc in next sc, inc) around. (18 stitches)
- Round 4: (Sc in next 2 sc, inc) around. (24 stitches)
- Round 5: (Sc in next 3 sc, inc) around. (30 stitches)
- Rounds 6-10: Sc in each sc around. (30 stitches)
- Round 11: (Sc in next 3 sc, dec) around. (24 stitches)
- Round 12: (Sc in next 2 sc, dec) around. (18 stitches)
Stuff the body firmly with fiberfill, shaping it into a rounded oval.
- Round 13: (Sc in next sc, dec) around. (12 stitches)
- Round 14: Decrease around. (6 stitches)
Fasten off and weave in the end securely. The body should now be a closed, stuffed oval.
Spikes (Worked in Rows, Then Sewn onto Body)
This creates the textured, scalloped spike layer that covers the hedgehog’s back. Use warm brown yarn.
- Foundation: Chain 25.
- Row 1: Sc in the 2nd ch from the hook and in each ch across. (24 sc)
- Row 2: Ch 1, turn. Sc in next 2 sc, (sc, ch 2, sl st in 2nd ch from hook) in next sc, sc in next 3 sc. Repeat from * to end, ending with sc in last 2 sc. This creates a scalloped spike edge.
Fasten off, leaving a long tail (about 18 inches) for sewing. The strip will naturally curl slightly, which is perfect for covering the rounded back.
Ears (Make 2)
Use cream yarn to match the head.
- Round 1: Make a magic ring, work 6 sc into the ring. (6 stitches)
- Round 2: (Sc in next sc, inc) around. (9 stitches)
- Round 3: Sc in each sc around. (9 stitches)
Fasten off, leaving a tail. Fold each ear flat and sew to the sides of the head, positioning them slightly above the eyes.
Assembly
Now it’s time to bring your hedgehog to life!
- Sew the head to the body: Using the long tail from the head, sew it to the top of the body, positioning it slightly to one side so the hedgehog looks playful and dynamic. Use a whip stitch and make sure it’s securely attached.
- Attach the spikes: Using the long tail from the spike strip, sew it onto the back of the body. Start from the top of the head (just behind the ears) and curve it down to the bottom, covering the back and sides. The scalloped edge should face outward for a textured, spiky look. Sew securely along the entire length.
- Embroider the eyes: With dark brown yarn and a yarn needle, embroider two small French knots or cross-stitches on the head, positioned about 1 inch apart and slightly above the nose area. Make them symmetrical for a cute, expressive face.
- Embroider the nose: Using dark brown yarn, embroider a small triangle or oval on the tip of the head, just below the eyes. A simple satin stitch works well for a smooth nose.
- Weave in all ends: Use your yarn needle to hide any remaining tails inside the body or head. Trim any excess yarn.
Final Touches & Tips
- Stuffing: Make sure to stuff firmly but not too tightly, so the hedgehog stays soft and huggable.
- Tight stitches: Keep your tension consistent and tight to prevent the stuffing from peeking through.
- Customization: Feel free to experiment with different yarn colors—a gray or tan hedgehog would look equally adorable!
- Gift idea: This hedgehog makes a perfect handmade gift for baby showers, birthdays, or as a cozy desk companion.
Your Whimsical Woodland Hedgehog is complete! With its rustic charm, textured spikes, and sweet face, it’s sure to become a cherished handmade treasure. Enjoy your new crochet companion, and happy stitching!