Amigurumi Patterns
Whimsical Succulent Amigurumi Free Pattern
Anonymous
•
July 04, 2026
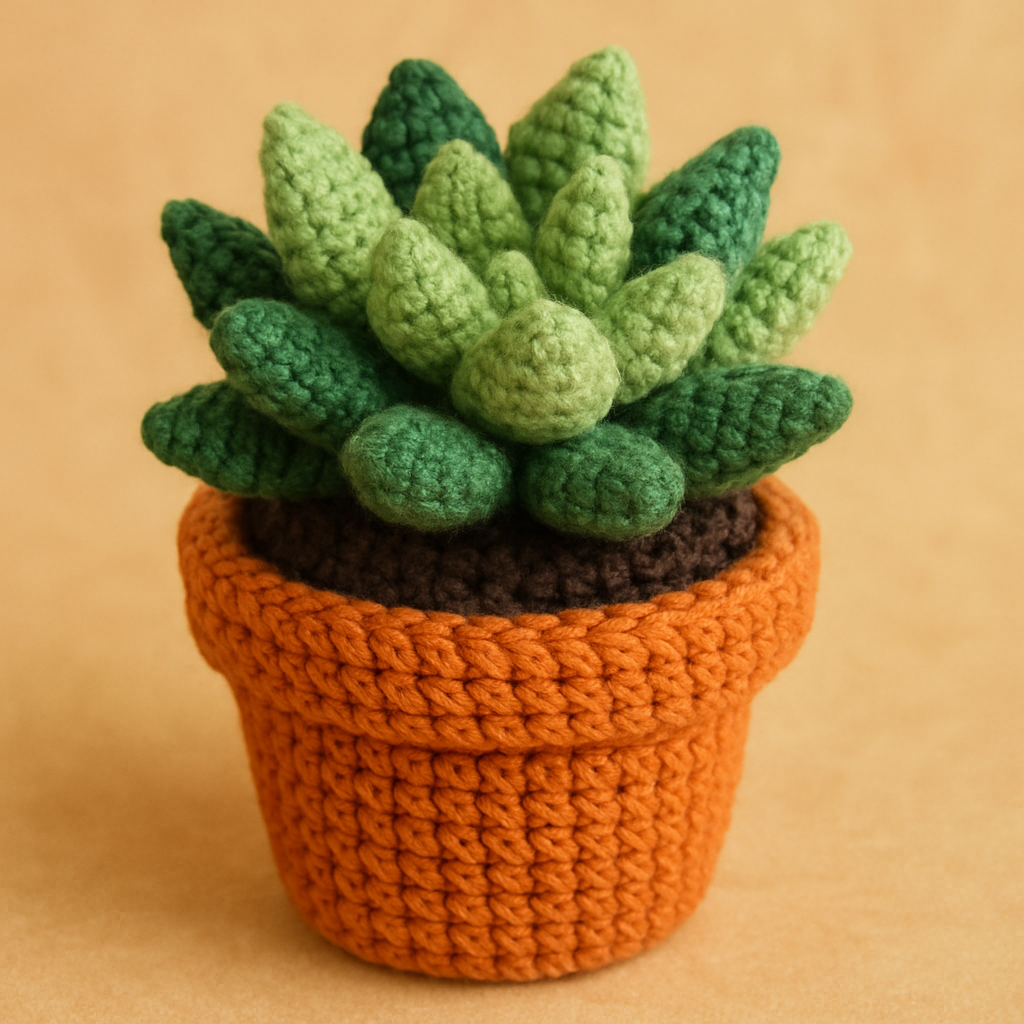
Whimsical Succulent Amigurumi Free Pattern
Introduction
Bring the charm of a lush indoor garden to your crafting with this delightful succulent amigurumi pattern. Perfect for plant lovers and those who appreciate unique decor, these crocheted succulents add a touch of greenery without the need for watering. Follow this step-by-step guide to create your own whimsical succulent that will brighten up any space!
Materials Needed
- Worsted weight cotton yarn in various shades of green, brown, and terracotta
- 3.5 mm crochet hook
- Fiberfill stuffing
- Yarn needle
- Scissors
Step-by-Step Instructions
Abbreviations
- MR: Magic Ring
- sc: single crochet
- inc: increase (2 sc in one stitch)
- dec: decrease (single crochet two stitches together)
- sl st: slip stitch
- ch: chain
Pot Base
- With terracotta yarn, create a Magic Ring (MR) and work 6 single crochets (sc) into the ring. (6 stitches)
- Round 2: Increase (inc) in each stitch around. (12 stitches)
- Round 3: (Sc in next stitch, inc) repeat around. (18 stitches)
- Round 4: (Sc in next 2 stitches, inc) repeat around. (24 stitches)
- Round 5: (Sc in next 3 stitches, inc) repeat around. (30 stitches)
- Round 6: (Sc in next 4 stitches, inc) repeat around. (36 stitches)
- Rounds 7-10: Sc in each stitch around. (36 stitches)
- Fasten off and weave in ends using a yarn needle.
Soil
- With brown yarn, create a MR and work 6 sc into the ring. (6 stitches)
- Round 2: Inc in each stitch around. (12 stitches)
- Round 3: (Sc in next stitch, inc) repeat around. (18 stitches)
- Round 4: (Sc in next 2 stitches, inc) repeat around. (24 stitches)
- Round 5: (Sc in next 3 stitches, inc) repeat around. (30 stitches)
- Round 6: (Sc in next 4 stitches, inc) repeat around. (36 stitches)
- Fasten off, leaving a long tail for sewing.
- Place the soil piece inside the pot and sew it in place using the long tail.
Succulent Leaves
- With green yarn, create a MR and work 6 sc into the ring. (6 stitches)
- Round 2: (Sc in next stitch, inc) repeat around. (9 stitches)
- Round 3: (Sc in next 2 stitches, inc) repeat around. (12 stitches)
- Rounds 4-5: Sc in each stitch around. (12 stitches)
- Round 6: (Sc in next 2 stitches, dec) repeat around. (9 stitches)
- Round 7: (Sc in next stitch, dec) repeat around. (6 stitches)
- Stuff lightly with fiberfill and fasten off, leaving a long tail for sewing.
- Make 5-7 leaves depending on the desired fullness of your succulent.
- Sew the leaves onto the soil piece in a circular pattern, arranging them to your liking.
Finishing Touches
- Use the yarn needle to weave in any remaining ends.
- Arrange the leaves to give a natural look, adjusting as necessary.
- Enjoy your whimsical succulent amigurumi as a charming decor piece!
Also Check Out: We think you'd love this beautiful pattern on our sister site: Rustic Farmhouse Baby Blanket with 3D Textured Stitches - Free Pattern


