Amigurumi Patterns
The Woodland Mushroom Amigurumi Free Pattern
Anonymous
•
July 03, 2026
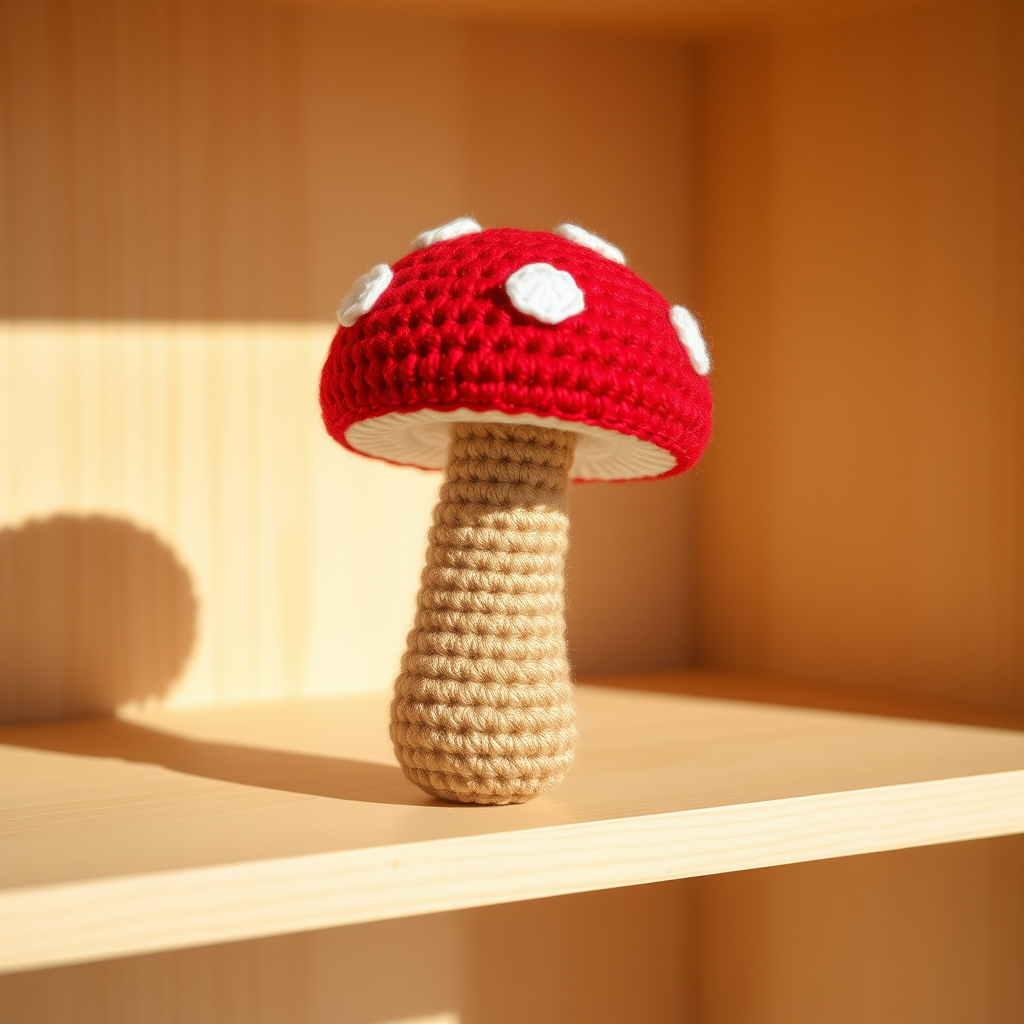
The Woodland Mushroom Amigurumi Free Pattern
Introduction
Welcome to the delightful world of amigurumi! Today, we will be creating a charming woodland mushroom that adds a touch of nature-inspired whimsy to your home decor. This pattern is perfect for beginners and can also make a thoughtful gift for a nature-loving friend. Let’s gather our materials and get started on this enchanting project!
Materials Needed
- Yarn: Worsted weight yarn in red, white, and brown
- Hook: 3.5 mm crochet hook
- Scissors: For cutting yarn
- Tapestry needle: For weaving in ends and sewing pieces together
Step-by-Step Instructions
Creating the Mushroom Cap
- Using the red yarn, create a magic ring.
- Round 1: Crochet 6 single crochets (sc) into the magic ring. (6 stitches)
- Round 2: Increase (inc) in each stitch around. (12 stitches)
- Round 3: *Single crochet in the next stitch, increase in the next stitch*; repeat around. (18 stitches)
- Round 4: *Single crochet in the next 2 stitches, increase in the next stitch*; repeat around. (24 stitches)
- Round 5: *Single crochet in the next 3 stitches, increase in the next stitch*; repeat around. (30 stitches)
- Round 6: *Single crochet in the next 4 stitches, increase in the next stitch*; repeat around. (36 stitches)
- Rounds 7-10: Single crochet in each stitch around. (36 stitches)
- Fasten off and weave in the ends securely.
Creating the Mushroom Stem
- Using the brown yarn, create a magic ring.
- Round 1: Crochet 6 single crochets (sc) into the magic ring. (6 stitches)
- Round 2: Increase (inc) in each stitch around. (12 stitches)
- Rounds 3-8: Single crochet in each stitch around. (12 stitches)
- Fasten off, leaving a long tail for sewing.
Creating the White Spots
- Spot 1: Using white yarn, create a magic ring and crochet 6 single crochets (sc) into the ring. Fasten off.
- Spot 2: Using white yarn, create a magic ring and crochet 4 single crochets (sc) into the ring. Fasten off.
- Spot 3: Using white yarn, create a magic ring and crochet 3 single crochets (sc) into the ring. Fasten off.
Assembly
- Take the white spots and sew them onto the red mushroom cap in a random pattern to mimic the look of a classic toadstool.
- Lightly stuff the brown stem with a small amount of fiberfill to give it a plush appearance.
- Carefully sew the stem to the underside of the mushroom cap using the long tail left from the stem.
- Weave in all ends securely to finish your mushroom amigurumi.
Conclusion
Congratulations on creating your very own Woodland Mushroom Amigurumi! This adorable piece is not only a fun project but also a lovely addition to your home decor or a perfect gift for someone special. Enjoy your crafting journey and let your creativity flourish!


