The Retro Granny Square Vest Free Pattern
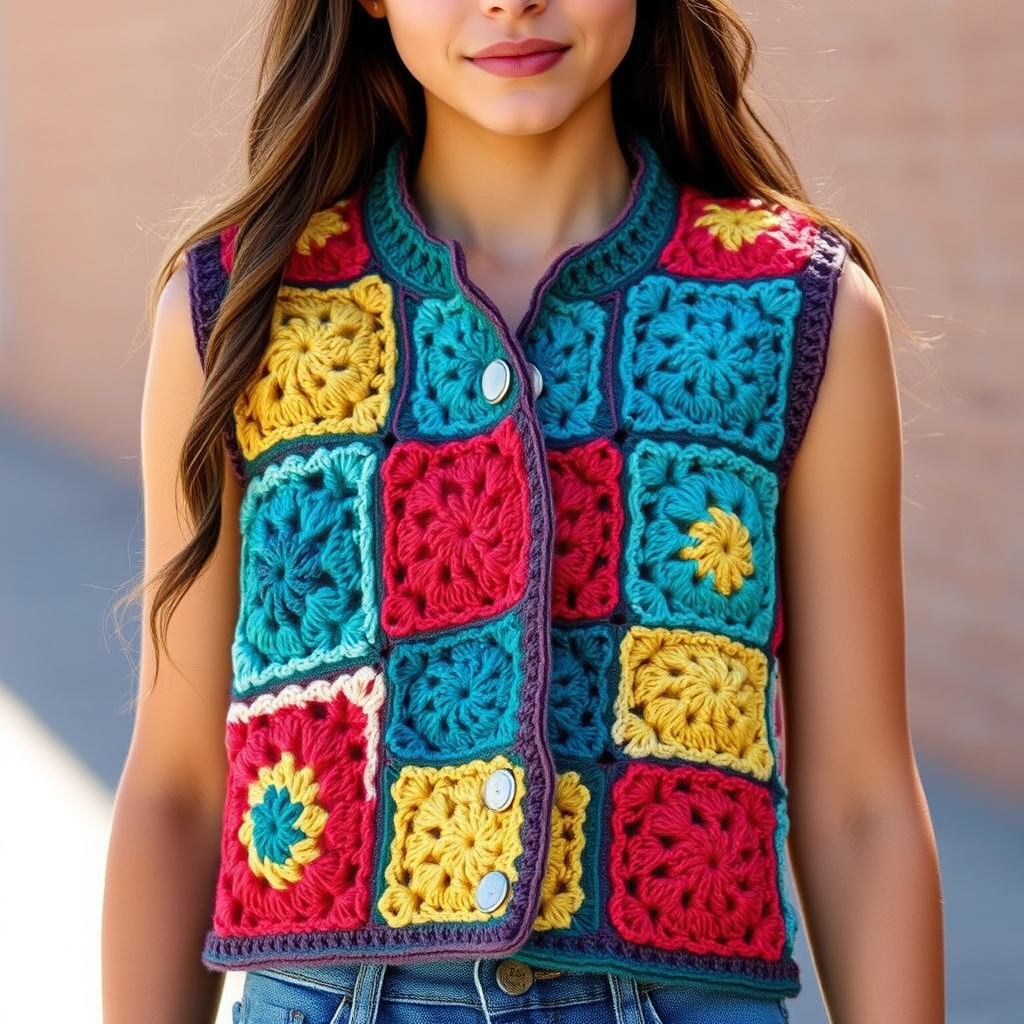
The Retro Granny Square Vest Free Pattern
Introduction
Embrace the charm of the past with this Retro Granny Square Vest, a delightful nod to vintage fashion. Perfect for layering, this vest combines classic motifs with a modern twist. Whether you're looking to add a pop of color to your wardrobe or simply enjoy the art of crochet, this pattern is designed for beginners and seasoned crafters alike. Let's dive into creating your very own vibrant patchwork vest!
Materials Needed
- Yarn: Worsted weight cotton yarn in multiple colors (suggested colors: teal, mustard, coral, and cream)
- Hook: 5.0 mm crochet hook
- Gauge: 4 granny squares = 10 inches
Step-by-Step Instructions
Step 1: Create the Granny Squares
Begin by creating individual granny squares. Each square will be approximately 5 inches across. Follow the pattern below for each square:
Granny Square Pattern
- Round 1: Start with a magic ring. Chain 3 (this counts as your first double crochet), then work 2 double crochets (dc) into the ring. Now, *chain 2, and work 3 dc into the ring*; repeat from * to * three more times. Finally, chain 2 and join with a slip stitch (sl st) to the top of your initial chain 3.
- Round 2: Slip stitch to the first chain-2 space. Chain 3, then work 2 dc in the same space. Chain 2, then work 3 dc in the same space. Now, *chain 1, and in the next chain-2 space, work (3 dc, chain 2, 3 dc)*; repeat from * to * around. Finish with a chain 1 and join with a slip stitch to the top of your initial chain 3.
- Round 3: Slip stitch to the first chain-2 space. Chain 3, then work 2 dc in the same space. Chain 2, then work 3 dc in the same space. Now, *chain 1, work 3 dc in the next chain-1 space, chain 1, and in the next chain-2 space, work (3 dc, chain 2, 3 dc)*; repeat from * to * around. Finish with a chain 1, work 3 dc in the next chain-1 space, chain 1, and join with a slip stitch to the top of your initial chain 3.
Step 2: Assemble the Vest
Once you have completed enough squares (typically around 20-30 squares, depending on your desired vest size), arrange them in a pattern that you like. You can mix and match colors for a vibrant look or create a more uniform design.
Step 3: Join the Squares
Using a whip stitch or slip stitch method, join the squares together. Make sure to align the edges neatly for a polished finish. Take your time to ensure that the squares are securely attached and that the seams are as flat as possible.
Step 4: Add the Edging
To finish your vest, work a round of single crochet (sc) around the entire vest. When you reach the corners, add extra stitches to keep the edges flat. This will give your vest a neat and professional appearance.
Step 5: Final Touch
For a polished look, finish with a round of reverse single crochet (also known as crab stitch). This adds a lovely retro touch to your vest and enhances its overall aesthetic.
Conclusion
Congratulations! You’ve now created your very own Retro Granny Square Vest. This vibrant piece not only showcases your crochet skills but also adds a unique touch to your wardrobe. Enjoy wearing your handmade creation or gifting it to someone special!


