Vintage Revival Crochet Patterns
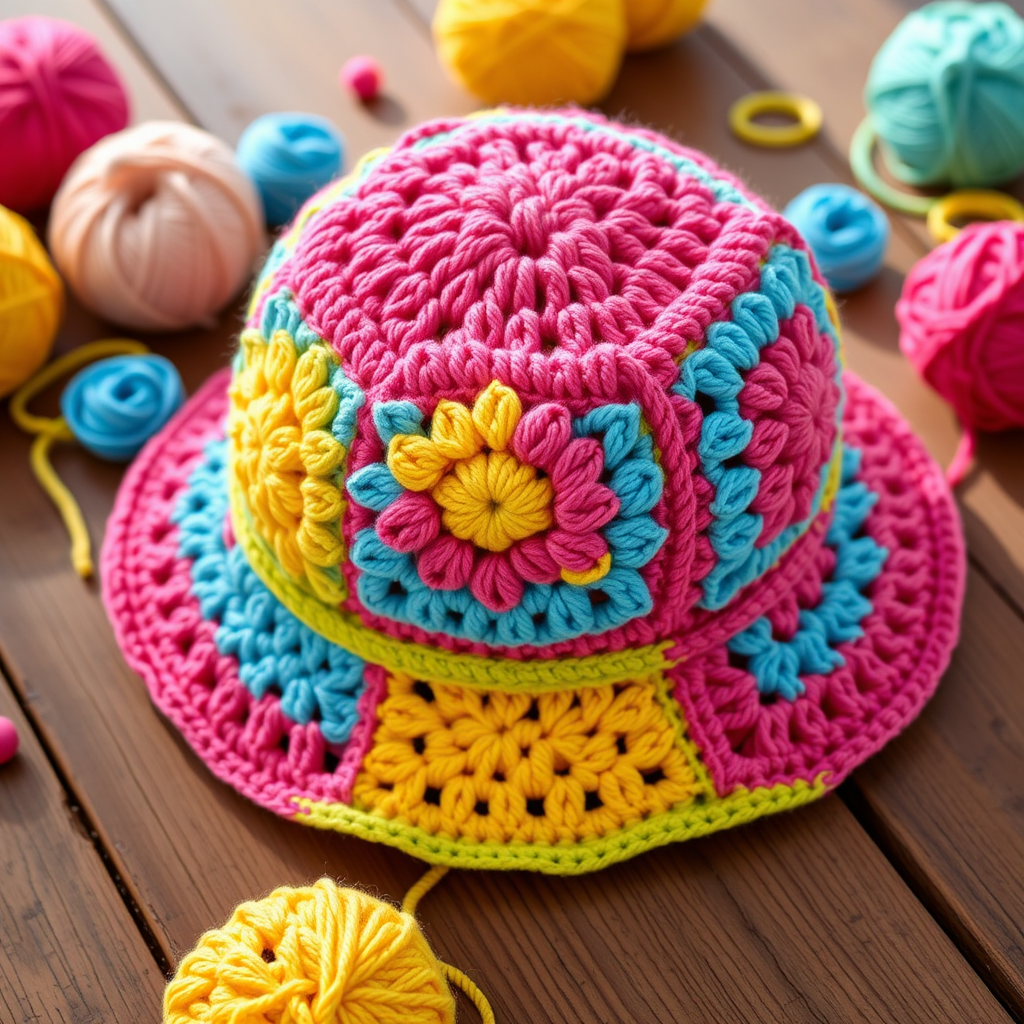
Retro Granny Square Bucket Hat Free Pattern
Anonymous
•
July 10, 2026

Introduction
Embrace the nostalgia of the 70s with this vibrant Granny Square Bucket Hat. This fun and colorful accessory is perfect for adding a pop of color and a touch of vintage flair to any outfit. Whether you're heading to the beach or just want to stand out in the crowd, this hat is sure to turn heads. Plus, it's a wonderful project for beginners looking to enhance their crochet skills!
Materials Needed
- Yarn: Worsted weight cotton yarn in assorted colors (e.g., mustard yellow, burnt orange, olive green, and cream)
- Hook: 5.0 mm crochet hook
- Gauge: 4 inches = 4 granny squares
- Scissors for cutting yarn
- Tapestry needle for weaving in ends
Step-by-Step Instructions
1. Create the Granny Squares
Start by crocheting individual granny squares:
- Make a Magic Ring. Chain 3 (this counts as your first double crochet), then crochet 2 double crochets (dc) into the ring. Chain 2.
- Repeat the following steps two more times: *3 dc into the ring, chain 2*. You should have a total of 12 dc and 4 chain-2 spaces. Join with a slip stitch (sl st) to the top of the initial chain-3.
2. Expand the Granny Squares
- Slip stitch to the first chain-2 space. Chain 3, then crochet 2 dc into the same space, followed by a chain 2 to create a corner.
- For the sides, repeat the following: *3 dc into the next chain-2 space, chain 2, 3 dc into the same space*. Continue this pattern around, joining with a slip stitch to the top of the chain-3.
3. Continue Crocheting the Squares
- Keep crocheting in this pattern, adding one more set of 3 dc clusters per side until your square measures approximately 4 inches. This will create the classic granny square look.
- Make a total of 8 granny squares.
4. Join the Squares
- Join the squares in a 2x4 rectangle using your preferred joining method, such as slip stitch or whip stitch. Ensure the squares are aligned properly for a seamless look.
5. Form the Hat Tube
- Fold the rectangle in half, joining the short sides together to form a tube. Make sure the right sides are facing out.
6. Create the Brim
- Attach your yarn to any stitch along the bottom edge of the tube. Chain 1, then single crochet (sc) around the entire edge. Join with a slip stitch.
- Chain 1, then repeat the following: *sc in the next 2 stitches, 2 sc in the next stitch*. Continue this pattern around, joining with a slip stitch.
- Repeat the previous round, increasing evenly until the brim measures approximately 2 inches. This will give your hat a nice flared look.
7. Finishing Touches
- Fasten off your yarn and weave in all ends using a tapestry needle. This will ensure your hat is neat and tidy.
Congratulations! You have now completed your very own Retro Granny Square Bucket Hat. Wear it proudly and enjoy the compliments that come your way!