The Retro Granny Square Bucket Hat Free Pattern
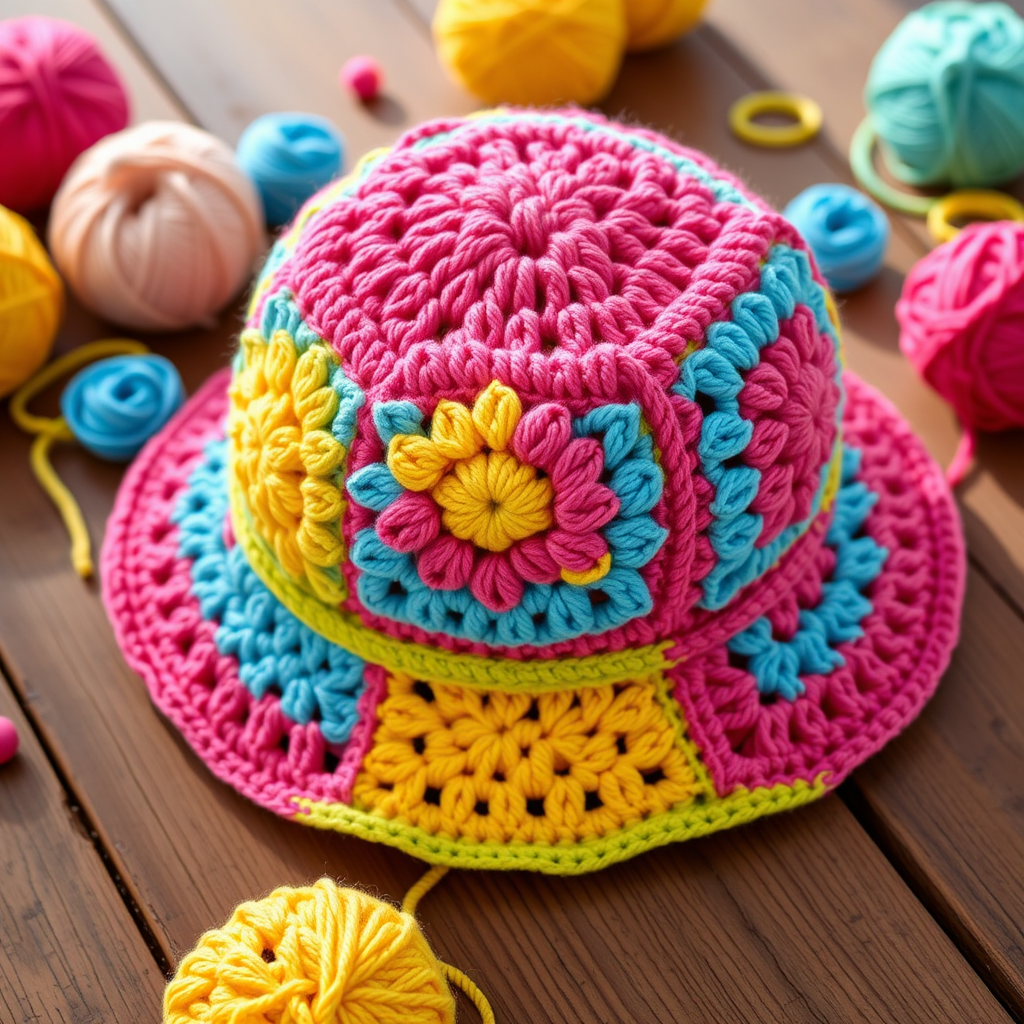
The Retro Granny Square Bucket Hat Free Pattern
Introduction
Embrace the Y2K nostalgia with this vibrant and playful granny square bucket hat. Perfect for adding a touch of vintage flair to any outfit, this pattern is a delightful exploration of color and texture. Whether you're a seasoned crocheter or a beginner, this step-by-step guide will help you create your very own Retro Granny Square Bucket Hat!
Materials Needed
- Yarn: Worsted weight cotton yarn in multiple colors (e.g., bright pink, sunny yellow, sky blue, and lime green)
- Hook: 5.0 mm crochet hook
- Gauge: 4 inches = 14 double crochets (dc) and 8 rows
Step-by-Step Instructions
Creating the Granny Squares
Start with the classic granny square pattern to create a total of 5 squares.
- Magic Ring: Start with a magic ring. To create a magic ring, wrap the yarn around your fingers to form a loop, then insert your hook into the loop and pull up a loop.
- Round 1: Chain 3 (this counts as your first double crochet), then work 2 double crochets (dc) into the ring. Chain 2, then *work 3 dc into the ring, chain 2*. Repeat from * to * two more times. Join with a slip stitch (sl st) to the top of the initial chain 3. You should have 12 dc and 4 chain-2 spaces.
- Round 2: Slip stitch to the next chain-2 space. Chain 3, then work 2 dc in the same space. Chain 2, then work 3 dc in the same space. Now, *work 3 dc in the next chain-2 space, chain 2, work 3 dc in the same space*. Repeat from * to * around. Join with a slip stitch to the top of the initial chain 3. You should have 24 dc and 4 chain-2 spaces.
- Round 3: Slip stitch to the next chain-2 space. Chain 3, then work 2 dc in the same space. Chain 2, then work 3 dc in the same space. Now, *work 3 dc in the next space between 3-dc groups, then 3 dc in the next chain-2 space, chain 2, work 3 dc in the same space*. Repeat from * to * around. Join with a slip stitch to the top of the initial chain 3. You should have 36 dc and 4 chain-2 spaces.
Joining the Squares
Once you have completed 5 granny squares, it's time to join them into a circular band.
- Align the squares in a circular shape. Use slip stitches to join the squares together at the edges. Ensure that the colors alternate as desired for a vibrant look.
Creating the Brim
Now that your squares are joined, let’s create the brim of the hat.
- Attach your yarn to any stitch on the band. Chain 1, then single crochet (sc) in each stitch around. Join with a slip stitch.
- Chain 1, then *sc in the next 2 stitches, 2 sc in the next stitch*. Repeat from * to * around. Join with a slip stitch.
- Chain 1, then *sc in the next 3 stitches, 2 sc in the next stitch*. Repeat from * to * around. Join with a slip stitch.
- Chain 1, sc in each stitch around. Join with a slip stitch.
- Fasten off your yarn and weave in any loose ends using a yarn needle.
Conclusion
Your Retro Granny Square Bucket Hat is now complete! This vibrant accessory not only showcases your crochet skills but also adds a unique touch to your wardrobe. Enjoy wearing your handmade creation or gift it to a friend who loves vintage fashion!


