Amigurumi Patterns
The Jolly Gnome Ornament: A Free Crochet Pattern for a Textured, Heirloom-Quality Christmas Decoration
Anonymous
•
July 27, 2026
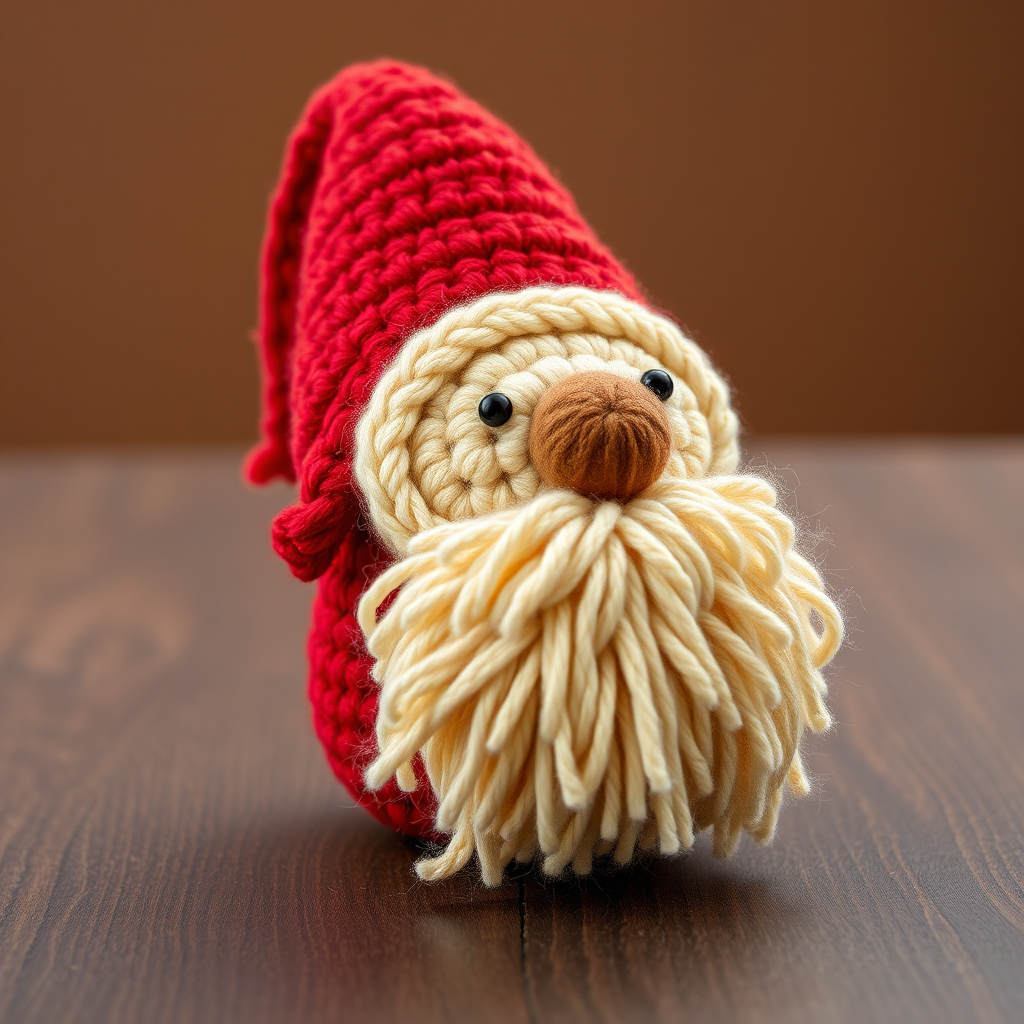
Introducing the Jolly Gnome Ornament
Bring a touch of whimsical, handmade charm to your holiday tree with this textured, heirloom-quality gnome ornament. Using simple crochet stitches and clever shaping, you'll create a cozy decoration featuring a fluffy, loop-stitch beard and a jaunty, pointed hat. This free pattern is perfect for beginners and experienced crafters alike, resulting in a soft, squishy gnome that will be treasured for years to come.
Materials Needed
- Yarn: Worsted weight yarn in the following colors:
- Red (for hat and body)
- Cream or white (for beard)
- Skin tone (for face)
- Small amounts of black (for eyes) and brown (for nose)
- Crochet Hook: 3.5 mm (E) crochet hook
- Other: Yarn needle, scissors, stuffing fiberfill
- Gauge: Not critical; aim for tight tension to prevent stuffing from showing.
Step-by-Step Instructions
Head
Work in continuous rounds; do not join unless specified.
- Round 1: With skin tone yarn, make a magic ring. Work 6 single crochet (sc) into the ring. (6 stitches)
- Round 2: Increase (inc) in each stitch around. (12 stitches)
- Round 3: *Sc in next stitch, inc* repeat around. (18 stitches)
- Round 4: *Sc in next 2 stitches, inc* repeat around. (24 stitches)
- Rounds 5-8: Sc in each stitch around. (24 stitches)
- Round 9: *Sc in next 2 stitches, decrease (dec)* repeat around. (18 stitches)
- Round 10: *Sc in next stitch, dec* repeat around. (12 stitches)
- Stuff the head firmly with fiberfill.
- Fasten off, leaving a long tail (about 12 inches) for sewing.
Body
- Round 1: With red yarn, make a magic ring. Work 6 sc into the ring. (6 stitches)
- Round 2: Inc in each stitch around. (12 stitches)
- Round 3: *Sc in next stitch, inc* repeat around. (18 stitches)
- Round 4: *Sc in next 2 stitches, inc* repeat around. (24 stitches)
- Rounds 5-7: Sc in each stitch around. (24 stitches)
- Round 8: *Sc in next 2 stitches, dec* repeat around. (18 stitches)
- Round 9: *Sc in next stitch, dec* repeat around. (12 stitches)
- Stuff the body firmly.
- Fasten off, leaving a long tail for sewing.
Hat
- Round 1: With red yarn, make a magic ring. Work 6 sc into the ring. (6 stitches)
- Round 2: Inc in each stitch around. (12 stitches)
- Round 3: *Sc in next stitch, inc* repeat around. (18 stitches)
- Round 4: *Sc in next 2 stitches, inc* repeat around. (24 stitches)
- Rounds 5-10: Sc in each stitch around. (24 stitches)
- Round 11: *Sc in next 2 stitches, dec* repeat around. (18 stitches)
- Round 12: Sc in each stitch around. (18 stitches)
- Round 13: *Sc in next stitch, dec* repeat around. (12 stitches)
- Rounds 14-15: Sc in each stitch around. (12 stitches)
- Round 16: Dec around. (6 stitches)
- Fasten off and weave in the end. Fold the tip of the hat to one side and stitch it in place for a jaunty look.
Beard
Worked in rows; ch 1 counts as turning chain.
- Row 1: With cream yarn, chain 11. Sc in the 2nd chain from the hook and across. (10 stitches)
- Row 2: Ch 1, turn. Sc in each stitch across. (10 stitches)
- Row 3: Ch 1, turn. Sc in first 2 stitches. *In the next stitch, work (sc, ch 1, sc)* to create a small loop for texture. Sc in next 4 stitches. Repeat from * to * in the next stitch. Sc in last 2 stitches. (12 stitches + 2 ch-1 loops)
- Row 4: Ch 1, turn. Sc in each stitch and each ch-1 space across. (14 stitches)
- Fasten off, leaving a long tail for sewing.
Nose
- With brown yarn, make a magic ring. Work 6 sc into the ring. (6 stitches)
- Fasten off, leaving a long tail. Sew the nose onto the center of the face.
Assembly
- Sew head to body: Using the tail from the head, sew the head onto the top of the body, matching the stitches evenly.
- Sew hat onto head: Position the hat slightly to one side (the folded tip should lean to the side). Sew the base of the hat securely around the top of the head.
- Sew beard onto face: Place the beard over the lower half of the face, covering from below the nose to the bottom of the head. Sew along the top edge of the beard, ensuring the textured loops face outward.
- Embroider eyes: Using black yarn, embroider two small French knots or satin stitches for eyes, positioned just above the nose.
- Create hanging loop: With red yarn, chain 15. Fasten off and sew both ends of the chain to the top of the hat.
- Weave in all ends: Use a yarn needle to hide any remaining yarn tails inside the ornament.
Your Jolly Gnome Ornament is now complete! Hang it on your tree, give it as a gift, or display it as a festive decoration. Enjoy your handmade, heirloom-quality creation!
Also Check Out: We think you'd love this beautiful pattern on our sister site: Chunky Peach Crochet Cowl Pattern


