Amigurumi Patterns
The Enchanted Teacup Amigurumi Free Pattern
Anonymous
•
July 03, 2026
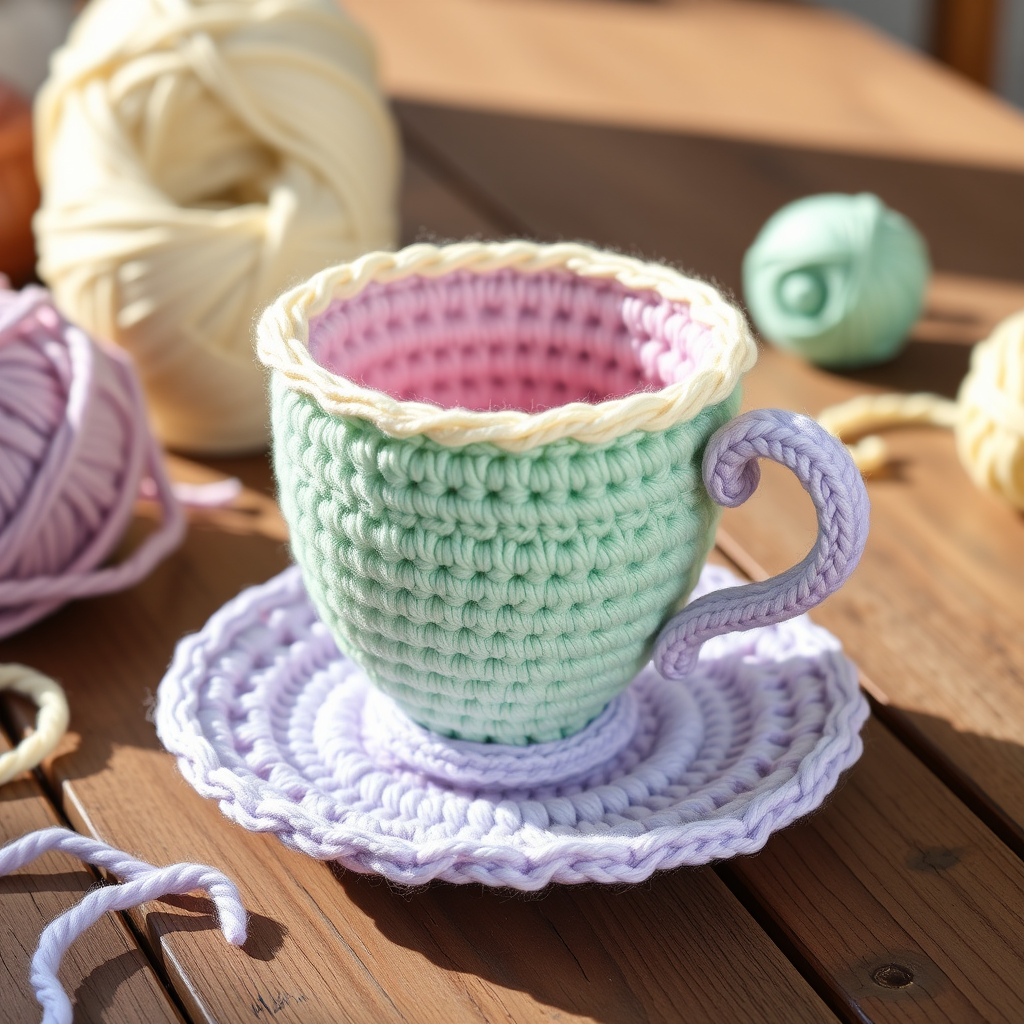
The Enchanted Teacup Amigurumi Free Pattern
Introduction
Welcome to the whimsical world of crochet! In this blog post, we will guide you through creating your very own Enchanted Teacup Amigurumi. This delightful pattern is perfect for adding a touch of charm to your home decor or gifting to a tea-loving friend. With its playful design and intricate details, this project is a must-try for crochet enthusiasts of all levels, especially beginners!
Materials Needed
- Yarn: Lightweight cotton yarn in pastel colors (e.g., mint green, soft pink, cream, and lavender)
- Hook: 3.5 mm crochet hook
- Gauge: 22 stitches and 30 rows = 4 inches in single crochet
- Scissors: For cutting yarn
- Tapestry Needle: For weaving in ends and sewing pieces together
Step-by-Step Instructions
1. Begin with the Base of the Teacup
- Using mint green yarn, make a magic ring.
- Work 6 single crochets (sc) into the magic ring. (6 stitches)
- Round 2: Increase (inc) in each stitch around. (12 stitches)
- Round 3: *Single crochet in the next stitch, increase in the next stitch*; repeat around. (18 stitches)
- Round 4: *Single crochet in the next 2 stitches, increase in the next stitch*; repeat around. (24 stitches)
- Round 5: *Single crochet in the next 3 stitches, increase in the next stitch*; repeat around. (30 stitches)
- Round 6: *Single crochet in the next 4 stitches, increase in the next stitch*; repeat around. (36 stitches)
- Round 7: *Single crochet in the next 5 stitches, increase in the next stitch*; repeat around. (42 stitches)
- Round 8: *Single crochet in the next 6 stitches, increase in the next stitch*; repeat around. (48 stitches)
- Round 9: Single crochet in each stitch around. (48 stitches)
2. Form the Sides of the Teacup
- Round 10: Working in back loops only, single crochet in each stitch around. (48 stitches)
- Rounds 11-18: Single crochet in each stitch around. (48 stitches)
3. Create the Rim
- Round 19: Change to cream yarn, single crochet in each stitch around. (48 stitches)
- Round 20: *Single crochet in the next 7 stitches, increase in the next stitch*; repeat around. (54 stitches)
- Round 21: Single crochet in each stitch around. (54 stitches)
4. Make the Handle
- With mint green yarn, chain (ch) 20, then turn your work.
- Row 1: Single crochet in the 2nd chain from the hook and in each chain across. (19 stitches)
- Row 2: Chain 1, single crochet in each stitch across.
- Fasten off, leaving a long tail for sewing. Attach the handle to the side of the teacup securely.
5. Create the Saucer
- Using lavender yarn, make a magic ring.
- Work 6 single crochets into the magic ring. (6 stitches)
- Round 2: Increase in each stitch around. (12 stitches)
- Round 3: *Single crochet in the next stitch, increase in the next stitch*; repeat around. (18 stitches)
- Round 4: *Single crochet in the next 2 stitches, increase in the next stitch*; repeat around. (24 stitches)
- Round 5: *Single crochet in the next 3 stitches, increase in the next stitch*; repeat around. (30 stitches)
- Round 6: *Single crochet in the next 4 stitches, increase in the next stitch*; repeat around. (36 stitches)
- Round 7: *Single crochet in the next 5 stitches, increase in the next stitch*; repeat around. (42 stitches)
- Round 8: *Single crochet in the next 6 stitches, increase in the next stitch*; repeat around. (48 stitches)
- Round 9: *Single crochet in the next 7 stitches, increase in the next stitch*; repeat around. (54 stitches)
- Round 10: Single crochet in each stitch around. (54 stitches)
- Fasten off and weave in all ends.
6. Assemble the Teacup
Place the teacup on the saucer and secure it with a few stitches if desired. Your Enchanted Teacup Amigurumi is now complete!
Enjoy your charming creation, and don’t forget to share your finished teacup with friends and fellow crafters!


