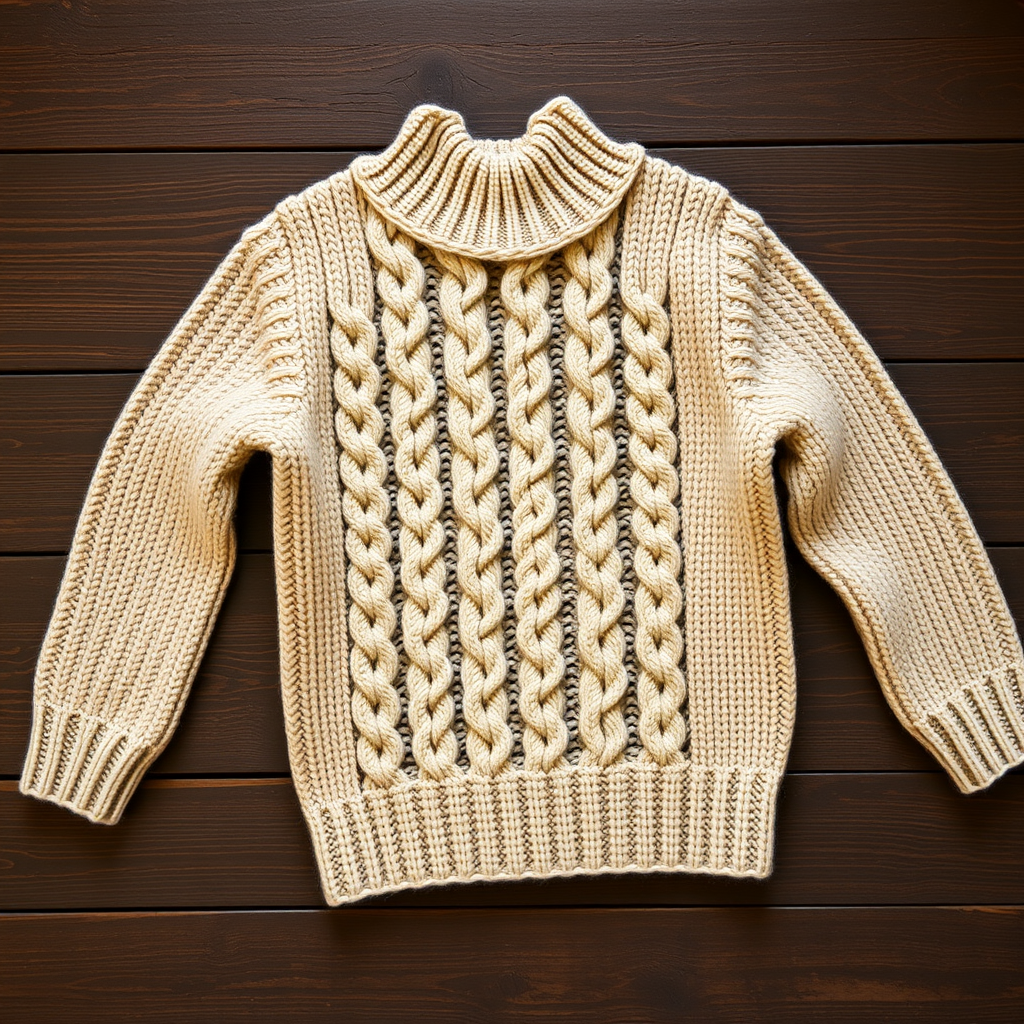
Seafoam Whisper Pullover Free Pattern – A Knitted Coastal Breeze

Seafoam Whisper Pullover Free Pattern – A Knitted Coastal Breeze
Wrap yourself in the gentle rhythm of the shore with this airy, textured pullover that captures the soft hues of sea glass and driftwood. Knitted in a breezy openwork stitch, the Seafoam Whisper Pullover is the perfect layering piece for cool summer evenings or a cozy addition to your year-round wardrobe. This top-down, seamless design features delicate lace panels that cascade down the center front and back, evoking the calming movement of ocean waves. Whether you're a seasoned knitter looking for a relaxing project or a confident beginner ready to tackle your first sweater, this free pattern offers clear guidance and a stunning, wearable result.
This pattern is thoughtfully designed to be knit in one piece from the top down, minimizing finishing work and allowing you to try on your sweater as you go. The simple lace repeat is easy to memorize, and the construction is straightforward, making it an ideal project for a weekend knit or a mindful, meditative craft session. Let's dive into the details and create a garment that feels like a gentle sea breeze against your skin.
Materials Needed
Before you begin, gather the following materials to ensure a smooth and enjoyable knitting experience. The Seafoam Whisper Pullover uses a worsted weight cotton blend, which provides excellent stitch definition and a soft, breathable drape—perfect for the openwork pattern.
Yarn
- Worsted weight cotton blend yarn in three colors:
- Seafoam green (main color)
- Sandy beige (contrast color for hem)
- Soft white (contrast color for cuffs)
- Approximate yardage: 1200-1400 yards total for sizes S-2XL (adjust based on your chosen size and desired length).
Needles & Notions
- US 7 (4.5 mm) circular needles (24-32 inch length) for the body and yoke.
- US 7 (4.5 mm) double-pointed needles (or a long circular needle for magic loop) for the sleeves.
- Stitch markers (at least 4, including one unique marker for the beginning of the round).
- Stitch holders or waste yarn for holding sleeve stitches.
- Tapestry needle for weaving in ends.
- Measuring tape.
Gauge
18 stitches and 24 rows = 4 inches in stockinette stitch (blocked). Always knit a gauge swatch and block it before measuring to ensure your sweater fits as intended. Adjust needle size if necessary to achieve the correct gauge.
Step-by-Step Instructions
This pullover is knit top-down in one piece, with a simple lace panel running down the center front and back. The body is worked in the round to the underarms, then split for front and back. Sleeves are picked up and knit down. Follow these detailed instructions carefully, and you'll have a beautiful, breezy pullover in no time.
Abbreviations
- CO: cast on
- K: knit
- P: purl
- K2tog: knit two together (right-leaning decrease)
- SSK: slip slip knit (left-leaning decrease)
- YO: yarn over (increase creating an eyelet)
- PM: place marker
- SM: slip marker
- St(s): stitch(es)
- RS: right side
- WS: wrong side
- M1L: make one left (increase) – pick up the bar between stitches from front to back and knit through the back loop.
Lace Panel Pattern (Worked over 12 sts)
This 12-stitch lace panel is the signature element of the Seafoam Whisper Pullover. It's a simple repeat that creates a beautiful wave-like texture. Work the following rows, repeating them for the length of the panel.
- Row 1 (RS): K2, YO, SSK, K4, K2tog, YO, K2
- Row 2 and all WS rows: Purl all sts
- Row 3: K1, YO, SSK, YO, SSK, K2, K2tog, YO, K2tog, YO, K1
- Row 5: K2, YO, SSK, YO, SSK, K2tog, YO, K2tog, YO, K2
- Row 7: K1, YO, SSK, YO, SSK, K2, K2tog, YO, K2tog, YO, K1
- Row 9: K2, YO, SSK, K4, K2tog, YO, K2
- Row 11: K1, YO, SSK, YO, SSK, K2, K2tog, YO, K2tog, YO, K1
- Row 12: Purl all sts
Repeat rows 1-12 for the pattern.
Yoke
The yoke is worked in the round from the neckline down, with increases to shape the shoulders and chest.
- Cast On: With seafoam green yarn, CO 90 (100, 110, 120, 130) sts. Join in the round, being careful not to twist. PM at the beginning of the round.
- Neckline Ribbing: Work 2 inches of K1, P1 ribbing for the neckline.
- Increase Round: K all sts, increasing 10 (12, 14, 16, 18) sts evenly around. You now have 100 (112, 124, 136, 148) sts.
- Knit Even: Knit 4 rounds even.
- Increase Round: *K10 (11, 12, 13, 14), M1L, repeat from * to end of round. You now have 110 (124, 138, 152, 166) sts.
- Knit Even: Knit 5 rounds even.
- Increase Round: *K11 (12, 13, 14, 15), M1L, repeat from * to end of round. You now have 120 (136, 152, 168, 184) sts.
- Continue Increasing: Continue increasing in this manner every 6th round (i.e., knit 5 rounds even between increase rounds) until the yoke measures 8 (9, 10, 11, 12) inches from the cast-on edge. You should end with a total of 180 (200, 220, 240, 260) sts.
Divide for Body and Sleeves
Now you'll separate the sleeve stitches from the body stitches, setting the sleeves aside to work later.
- Knit Back: Knit across the first 50 (56, 62, 68, 74) sts for the back.
- Place Sleeve Sts: Place the next 40 (44, 48, 52, 56) sts on a stitch holder or waste yarn for the first sleeve.
- Cast On Underarm: CO 6 (8, 10, 12, 14) sts for the underarm.
- Knit Front: Knit the next 50 (56, 62, 68, 74) sts for the front.
- Place Sleeve Sts: Place the next 40 (44, 48, 52, 56) sts on a stitch holder or waste yarn for the second sleeve.
- Cast On Underarm: CO 6 (8, 10, 12, 14) sts for the second underarm.
- Total Body Sts: You now have 112 (128, 144, 160, 176) sts on your needles for the body.
Body
The body is worked in the round, incorporating the lace panels at the center front and back.
- Knit Even: Work in stockinette stitch (knit every round) for 2 inches.
- Place Lace Markers: PM at the center front and center back of the body. To find the center, count your total body stitches and divide by two. Place a marker at each halfway point.
- Incorporate Lace Panels: Work as follows:
- Round 1: Knit to 6 sts before the center front marker, work the 12-stitch Lace Panel over the next 12 sts (the center 12 sts), knit to 6 sts before the center back marker, work the 12-stitch Lace Panel over the next 12 sts, knit to end of round.
- Continue: Continue working the lace panels on these 12 sts every round, while knitting all other sts. Work until the body measures 12 (13, 14, 15, 16) inches from the underarm.
- Hem Ribbing: Switch to sandy beige yarn and work 2 inches of K1, P1 ribbing. Bind off loosely in pattern.
Sleeves
You'll now pick up stitches around the armholes and knit the sleeves down to the cuffs.
- Pick Up Sts: With seafoam green yarn, pick up and knit 46 (52, 58, 64, 70) sts around the armhole, including the underarm cast-on stitches. PM at the underarm center to mark the beginning of the round.
- Knit Even: Knit in stockinette stitch for 2 inches.
- Decrease Round: K2tog, knit to the last 2 sts, SSK. This decreases 2 sts.
- Repeat Decreases: Repeat the decrease round every 8th round until the sleeve measures 14 (15, 16, 17, 18) inches from the underarm, or your desired length.
- Cuff Ribbing: Switch to soft white yarn and work 2 inches of K1, P1 ribbing. Bind off loosely in pattern.
- Repeat: Repeat for the second sleeve.
Finishing
Your Seafoam Whisper Pullover is almost complete! Follow these final steps for a polished, professional finish.
- Weave in Ends: Carefully weave in all loose ends using a tapestry needle, securing them on the wrong side of the fabric.
- Blocking: Block your sweater to the specified measurements. Gently stretch the lace panels to open up the pattern and enhance the drape. Lay flat to dry.
- Enjoy: Once dry, your breezy coastal pullover is ready to wear. Enjoy the soft, airy texture and the beautiful wave-like lace details!
We hope you love knitting this Seafoam Whisper Pullover as much as we loved designing it. The combination of the soothing color palette, the rhythmic lace pattern, and the seamless construction makes for a truly rewarding project. Happy knitting, and may your days be filled with coastal breezes and beautiful handmade garments!