Rust & Forest Green Yoga Mat Sling Band: Free Crochet Pattern with Post-Ribbing
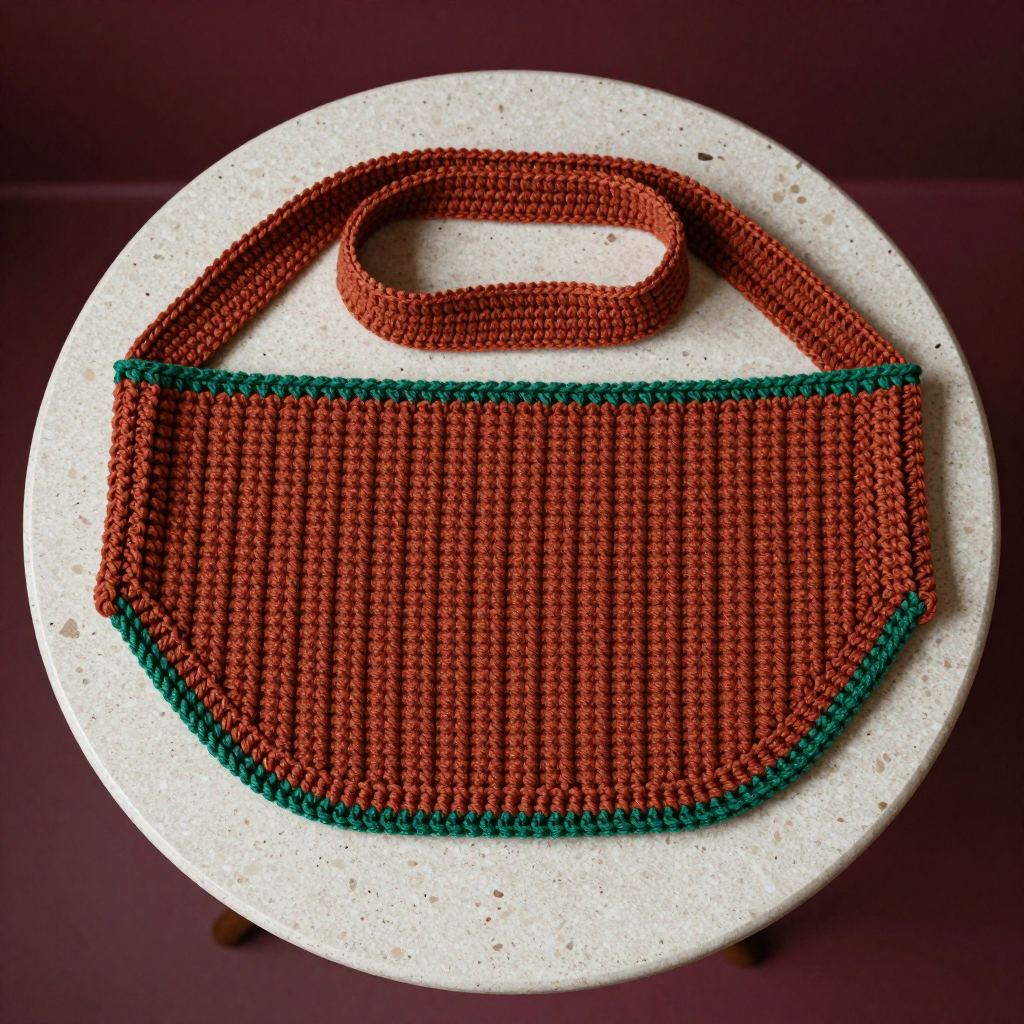
Rust & Forest Green Yoga Mat Sling Band: A Beginner-Friendly Free Crochet Pattern
If you have ever juggled a rolled-up yoga mat, a water bottle, and your keys on the way to class, this project is for you. This rust and forest green yoga mat sling band is the perfect first "real" project for a complete beginner: it is a simple flat strip of stretchy ribbing, joined into a loop, with two little straps that let you carry your mat hands-free over your shoulder. Worked in plush super bulky chenille yarn, the finished band feels velvety and soft in your hands, looks modern and expensive, and the deep rust body with a crisp forest green edge makes it a piece you will actually want to show off. There is no shaping, no counting to a hundred, and no complicated stitch combinations — just one easy stitch repeated until your band is long enough. If you can make a chain and a half double crochet, you can make this.
Materials Needed
- Yarn (main color): Chenille plush yarn, super bulky / weight 6 — approximately 120 yd (110 m) in rust.
- Yarn (contrast color): Same chenille plush yarn, super bulky / weight 6 — approximately 25 yd (23 m) in forest green.
- Hook: 8.0 mm (US L-11) crochet hook.
- Stitch markers: At least 4 (or use scrap yarn loops) to mark your first stitch, your seam, and your strap positions.
- Tapestry needle: A large-eye blunt needle (sometimes called a yarn needle) for weaving in ends and sewing the straps down. Chenille yarn is thick, so choose a needle with a wide eye.
- Scissors: Any sharp pair for cutting yarn.
- Measuring tape: For checking your 44 in (112 cm) band length and your gauge.
Finished measurements:
- Band: 3 in (7.5 cm) wide x 44 in (112 cm) long before joining (fits a rolled mat up to 26 in / 66 cm circumference).
- Straps: 2 straps, each 1.5 in (4 cm) wide x 6 in (15 cm) long.
Abbreviations and Beginner Glossary
Every abbreviation used in this pattern is listed below with a plain-English explanation. Read this section once before you start — you will not need to look anything up again.
- ch – chain. Make a loop with your yarn, then pull a new loop through it. Each loop you pull through is one chain. Chains are the foundation you build on.
- st / sts – stitch / stitches. One completed unit of crochet work.
- sc – single crochet. Insert your hook into the stitch, yarn over (wrap the yarn around the hook), pull up a loop (you now have 2 loops on the hook), yarn over again, and pull through both loops. One loop remains. That is one single crochet.
- hdc – half double crochet. Yarn over first, insert your hook into the stitch, yarn over and pull up a loop (3 loops on hook), yarn over again, and pull through all 3 loops at once. One loop remains.
- fphdc – front post half double crochet. Work a half double crochet around the post (the vertical body) of the stitch below instead of into its top loops. Insert your hook from front to back to front around that post, then complete the hdc as usual. This pushes the stitch forward, creating a raised rib.
- bphdc – back post half double crochet. Same idea, but insert your hook from back to front to back around the post of the stitch below. This pushes the stitch backward, creating a recessed rib.
- post – the vertical "leg" of a stitch, below the two top loops. Post stitches wrap around this leg.
- sl st – slip stitch. Insert your hook into the stitch, yarn over, and pull the loop straight through both the stitch and the loop on your hook. It creates almost no height — used here for joining.
- rep – repeat. Do the instruction again.
- turn – flip your work over so you can work back along the row you just made.
- fasten off – cut the yarn a few inches from your work, then pull the tail all the way through the last loop to lock it.
- join with a slip stitch – attach a new color or start a round by making a slip stitch into the stated stitch.
- right sides facing – the "public" side of your work (the side you want showing) folded against itself.
- weave in ends – thread a yarn tail onto a tapestry needle and run it back and forth through the back of the work so it disappears.
Gauge
Gauge: 8 hdc post-ribbing stitches x 7 rows = 4 x 4 in (10 x 10 cm).
Why gauge matters: Gauge is simply how big your stitches come out. If your stitches are bigger than the pattern's, your band will be too long and loose; if they are smaller, it may not stretch around your mat. Checking gauge first saves you from ripping out a finished project.
How to make a gauge swatch: With your 8.0 mm hook and rust yarn, ch 12. Work Row 1 as written below (hdc in the 3rd ch from hook and in each ch across = 10 hdc). Then work Rows 2–3 of the band pattern twice (4 rows total). Lay the swatch flat without stretching it and measure a 4 x 4 in (10 x 10 cm) square in the middle. Count the stitches across 4 in and the rows up 4 in. If you have more stitches than 8 per 4 in, try a larger hook; if fewer, try a smaller hook. Chenille yarn is forgiving, so being within one stitch is fine.
Beginner Tips Before You Start
- Use stitch markers. Place one in the very first stitch of every row so you never lose your place, and one at the seam once the band is joined. This pattern is easy to drift on because the post stitches look similar.
- Do not pull the yarn too tight. Chenille yarn sheds and snaps if you yank it. Keep your tension relaxed and even — loose, fluffy stitches are what give this band its stretch.
- Remember the ch 2 does not count as a stitch. At the start of every row you make 2 chains purely to lift your yarn to the right height. Your first real stitch goes into the first stitch of the row below, not into those chains.
- Post stitches go around the post, not into the top. This is the one new skill here. Go slowly on Row 2 and watch which way your hook enters — front post from the front, back post from the back.
- Measure, don't count, for the band length. After about 20 rows, start checking with your measuring tape. Stop when the band measures 44 in (112 cm) — your row count may differ slightly from the pattern and that is completely fine.
- Keep your starting chain loose. A tight chain makes the first row hard to work into. If you struggle, make the chain with a hook one size larger, then switch back.
Step-by-Step Instructions
Notes Before You Begin
- The band is worked flat in rows of half double crochet post-ribbing (alternating front post and back post hdc), then joined into a loop with a slip-stitch seam.
- The straps are worked in rows of single crochet directly onto the band ends, then joined to form loops.
- Ch 2 at the start of a row does not count as a stitch.
- Post stitches are worked around the post of the stitch below, not into the top loops.
Part 1: The Band (make 1 in rust)
Row 1: Ch 10. Hdc in the 3rd ch from hook and in each ch across. Turn. (8 hdc)
Row 2: Ch 2. Hdc in the first st. *Fphdc around the next st, bphdc around the next st; rep from * to the last st, hdc in the last st. Turn. (8 sts: 1 plain hdc, 3 fphdc, 3 bphdc, 1 plain hdc)
Row 3: Ch 2. Hdc in the first st. *Bphdc around the next st, fphdc around the next st; rep from * to the last st, hdc in the last st. Turn. (8 sts)
Rows 4–77: Rep Rows 2–3, alternating the post-stitch sequence every row, until the band measures 44 in (112 cm) from the beginning. Do not fasten off. (8 sts per row; 77 rows total)
How to check yourself: every row has exactly 8 stitches — one plain hdc at each end and six post stitches in between. If you ever count 7 or 9, undo back to the last correct row. The 77 rows at the stated gauge give you roughly 44 in (112 cm); if your band reaches 44 in a row or two early or late, simply stop there.
Part 2: Joining the Band into a Loop
Bring the two short ends together with right sides facing. Ch 1, then slip stitch the ends together through both layers across the 8 sts. Fasten off rust, leaving a 6 in (15 cm) tail. Weave in the tail. (8 sl sts)
Part 3: Forest Green Contrast Edge
With forest green, join yarn with a slip stitch at the seam. Work 1 round of sc evenly around the entire outer edge of the loop — approximately 96 sc along the long edges and 8 sc across each short edge. Join with a slip stitch to the first sc. Fasten off and weave in ends. (approx. 208 sc total)
What "evenly" means: you are not counting into stitches here, because you are working into the side edges of the rows. Space your sc so they sit flat and close together without bunching — roughly one sc per row along the long edges. If your edge ripples, you have too many; if it pulls in, you have too few.
Part 4: Straps (make 2, rust)
Strap 1: With rust, join yarn with a slip stitch at one short edge of the band, 1 in (2.5 cm) in from the side.
Row 1: Ch 1, sc in the same space and in each of the next 3 sts. Turn. (4 sc)
Rows 2–12: Ch 1, sc in each st across. Turn. (4 sc; 12 rows total)
Fasten off, leaving a 6 in (15 cm) tail. Fold the strap over to meet the band edge and sew the end down with the tail to form a loop. Rep for Strap 2 on the opposite short edge.
Check your strap length: 12 rows of sc at this gauge gives you about 6 in (15 cm). If your strap measures noticeably short, add one or two more rows before sewing down — just keep the two straps matching.
Assembly and Finishing
- Seam check: Turn the band inside out and look at the slip-stitch seam joining the short ends. If any gap shows, thread your rust tail onto the tapestry needle and take two or three small stitches across the gap, then weave the tail into the inside of the band.
- Sewing the straps: Fold each strap end down so it overlaps the band edge by about ½ in (1 cm). Thread the 6 in (15 cm) tail onto the tapestry needle and sew through both layers with small, firm stitches, going back and forth across the width of the strap. Go through the strap and the band, not just the surface, so it holds under the weight of a mat.
- Weaving in ends: Thread each remaining tail onto the tapestry needle and run it back and forth through the back of the work for about 2 in (5 cm), changing direction once so it cannot work loose. Trim the yarn close to the fabric. Never knot chenille yarn — knots work their way out and leave lumps.
- Blocking: You do not need to wet-block this project. Instead, gently stretch the band widthwise and lengthwise with your hands to even out the ribbing, then lay it flat and let it rest for an hour. If you do want to block it, mist it lightly with water, pat it into shape flat, and let it air-dry completely — do not iron chenille yarn, as the heat will flatten the pile.
- Final test: Slide a rolled yoga mat through the loop and carry it by the straps. If the loop feels snug, a gentle stretch will relax it into place.
Pro Tips and Variations
- Change the colors: Swap the rust for mustard, terracotta, or charcoal, and the forest green edge for cream or black. The contrast edge uses only about 25 yd (23 m), so one small skein is plenty — this is a great way to use up a leftover.
- Adjust the size: For a thicker mat or a mat plus a towel, add rows in pairs (Rows 2–3) until the band measures 48–50 in (122–127 cm) before joining. For a thinner mat, stop at 40 in (102 cm). Always add or remove rows in pairs so the post-stitch pattern stays aligned.
- Substitute the yarn: Any super bulky (weight 6) yarn works — a smooth acrylic or a wool-blend bulky will be less plush but more durable and easier to rip back. Avoid anything fuzzy or hairy for your first attempt, as it hides your stitches. Always swatch again if you change yarn, since gauge will shift.
- Make it a crossbody carrier: Work the band to 56 in (142 cm) instead of 44 in and wear it across your body. The post ribbing stretches comfortably, and the two straps still hold the mat securely.