Opaline Aura Shrug Free Knitting Pattern – Pearlized Lace Bolero
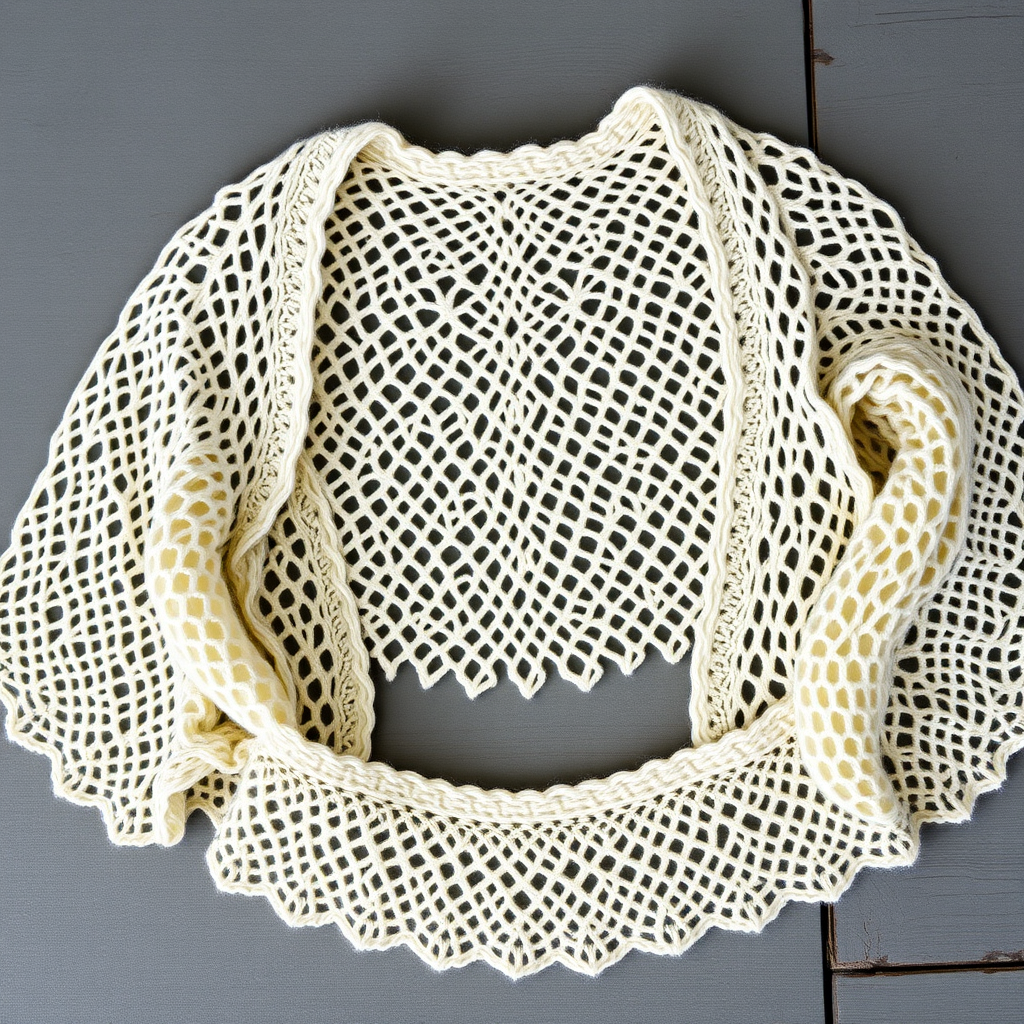
Wrap Yourself in Elegance: The Opaline Aura Shrug Free Knitting Pattern
Imagine a garment that feels like a whisper of morning mist—delicate, luminous, and impossibly elegant. That's the magic of the Opaline Aura Shrug, a featherlight bolero knitted with a pearlized lace pattern that catches the light with every movement. Whether draped over a silk camisole for a romantic dinner or layered atop a simple dress for a garden party, this cropped cover-up adds a touch of refined glamour to any ensemble. Best of all, this free knitting pattern is surprisingly beginner-friendly, thanks to a simple, memorable lace repeat and seamless construction. Let's dive in and create something truly ethereal.
Materials Needed
Before you begin, gather these supplies to ensure a smooth knitting experience:
- Yarn: Worsted weight yarn in a soft pearl white or champagne (approx. 400-500 yards). A merino-silk blend is ideal for extra sheen and drape, but any soft worsted weight will work beautifully.
- Needles: US 7 (4.5 mm) circular knitting needles, 24-inch or longer (for magic loop or working flat). You'll also need a spare needle for binding off.
- Notions: Stitch markers (at least 4), a tapestry needle for weaving in ends, and locking stitch markers or waste yarn for lifelines (optional but recommended).
- Gauge: 20 stitches and 28 rows = 4 inches in stockinette stitch (after blocking). Always check your gauge to ensure the perfect fit!
Step-by-Step Instructions
This shrug is knitted seamlessly from the center back out to the sleeves, using a simple lace repeat that is easy to memorize. Follow these detailed instructions carefully, and you'll have a stunning garment in no time.
Abbreviations
- CO: Cast on
- K: Knit
- P: Purl
- YO: Yarn over
- K2tog: Knit two together (right-leaning decrease)
- SSK: Slip, slip, knit (left-leaning decrease)
- PM: Place marker
- SM: Slip marker
- BO: Bind off
- M1L: Make one left (increase)
- M1R: Make one right (increase)
Pattern Notes
- The shrug is worked in one piece, starting at the center back and increasing outward to form the sleeves and body.
- The lace pattern is a 4-row repeat, worked over a multiple of 6 stitches plus 1.
- Use a lifeline (a piece of waste yarn threaded through your stitches) before starting the lace section if desired—this will save you hours of frustration if you need to rip back.
Center Back Cast On
CO 61 stitches. Do not join in the round; you will work flat for the back panel. Place a marker at each end to help you keep track of your rows if you like.
Lace Pattern Setup
Row 1 (WS): Purl all stitches.
Row 2 (RS): K1, *YO, K2tog, K3; repeat from * to last 6 stitches, YO, K2tog, K2, K1. (Note: The last repeat will end with K2tog, K2, K1 to maintain the pattern.)
Row 3 (WS): Purl all stitches.
Row 4 (RS): K1, *K3, YO, SSK; repeat from * to last 6 stitches, K3, YO, SSK, K1.
Repeat Rows 1-4 until the back panel measures 12 inches from the cast-on edge, ending with a WS row. This forms the center back of the shrug.
Shape the Sleeves
Now you will begin increasing at both ends to create the sleeves. Continue working the lace pattern as established, but add increases on each RS row as follows:
Increase Row (RS): K1, M1L (make one left), work in pattern to last stitch, M1R (make one right), K1.
Work an increase row every 4th row (i.e., on every other RS row) a total of 8 times. You will have 77 stitches on your needle. This gradual increase creates a gentle flare for the sleeves.
Sleeve Length
Continue working even in the lace pattern (without increases) until the piece measures 10 inches from the start of the sleeve increases. End with a WS row. This gives you a beautiful three-quarter-length sleeve.
Sleeve Cap Shaping
Now decrease at the beginning of each row to shape the sleeve cap, which will sit elegantly on your shoulder:
Row 1 (RS): K1, SSK, work in pattern to last 3 stitches, K2tog, K1.
Row 2 (WS): Purl all stitches.
Repeat these two rows until you have 45 stitches remaining. Then, BO all stitches loosely. This shaping creates a gentle curve that hugs your shoulder beautifully.
Finishing Touches
Weave in all ends using your tapestry needle, being careful not to pull too tightly and distort the lace.
Block the shrug gently to open up the lace pattern and even out the stitches. Pin to shape, especially around the sleeve caps, and mist with water. Allow to dry completely. This step is crucial for the lace to truly shine!
Fold the shrug in half with the right sides together. Sew the side seams from the underarm down to the hem, leaving the center back open for the neck opening. Alternatively, you can leave the sides open for a more draped look, using a decorative pin to close—this is a lovely option for a more versatile garment.
Optional Edging
For a more polished finish, pick up stitches around the entire outer edge (including the sleeves and bottom hem) and knit 3 rounds of garter stitch (knit every round) or a simple picot bind-off: BO 2, *slip stitch back to left needle, CO 2, BO 4; repeat from * around. This delicate picot trim adds a touch of vintage charm that perfectly complements the pearlized lace.
And there you have it—your very own Opaline Aura Shrug! This elegant cover-up is perfect for layering and makes a thoughtful handmade gift. The lace pattern is forgiving and meditative once you get into the rhythm, and the seamless construction means minimal finishing. So grab your needles, pour yourself a cup of tea, and let the ethereal beauty of this shrug wrap you in its shimmering embrace. Happy knitting!


