Frosted Berry Wreath Ornament Free Pattern – Crochet a Mini Nordic Holiday Charm
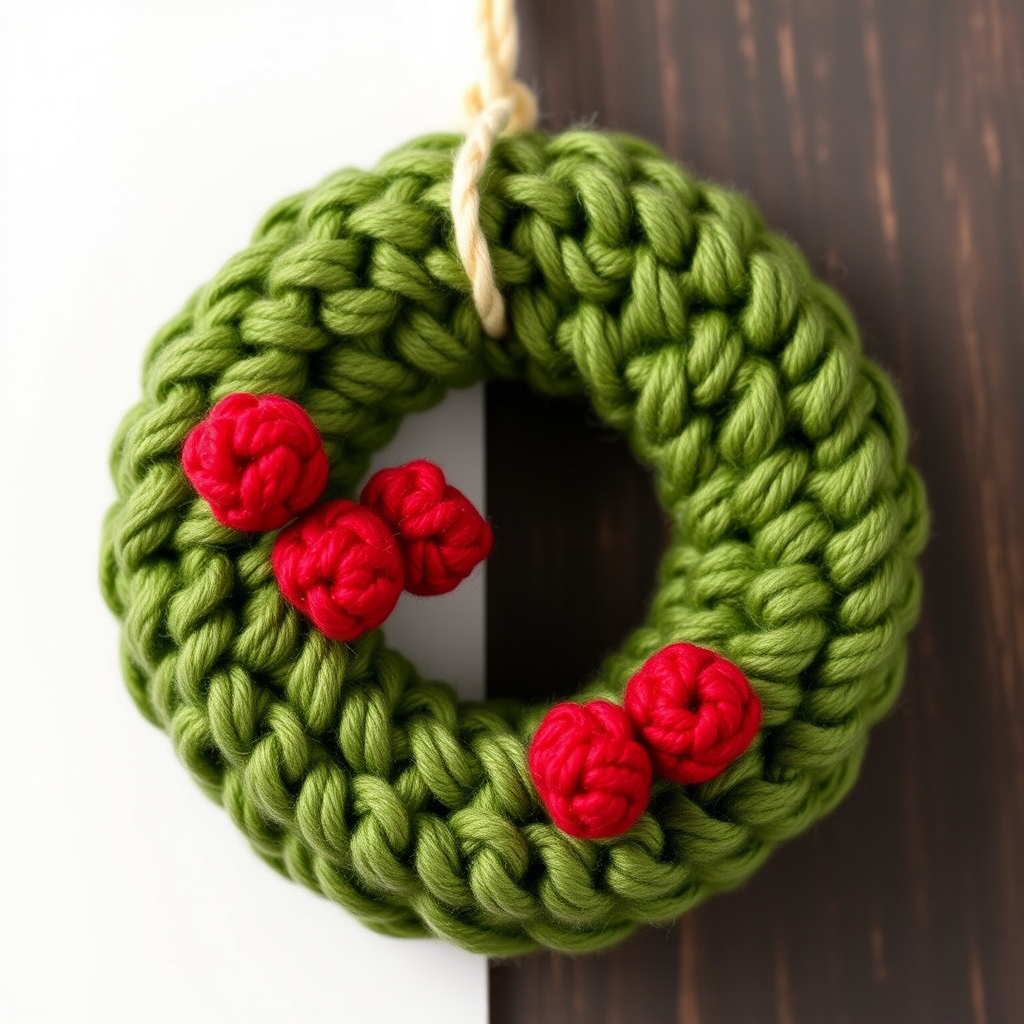
Frosted Berry Wreath Ornament Free Pattern – Crochet a Mini Nordic Holiday Charm
Looking for a quick, charming crochet project to add a handmade touch to your holiday decor? This Frosted Berry Wreath Ornament is the perfect mini make! With just a few yards of yarn and a small hook, you can create a delicate wreath adorned with tiny red berries—a classic Nordic-inspired charm that looks beautiful on a Christmas tree, tied to a gift tag, or hung in a sunny window. Best of all, this pattern is beginner-friendly and works up in under an hour. Let's get started!
Materials Needed
Before you begin, gather these simple supplies. Gauge is not critical for this project, but aim for a tight, firm fabric so your wreath holds its plump shape.
- Yarn: Worsted weight cotton or acrylic yarn in three colors:
- Evergreen green (for the wreath base)
- Deep red (for the berries)
- Cream (for the hanging loop and optional frosted embellishment)
- Hook: 3.5mm (E) crochet hook
- Notions: Stitch marker, tapestry needle, small amount of fiberfill stuffing, scissors
Step-by-Step Instructions
This pattern is worked in continuous rounds unless otherwise stated. Use a stitch marker to keep track of your rounds—it's essential for a neat finish!
Wreath Base (Make 2)
You'll crochet two identical flat circles, then join them together to create a plump, double-sided wreath.
Round 1: With green yarn, make a magic ring. Chain 1, then work 6 single crochet (sc) into the ring. Pull the tail tight to close the ring. (6 stitches)
Round 2: Work 2 sc in each stitch around. (12 stitches)
Round 3: *Sc in next stitch, 2 sc in next stitch* repeat from * to * around. (18 stitches)
Round 4: *Sc in next 2 stitches, 2 sc in next stitch* repeat around. (24 stitches)
Round 5: *Sc in next 3 stitches, 2 sc in next stitch* repeat around. (30 stitches)
Round 6: *Sc in next 4 stitches, 2 sc in next stitch* repeat around. (36 stitches)
Round 7: Sc in each stitch around. (36 stitches) — This round creates the flat, even edge of the wreath.
Round 8: *Sc in next 4 stitches, sc2tog (single crochet decrease)* repeat around. (30 stitches)
Round 9: *Sc in next 3 stitches, sc2tog* repeat around. (24 stitches)
Round 10: *Sc in next 2 stitches, sc2tog* repeat around. (18 stitches)
Round 11: *Sc in next stitch, sc2tog* repeat around. (12 stitches)
Round 12: Sc2tog around. (6 stitches)
Fasten off, leaving a long tail (about 12 inches). Thread the tail through a tapestry needle and weave it through the front loops of the remaining 6 stitches. Pull tight to cinch the center hole closed. Weave in the end securely.
Repeat all 12 rounds to make a second identical circle.
Joining the Wreath
Now it's time to turn your two flat circles into a plump, three-dimensional wreath.
- Place the two circles together with wrong sides facing (the right sides should be facing out).
- Thread a tapestry needle with a length of green yarn.
- Whip stitch around the outer edge, inserting the needle through the outer loops of both circles. Leave a small opening of about 2 inches.
- Stuff the wreath lightly with fiberfill through the opening. Don't overstuff—you want it plump but not bulging.
- Continue whip stitching the opening closed. Weave in all ends securely.
Berries (Make 5-6)
These tiny berries are quick to make and add that classic holiday pop of color.
Round 1: With red yarn, make a magic ring. Chain 1, work 6 sc into the ring. Pull tight. Do not join. (6 stitches)
Round 2: Work 2 sc in each stitch around. (12 stitches)
Round 3: Sc2tog around. (6 stitches)
Fasten off, leaving a long tail. Thread the tail through the front loops of the remaining 6 stitches and pull tight to close the berry. Weave in the end. Repeat for each berry until you have 5-6 total.
Assembly
Now for the fun part—bringing your wreath to life!
- Arrange the berries evenly around the wreath. A classic look is 5 berries, but 6 works beautifully too.
- Using red yarn and a tapestry needle, sew each berry securely to the wreath base. Make a few firm stitches through the base of each berry and into the wreath fabric. Weave in ends.
Hanging Loop
Your wreath needs a way to hang! This simple loop is both functional and charming.
- Cut a 6-inch (15 cm) piece of cream yarn.
- Fold it in half to create a loop.
- Insert your crochet hook through the top of the wreath (between stitches) and pull the folded loop through.
- Thread the two loose ends through the loop and pull tight to secure. Trim the ends neatly.
Optional Embellishment: Frosted Effect
For that "frosted" Nordic look, add a few delicate touches with your cream yarn.
- Using a tapestry needle, embroider small French knots or tiny star stitches (straight stitches crossing at a center point) around the wreath.
- Scatter them randomly between the berries for a snow-kissed effect.
And there you have it—a beautiful, handmade Frosted Berry Wreath Ornament! These make wonderful gifts, thoughtful gift toppers, or a lovely addition to your own tree. Because they're so quick to make, you can whip up a whole set in an evening. Happy crocheting, and may your holidays be filled with cozy handmade charm!


