Ember Glow Crescent Shawlette Free Pattern – Textured Knit with Beaded Edge
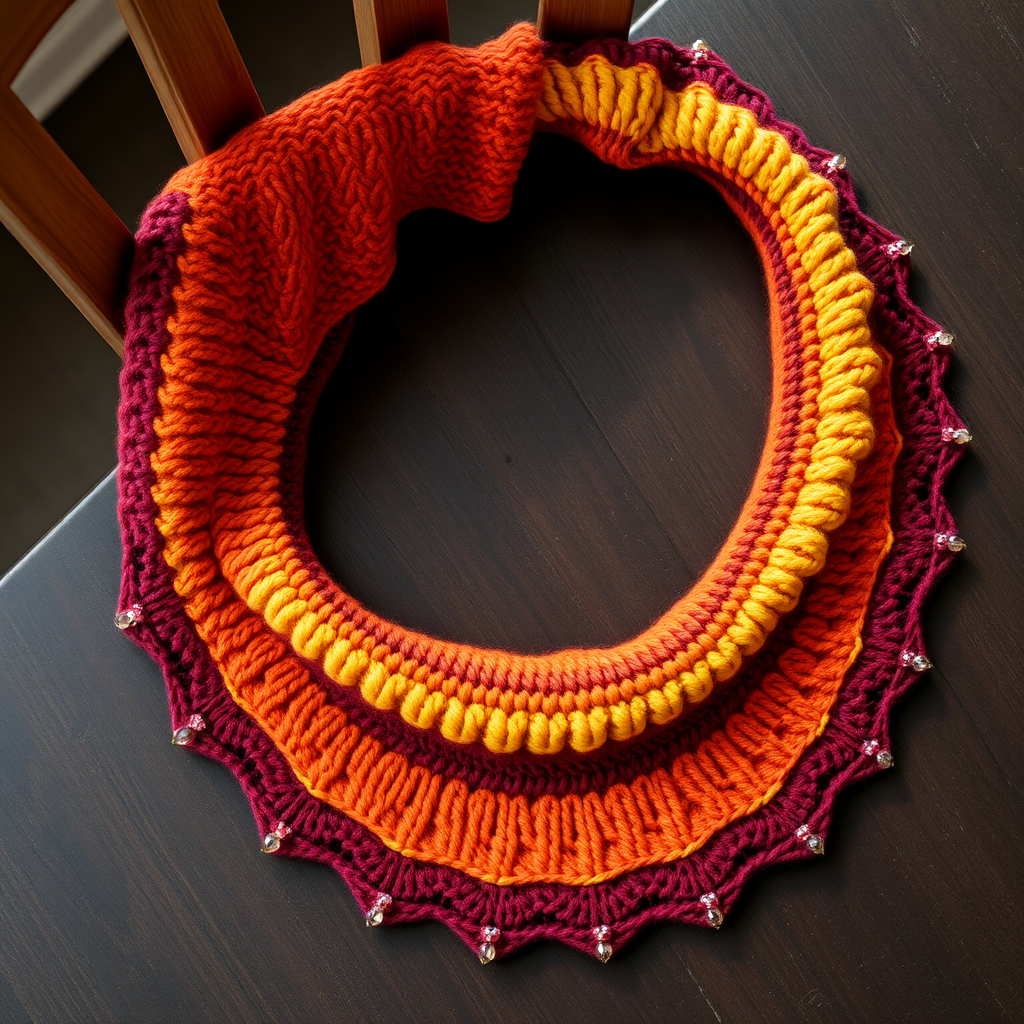
Wrap Yourself in Warmth: The Ember Glow Crescent Shawlette
Imagine the last rays of a sunset captured in a cozy, handcrafted accessory. That's the magic of the Ember Glow Crescent Shawlette. This free knitting pattern is a joy to create, featuring a richly textured slipped-stitch pattern that mimics a woven fabric, all worked in a stunning gradient of burnt orange, golden yellow, and deep merlot. Knitted from the top down, this crescent-shaped shawlette drapes beautifully over any outfit, making it the perfect hostess gift or a special treat for your own holiday wardrobe. The optional beaded bind-off adds a touch of festive sparkle, elevating this piece from simple to simply stunning.
This pattern is designed with the beginner in mind, using basic knit and purl stitches, simple yarn overs for increases, and slipped stitches for texture. The result is an elegant, professional-looking shawlette that you'll be proud to say you made yourself.
Materials Needed
Before you begin, gather your supplies. This project is portable and requires minimal tools, making it perfect for knitting on the go.
- Yarn: Worsted weight yarn in 3 colors:
- Color A (Burnt Orange): 220 yards
- Color B (Golden Yellow): 180 yards
- Color C (Deep Merlot): 150 yards
- Needles: US 8 (5.0 mm) 32-inch circular knitting needle. The long cable is essential to hold the many stitches as the shawlette grows.
- Notions: Tapestry needle for weaving in ends.
- Optional for Beaded Edge: 150 size 6/0 glass beads. (Clear or gold beads add a lovely sparkle.)
Gauge
18 stitches and 24 rows = 4 inches in stockinette stitch (after blocking). While gauge isn't critical for a shawlette, matching it will ensure you use the correct amount of yarn and achieve the intended size.
Step-by-Step Instructions
This pattern is worked flat from the top center outwards. The increases are placed at the edges to create the crescent shape. Let's get started!
Getting Started: The Top Edge
Setup: With Color A, cast on 5 stitches.
- Row 1 (RS): Knit all stitches.
- Row 2 (WS): Knit 2, purl 1, knit 2.
- Row 3 (RS): Knit 2, yarn over (yo), knit 1, yo, knit 2. (You now have 7 stitches)
- Row 4 (WS): Knit 2, purl to the last 2 stitches, knit 2.
- Row 5 (RS): Knit 2, yo, knit 1, yo, knit 1, yo, knit 1, yo, knit 2. (You now have 11 stitches)
- Row 6 (WS): Knit 2, purl to the last 2 stitches, knit 2.
The Textured Pattern
Now we begin the main body of the shawlette. This 6-row repeat creates the beautiful woven texture. The slipped stitches are worked with the yarn in back (wyib) on the right side, which creates long, floating strands of yarn on the surface.
Pattern Repeat (Rows 7-12):
- Row 7 (RS): Knit 2, yo, *slip 1 purlwise with yarn in back (wyib), knit 1; repeat from * to the last 2 stitches, yo, knit 2. (13 stitches)
- Row 8 (WS): Knit 2, purl to the last 2 stitches, knit 2.
- Row 9 (RS): Knit 2, yo, *knit 1, slip 1 purlwise wyib; repeat from * to the last 2 stitches, yo, knit 2. (15 stitches)
- Row 10 (WS): Knit 2, purl to the last 2 stitches, knit 2.
- Row 11 (RS): Knit 2, yo, *slip 1 purlwise wyib, knit 1; repeat from * to the last 2 stitches, yo, knit 2. (17 stitches)
- Row 12 (WS): Knit 2, purl to the last 2 stitches, knit 2.
Increasing for the Crescent Shape
To shape the crescent, we add an increase row after each full pattern repeat. This is a simple yarn over on each edge.
- Increase Row (RS): Knit 2, yo, knit to the last 2 stitches, yo, knit 2. (19 stitches)
- Next Row (WS): Knit 2, purl to the last 2 stitches, knit 2.
Building the Shawlette
Now, you'll repeat the pattern and increase rows to build the shawlette to its full size. The edge stitches (knit 2 on each side) will form a neat, garter-stitch border.
Color A Section: Repeat rows 7-12, then the Increase Row and WS row, until you have 91 stitches on the needle, ending with a WS row. Cut Color A, leaving a tail for weaving in.
Color B Section: Join Color B. Work the rows 7-12 pattern repeat, followed by the Increase Row and WS row, until you have 151 stitches, ending with a WS row. Cut Color B.
Color C Section: Join Color C. Work the rows 7-12 pattern repeat, followed by the Increase Row and WS row, until you have 211 stitches, ending with a WS row. Do not cut Color C.
The Beaded Bind-Off
This is the finishing touch that makes the shawlette sparkle. If you prefer a simpler edge, you can do a standard bind-off. For the beaded version, follow these steps:
- Before you begin the bind-off, pre-thread your beads onto the yarn. Using a small needle or a dental floss threader, slide the beads onto the yarn one by one. You'll need about 70 beads for this edge.
- Beaded Bind-Off (RS): Slide a bead up to the needle so it sits right next to the stitch. Knit 2 stitches. Then, pass the first stitch over the second stitch to bind it off. *Slide a bead up to the needle, knit 1 stitch, then pass the first stitch over the second stitch. Repeat from * across the row, placing a bead on every 3rd stitch for a subtle sparkle.
- Cut the yarn, leaving a long tail, and pull it through the last loop to secure. Weave in all ends with your tapestry needle.
Blocking for a Professional Finish
Blocking is essential for a shawlette. It opens up the stitches, evens out the texture, and shapes the crescent.
- Soak the shawlette in lukewarm water with a drop of wool wash for 20 minutes.
- Gently squeeze out the excess water. Do not wring or twist.
- Lay the shawlette flat on a clean towel and roll it up to remove more water.
- Place the shawlette on a blocking mat or a dry towel. Pin out the crescent shape, stretching the top edge straight and the bottom edge into a gentle curve. The increases will naturally form this shape.
- Allow it to dry completely before unpinning.
Your Ember Glow Crescent Shawlette is now complete! The rich, warm colors and subtle texture make it a versatile piece that can be worn draped over your shoulders or wrapped snugly around your neck. Enjoy the compliments you're sure to receive!


