Whimsical Woodland Gnome Free Pattern – A Crocheted Forest Friend
Whimsical Woodland Gnome Free Pattern – A Crocheted Forest Friend
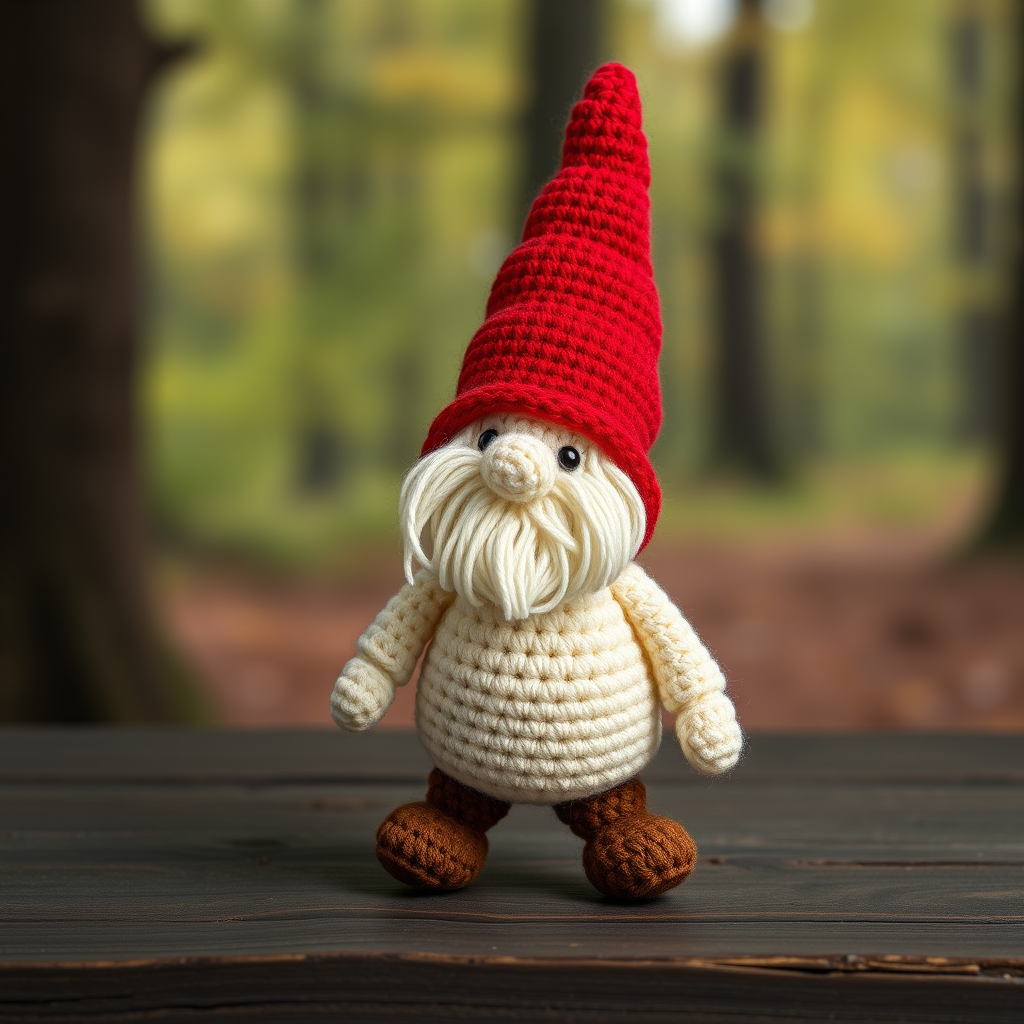
Bring a touch of enchanted forest charm to your home with this adorable crocheted gnome. Perfect for gifting or as a cozy seasonal decoration, this pattern is both beginner-friendly and endlessly customizable. Whether you're a seasoned crocheter or just starting your amigurumi journey, this little forest friend is sure to become a treasured handmade keepsake.
Materials Needed
Before you begin, gather the following supplies to ensure a smooth and enjoyable crochet experience:
- Yarn: Worsted weight yarn in red, cream, and brown (or any colors of your choice)
- Crochet Hook: 3.5mm crochet hook (or size needed to obtain gauge)
- Gauge: 4 sc x 4 rows = 1 inch (approx.)
- Other Supplies: Stitch marker, yarn needle, scissors, stuffing (polyester fiberfill), and black yarn or safety eyes for the face
Step-by-Step Instructions
This pattern is worked in continuous rounds unless otherwise stated. Use a stitch marker to keep track of rounds. The entire gnome is worked from the top down, starting with the head and body as one piece, then adding the nose, hat, beard, arms, and legs.
Head & Body (worked as one piece)
Begin with cream yarn. This section creates the gnome's head and tunic-like body in one continuous piece.
- Make a magic ring, 6 sc in ring. (6)
- Inc in each st around. (12)
- *Sc in next st, inc* repeat around. (18)
- *Sc in next 2 sts, inc* repeat around. (24)
- *Sc in next 3 sts, inc* repeat around. (30)
- Rounds 6-10: Sc in each st around. (30)
- Round 11: *Sc in next 3 sts, dec* repeat around. (24)
- Round 12: *Sc in next 2 sts, dec* repeat around. (18)
- Round 13: *Sc in next st, dec* repeat around. (12)
- Round 14: Sc in each st around. (12) — This is the neck area.
- Round 15: Inc in each st around. (24) — Begin the body.
- Round 16: *Sc in next st, inc* repeat around. (36)
- Rounds 17-20: Sc in each st around. (36)
- Round 21: *Sc in next 4 sts, dec* repeat around. (30)
- Round 22: *Sc in next 3 sts, dec* repeat around. (24)
- Round 23: *Sc in next 2 sts, dec* repeat around. (18)
- Round 24: *Sc in next st, dec* repeat around. (12)
- Round 25: Dec around. (6)
Important: Fasten off, leaving a long tail for sewing. Stuff the head and body firmly before closing the opening. Use the tail to weave through the remaining stitches and pull tight to close.
Nose
Using cream yarn, create the gnome's signature round nose.
- Make a magic ring, 6 sc in ring. (6)
- Inc in each st around. (12)
- Sc in each st around. (12)
Fasten off, leaving a tail for sewing. Stuff lightly and sew to the center of the face, positioning it between the eyes and above the beard.
Hat
Switch to red yarn for the iconic pointed gnome hat.
- Make a magic ring, 6 sc in ring. (6)
- Inc in each st around. (12)
- *Sc in next st, inc* repeat around. (18)
- *Sc in next 2 sts, inc* repeat around. (24)
- Rounds 5-10: Sc in each st around. (24)
- Round 11: *Sc in next 2 sts, dec* repeat around. (18)
- Round 12: Sc in each st around. (18)
- Round 13: *Sc in next st, dec* repeat around. (12)
- Round 14: Sc in each st around. (12)
- Round 15: Dec around. (6)
Fasten off, leaving a long tail. Fold the hat slightly to one side for a whimsical look and sew onto the head, covering the top and part of the forehead. The hat should sit snugly above the eyes.
Beard
Using cream yarn, create the fluffy beard that frames the gnome's face.
- Make a chain of 20.
- Sc in second ch from hook and in each ch across. (19)
- Ch 1, turn, sc in each st across. (19)
- Ch 1, turn, *sc in next st, 2 sc in next st* repeat across, sc in last st. (28)
Fasten off, leaving a tail. Sew the beard around the face, under the nose, and around the sides. Position it so it wraps around the lower half of the face for a full, bushy look.
Arms (make 2)
Using cream yarn, create two small arms for your gnome.
- Make a magic ring, 6 sc in ring. (6)
- Inc in each st around. (12)
- Rounds 3-6: Sc in each st around. (12)
- Round 7: Dec around. (6)
Fasten off, leaving a tail. Stuff lightly and sew to the sides of the body, positioning them just below the neck.
Legs (make 2)
Switch to brown yarn for the gnome's sturdy little legs.
- Make a magic ring, 6 sc in ring. (6)
- Inc in each st around. (12)
- Rounds 3-5: Sc in each st around. (12)
- Round 6: Dec around. (6)
Fasten off, leaving a tail. Stuff lightly and sew to the bottom of the body, ensuring the gnome stands upright.
Finishing Touches
Complete your woodland gnome with these final details:
- Eyes: Embroider eyes with black yarn or attach safety eyes between rounds 8 and 9 of the head. Position them about 4-5 stitches apart for a friendly expression.
- Weave in Ends: Carefully weave in all loose ends using a yarn needle to ensure a clean, professional finish.
Your whimsical woodland gnome is now ready to bring a touch of forest magic to any space! Display it on a shelf, mantel, or gift it to someone special. This pattern is wonderfully versatile — try experimenting with different color combinations, adding a tiny scarf, or even creating a whole gnome family. Happy crocheting!


