Whimsical Rainbow Baby Developmental Ball Free Pattern
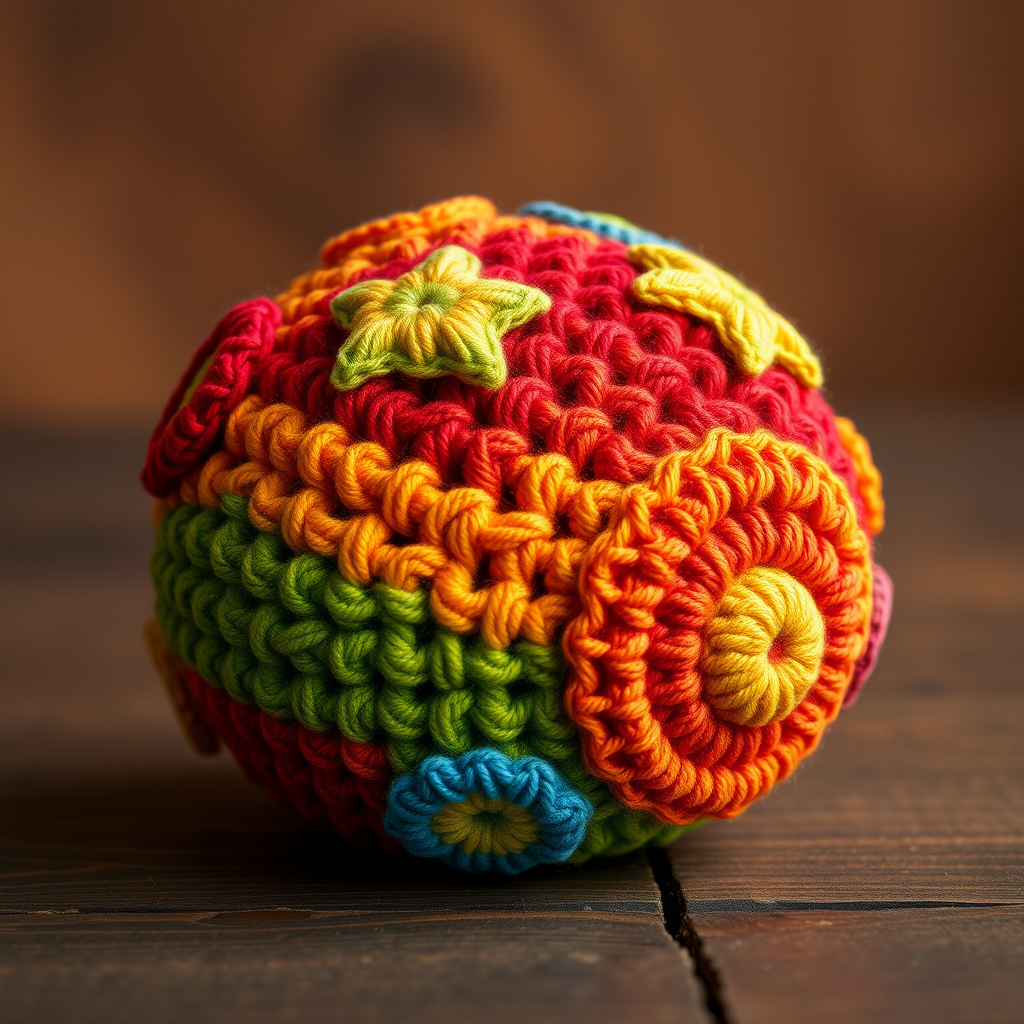
Whimsical Rainbow Baby Developmental Ball Free Pattern
Delight your little one with a whimsical crocheted developmental ball, featuring vibrant colors and engaging textures. This cozy, soft toy is perfect for stimulating sensory exploration and fine motor skills. Follow this easy pattern to create a delightful and colorful ball that your baby will love!
Materials Needed
- Yarn: Cotton DK in rainbow colors (red, orange, yellow, green, blue, purple)
- Crochet Hook: 3.5 mm crochet hook
- Gauge: 22 stitches x 30 rows = 4 inches in single crochet
- Stuffing: Hypoallergenic fiberfill
- Yarn Needle: For sewing and weaving in ends
Step-by-Step Instructions
Starting the Ball
- Magic Ring: Begin by creating a magic ring. This will be the foundation of your ball. To do this, wrap the yarn around your fingers to form a loop, then pull a loop of yarn through the center of the ring.
- Round 1: Work 6 single crochets (sc) into the magic ring. Pull the tail of the yarn to tighten the ring. (6 sts)
- Round 2: Increase in each stitch around by working 2 single crochets in each stitch. (12 sts)
- Round 3: (Sc in next stitch, inc in next stitch) around. This means you will single crochet in the first stitch, then increase in the next stitch. Repeat this pattern around. (18 sts)
- Round 4: (Sc in next 2 stitches, inc in next stitch) around. Continue this pattern of increasing. (24 sts)
- Continue Increasing: Keep increasing in this manner until you reach a total of 48 stitches. You will do this by adding one more single crochet before each increase in each subsequent round. The pattern will look like this:
- Round 5: (Sc in next 3 sts, inc) around (30 sts)
- Round 6: (Sc in next 4 sts, inc) around (36 sts)
- Round 7: (Sc in next 5 sts, inc) around (42 sts)
- Round 8: (Sc in next 6 sts, inc) around (48 sts)
- Work Even: After reaching 48 stitches, work even (no increases or decreases) for 5 rounds. This will create the body of the ball.
Decreasing to Close the Ball
- Begin Decreasing: (Sc in next 6 stitches, dec) around. This means you will single crochet in the next 6 stitches, then decrease by crocheting two stitches together. (42 sts)
- Continue decreasing in this manner:
- Round 9: (Sc in next 5 sts, dec) around (36 sts)
- Round 10: (Sc in next 4 sts, dec) around (30 sts)
- Round 11: (Sc in next 3 sts, dec) around (24 sts)
- Round 12: (Sc in next 2 sts, dec) around (18 sts)
- Round 13: (Sc in next st, dec) around (12 sts)
- Final Rounds: When you have 6 stitches remaining, fasten off, leaving a long tail for sewing. Before closing the ball, stuff it with hypoallergenic fiberfill to give it shape and softness.
- Closing the Ball: Use the yarn needle to weave the tail through the remaining stitches and pull tight to close the opening. Secure the yarn and weave in any ends.
Adding Texture
To enhance the sensory experience, you can add surface crochet or embroidery in contrasting colors to create tactile patterns such as stars and spirals on the surface of the ball. This will make it even more engaging for your little one!
Conclusion
Congratulations on creating your very own whimsical rainbow baby developmental ball! This delightful toy not only provides sensory stimulation but also encourages fine motor skills in your baby. Enjoy watching them explore and play with their new favorite toy!


