The Honeycomb Hug Cardigan: A Free Knitting Pattern for a Cozy, Textured Baby Girl Jacket
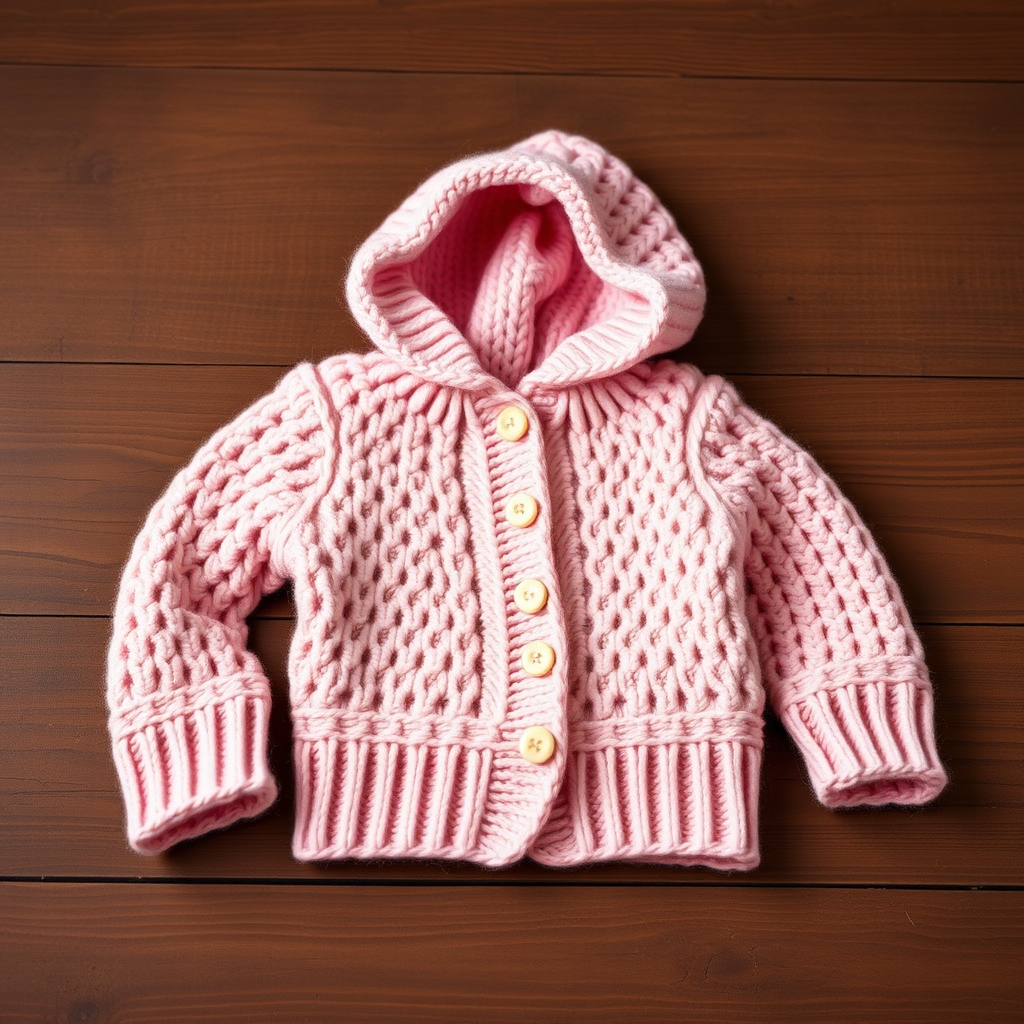
The Honeycomb Hug Cardigan: A Free Knitting Pattern for a Cozy, Textured Baby Girl Jacket
Wrap your little one in the sweetest warmth with this modern honeycomb-textured cardigan, featuring a playful hood and delicate button band. This free pattern creates a soft, heirloom-quality jacket that's as unique as it is cozy. The rich, dimensional honeycomb stitch pattern creates a beautiful, textured fabric that invites cuddles, while the classic shape with a generous hood and front button band makes it both stylish and practical. Whether you're a seasoned knitter or a confident beginner, this pattern will guide you through creating a cherished piece for your baby girl.
Materials Needed
- Yarn: Worsted weight (Category 4) yarn in a soft pastel shade (e.g., blush pink, buttercream, or mint). Approximately 300-350 yards for size 6-12 months. Sample used Lion Brand Heartland in 'Mount Rainier Gray'.
- Needles: US Size 7 (4.5 mm) knitting needles (straight or circular for body), US Size 6 (4.0 mm) for ribbing.
- Notions: Stitch markers, tapestry needle, 4-5 buttons (approx. 1/2 inch).
- Gauge: 20 stitches and 28 rows = 4 inches in honeycomb stitch pattern on larger needles, after blocking.
Step-by-Step Instructions
Sizes
Instructions are for size 0-3 months, with sizes 3-6, 6-12, and 12-18 months in parentheses.
Stitch Pattern: Honeycomb
Worked over a multiple of 6 stitches + 2.
- Row 1 (RS): *K2, p4; repeat from *, end k2.
- Row 2 (WS): *P2, k4; repeat from *, end p2.
- Row 3: *P2, k4; repeat from *, end p2.
- Row 4: *K2, p4; repeat from *, end k2.
- Row 5: *K2, p4; repeat from *, end k2.
- Row 6: *P2, k4; repeat from *, end p2.
- Repeat rows 1-6 for pattern.
Back
- With smaller needles (US Size 6), cast on 58 (64, 70, 76) stitches.
- Work in k1, p1 ribbing for 1.5 inches, ending with a wrong-side row.
- Switch to larger needles (US Size 7). Begin honeycomb pattern and work even until piece measures 7 (8, 9, 10) inches from cast-on edge.
- Bind off all stitches loosely. Do not cut yarn if you plan to pick up stitches for the hood later.
Left Front
- With smaller needles, cast on 28 (31, 34, 37) stitches.
- Work in k1, p1 ribbing for 1.5 inches, ending with a wrong-side row.
- Switch to larger needles. Work in honeycomb pattern, but keep the first 5 stitches at the center front (the edge that will be the button band) in garter stitch (knit every row).
- Continue until piece measures the same as the back to the shoulder (7, 8, 9, or 10 inches).
- Bind off all stitches.
Right Front
- Work as for left front, but reverse shaping. The button band will be the first 5 stitches from the center front edge.
- On the button band, create buttonholes as follows: On a right-side row, k2, yo (yarn over), k2tog, k1. This creates a small buttonhole.
- Space buttonholes every 2.5 (2.75, 3, 3.25) inches. For a 6-12 month size, you'll likely have 4-5 buttonholes. Mark their positions as you go.
- Continue until piece measures the same as the back to the shoulder.
- Bind off all stitches.
Sleeves (Make 2)
- With smaller needles, cast on 30 (32, 34, 36) stitches.
- Work in k1, p1 ribbing for 1.5 inches.
- Switch to larger needles and honeycomb pattern.
- Increase 1 stitch at each end of every 4th row, 6 (7, 8, 9) times. To increase, knit into the front and back of the first and last stitch of the row.
- Work even until sleeve measures 6 (7, 8, 9) inches from cast-on edge.
- Bind off loosely.
Hood
- Sew the shoulder seams of the back and front pieces together.
- With larger needles, pick up and knit 60 (66, 72, 78) stitches evenly around the neck edge. Start at the right front edge and end at the left front edge.
- Work in honeycomb pattern for 6 (7, 8, 9) inches.
- Fold the hood in half (right sides together) so the cast-on edge is at the top.
- Use a three-needle bind-off to close the top of the hood. Alternatively, you can bind off and sew the seam with a tapestry needle.
Finishing
- Sew the sleeves into the armholes. The top of the sleeve should align with the shoulder seam.
- Sew the side seams from the bottom hem to the underarm, and the sleeve seams from the cuff to the underarm.
- Weave in all ends using a tapestry needle.
- Block the cardigan gently by wetting it and laying it flat to dry, shaping it to the correct dimensions.
- Sew buttons opposite the buttonholes on the left front button band.
Your Honeycomb Hug Cardigan is now complete! This cozy, textured jacket will be a cherished addition to your little one's wardrobe, perfect for snuggles and everyday adventures.


