The Honeycomb Hearth Amigurumi Beehive Free Pattern – A Knitted Hexagon Honey Pot with Embroidered Bees
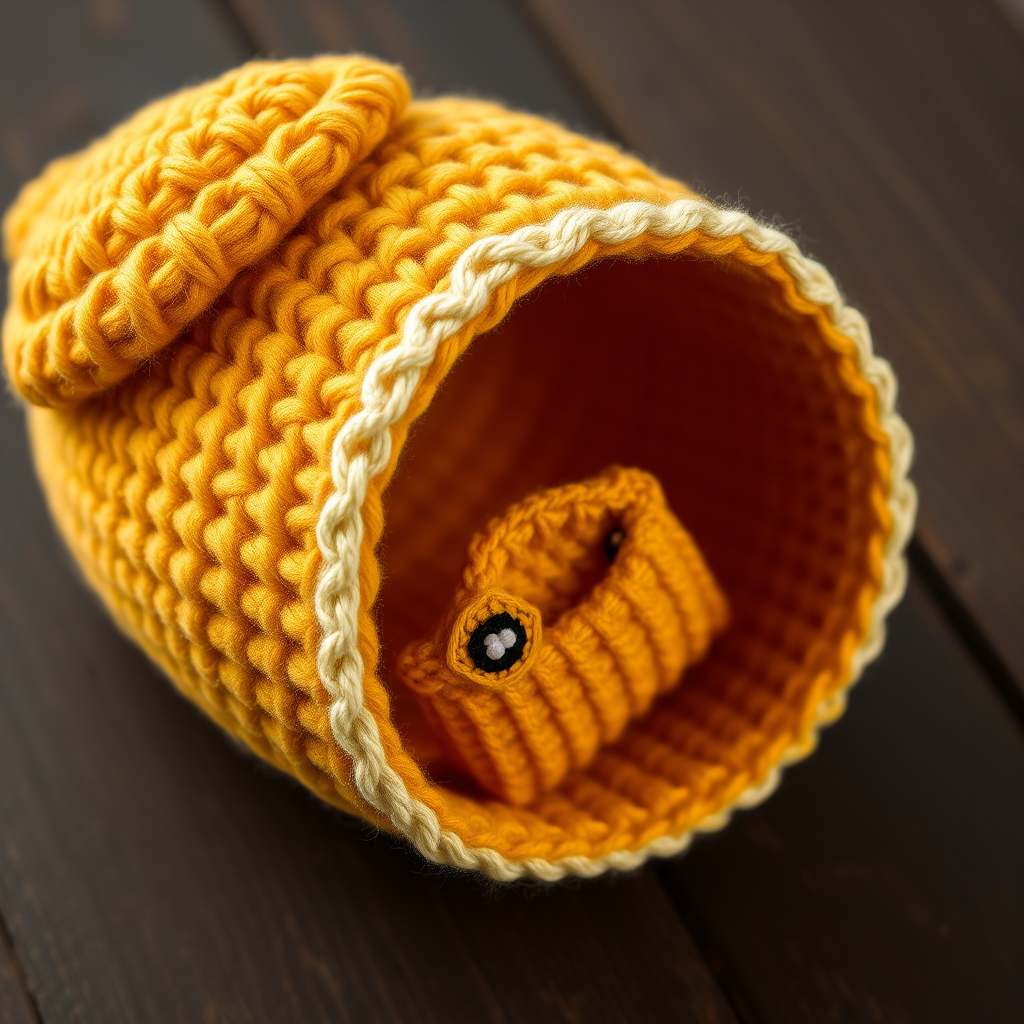
The Honeycomb Hearth Amigurumi Beehive: A Free Knitted Pattern
Bring the warmth of a sunlit apiary into your home with this charming knitted beehive, complete with a removable honeycomb lid and tiny embroidered bees. This cozy, whimsical project doubles as a decorative storage jar for trinkets, a delightful gift for nature lovers, or a sweet addition to any shelf. The Honeycomb Hearth is a perfect weekend project that combines simple knitting with a touch of crochet and embroidery, resulting in a handcrafted treasure that feels both rustic and refined.
Whether you're a seasoned knitter looking for a quick make or a beginner eager to expand your skills, this pattern offers a satisfying journey. The texture of the stockinette stitch gives the hive a soft, plush feel, while the amber lid and cream edging add a polished, honey-dipped finish. Let's gather our supplies and create this little piece of countryside charm.
Materials Needed
Before we begin, let's ensure you have everything you need. This project uses simple, readily available materials:
- Yarn: Worsted weight cotton yarn in the following colors:
- Golden Yellow (main hive body) – approx. 100g
- Warm Amber (lid and hexagon pocket) – approx. 50g
- Soft Cream (edging) – small amount
- Black (bee bodies and eyes) – small amount
- White (bee wings) – small amount
- Knitting Needles: US 6 (4.0 mm) for the main knitted pieces.
- Crochet Hook: US 4 (3.5 mm) for the edging and hexagon pocket.
- Other Tools: Yarn needle for seaming and embroidery, scissors, stitch markers (optional), and a tape measure.
Gauge: 20 stitches and 28 rows = 4 inches in stockinette stitch (blocked). Gauge is important for achieving the correct size, so take a moment to knit a small swatch and adjust your needle size if needed.
Step-by-Step Instructions
This pattern is knitted flat in pieces and seamed, with crochet edging for a polished finish. All pieces are worked in stockinette stitch (knit on the right side, purl on the wrong side) unless otherwise noted. Let's begin!
Hive Body (Make 1)
This is the main cone-shaped structure of your beehive. We'll start at the bottom and work our way up, decreasing to shape the top.
- Cast On: With golden yellow yarn and your US 6 needles, cast on 40 stitches.
- Begin Stockinette:
- Row 1 (Right Side): Knit all stitches.
- Row 2 (Wrong Side): Purl all stitches.
- Work the Body: Repeat Rows 1 and 2 until the piece measures 6 inches from the cast-on edge, ending with a Wrong Side row. This creates the straight-sided base of the hive.
- Shape the Top (Decreases): Now we'll begin decreasing to form the cone shape.
- Decrease Row 1 (Right Side): K2tog (knit two together), knit to the last 2 stitches, K2tog. (You will have 38 stitches).
- Decrease Row 2 (Wrong Side): Purl all stitches.
- Repeat these two rows until you have 20 stitches remaining, always ending with a Wrong Side row. This will create a gentle, even taper.
- Final Decrease: On the next Right Side row, K2tog across the row. (You will have 10 stitches).
- Close the Top: Cut the yarn, leaving a long tail (about 12 inches). Thread the tail onto a yarn needle, slide it through the remaining 10 stitches, and pull tight to gather the top closed. Secure with a knot.
- Seam the Side: With the right side facing out, use the yarn needle and the same tail to sew the side seam together, creating a cone-like shape. Leave the bottom edge open for now.
Hive Base (Make 1)
This flat piece will close the bottom of the hive and allow it to stand on its own.
- Cast On: With golden yellow yarn, cast on 20 stitches.
- Work the Base: Work in stockinette stitch for 2 inches, ending with a Wrong Side row.
- Bind Off: Bind off all stitches knitwise.
- Attach to Body: Using a yarn needle and golden yellow yarn, sew the base to the bottom opening of the hive body. Ease the fabric gently to fit, ensuring the base is centered and the seam is neat.
Honeycomb Lid (Make 1)
This small, domed piece sits on top of the hive opening, creating a removable lid.
- Cast On: With warm amber yarn, cast on 30 stitches.
- Work the Lid: Work in stockinette stitch for 1.5 inches, ending with a Wrong Side row.
- Shape the Dome: On the next Right Side row, K2tog across the row. (You will have 15 stitches).
- Close the Top: Cut the yarn, leaving a long tail. Thread the tail onto a yarn needle, slide it through the remaining 15 stitches, and pull tight to gather the top. Secure with a knot.
- Seam the Side: Sew the side seam to form a small dome. This lid should fit snugly over the top opening of the hive body.
Hexagon Pocket (Make 1)
This decorative crochet piece adds a honeycomb motif to the front of the hive. It's worked in the round.
- Magic Ring: Using the US 4 crochet hook and warm amber yarn, make a magic ring.
- Round 1: Work 6 single crochet (sc) into the ring. Pull the ring tight to close. (6 stitches)
- Round 2: Work 2 sc in each stitch around. (12 stitches)
- Round 3: *Sc in the next stitch, 2 sc in the next stitch*; repeat from * to * around. (18 stitches)
- Round 4: *Sc in the next 2 stitches, 2 sc in the next stitch*; repeat from * to * around. (24 stitches)
- Round 5: *Sc in the next 3 stitches, 2 sc in the next stitch*; repeat from * to * around. (30 stitches)
- Fasten Off: Cut the yarn, leaving a long tail for sewing. Use the yarn needle to sew this hexagon onto the front of the hive body as a decorative pocket. You can leave the top edge open to create a tiny pocket for small treasures.
Embroidered Bees (Make 3)
These little details bring the hive to life. Use the yarn needle and embroidery techniques to create three charming bees.
- Bee Body: Using black yarn, embroider small oval bodies (about 1 inch long) onto the hive body and lid using a satin stitch. This creates a solid, smooth oval.
- Bee Wings: Using white yarn, embroider two tiny wings on each side of the black oval using a lazy daisy stitch. This forms a small loop that resembles a wing.
- Bee Eyes: Using black yarn, embroider tiny eyes (French knots) at one end of each body. This gives the bee a face.
Crochet Edging
This neat finish gives the hive a polished, professional look.
- Bottom Edge: With soft cream yarn and the US 4 crochet hook, work a round of single crochet around the bottom edge of the hive body. This will cover the seam where the base meets the body.
- Lid Edge: Work a round of single crochet around the edge of the lid to give it a neat, finished border.
Assembly and Finishing
Now it's time to bring all the pieces together!
- Place the Lid: Gently place the honeycomb lid on top of the hive opening. It should fit snugly but be easily removable for storing trinkets inside.
- Weave in Ends: Carefully weave in all loose yarn ends using the yarn needle. Make sure they are secure and hidden within the fabric.
- Optional Hanging Loop: If you'd like to hang your beehive, create a small loop of yarn at the top of the lid. Simply thread a piece of yarn through the top, tie a knot, and secure it.
- Blocking: Lightly block the pieces to even out the stitches. Do not over-block, as you want to maintain the cozy, textured look of the knitted fabric. A gentle steam or a light mist and flat dry will work well.
Your Honeycomb Hearth Amigurumi Beehive is now complete! This delightful piece is perfect for holding small treasures, displaying on a shelf, or gifting to someone who appreciates handmade charm. The combination of knitting, crochet, and embroidery makes it a truly unique and rewarding project. Enjoy your little slice of the countryside!


