The Frosted Fern Sprig Free Pattern – A Crocheted Winter Woodland Charm
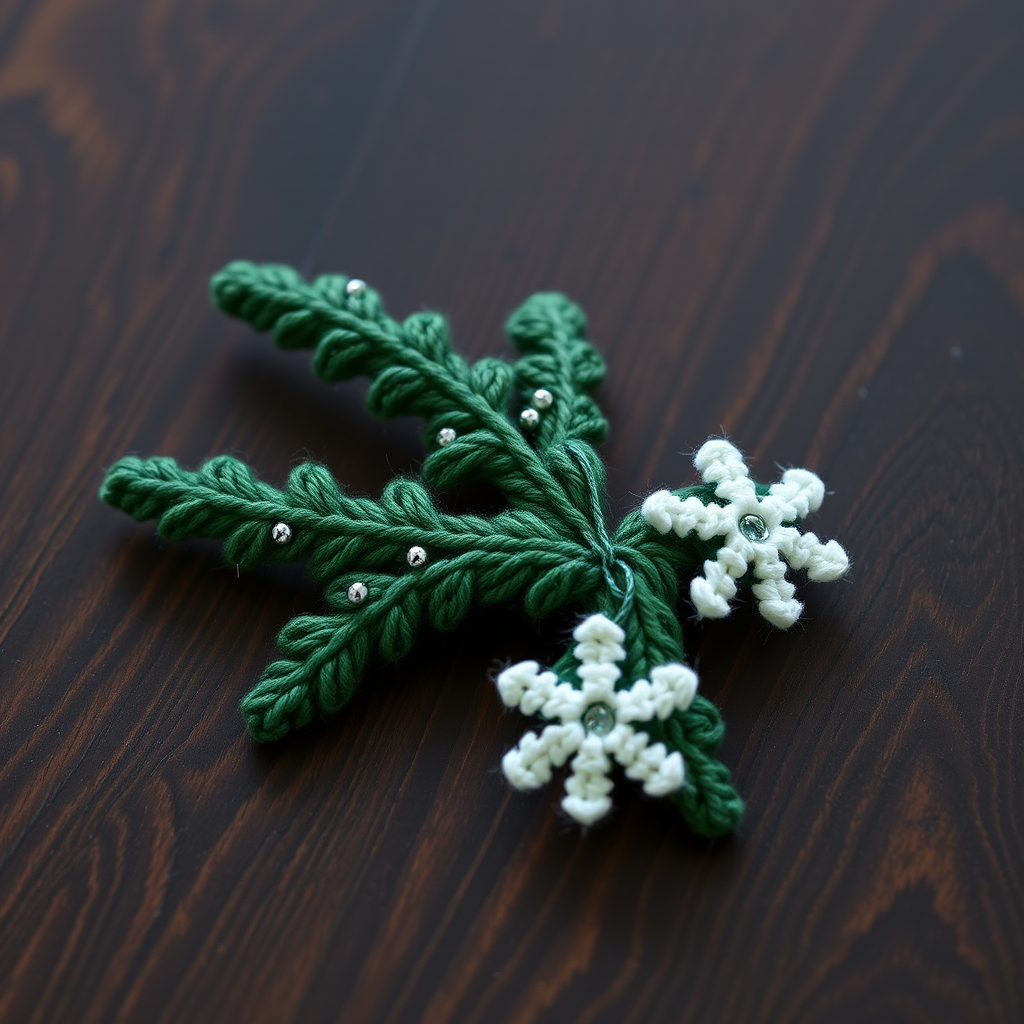
The Frosted Fern Sprig: A Free Crochet Pattern for Winter Woodland Charm
Bring a touch of enchanted forest to your holiday décor with this delicate, frosted fern sprig. Crocheted in soft, icy greens and topped with shimmering snow-kissed accents, this quick project makes a perfect gift topper, garland accent, or whimsical ornament. Whether you're a seasoned crocheter or just starting your amigurumi journey, this pattern is designed to be approachable, rewarding, and utterly charming. Let's create a little piece of winter magic together!
Materials Needed
Before we begin, gather these simple supplies. This project is wonderfully portable and uses minimal materials, making it perfect for crafting on the go.
- Yarn: Worsted weight cotton or acrylic yarn in two shades:
- Deep Forest Green (MC) – for the fern fronds and leaflets
- Icy White (CC) – for the snowflake accents
- Hook: US Size G/6 (4.0 mm) crochet hook
- Notions: Yarn needle, stitch marker, scissors, fiberfill stuffing
- Optional Embellishment: Small amount of silver or clear seed beads for the snowflake centers
Gauge Note: Gauge is not critical for this project. Aim for a tight, firm fabric to help the fern hold its shape. Approximately 5 single crochets = 1 inch.
Step-by-Step Instructions
This pattern is worked in continuous spirals unless otherwise noted. Use a stitch marker to track the beginning of each round. Let's break this down into manageable pieces: the fronds, the leaflets, the snowflakes, and the final assembly.
Part 1: The Fern Fronds (Make 3)
Each fern frond is worked from the base upward, starting with a magic ring and increasing to create a rounded base, then working even, and finally decreasing to a point. This creates the classic, tapering fern shape.
With MC, make a magic ring.
- Round 1: Work 6 single crochet (sc) into the ring. Pull the tail tight to close the ring. (6 stitches)
- Round 2: Work 2 sc in each stitch around. (12 stitches)
- Round 3: *Sc in next stitch, 2 sc in next stitch* repeat around. (18 stitches)
- Round 4: *Sc in next 2 stitches, 2 sc in next stitch* repeat around. (24 stitches)
- Round 5: *Sc in next 3 stitches, 2 sc in next stitch* repeat around. (30 stitches)
- Round 6: *Sc in next 4 stitches, 2 sc in next stitch* repeat around. (36 stitches)
- Rounds 7-10: Sc in each stitch around. (36 stitches) This creates the straight, middle section of the frond.
- Round 11: *Sc in next 4 stitches, sc2tog (single crochet two together)* repeat around. (30 stitches)
- Round 12: *Sc in next 3 stitches, sc2tog* repeat around. (24 stitches)
- Round 13: *Sc in next 2 stitches, sc2tog* repeat around. (18 stitches)
- Round 14: *Sc in next stitch, sc2tog* repeat around. (12 stitches)
- Round 15: Sc2tog around. (6 stitches)
Finishing the Frond: Fasten off, leaving a long tail (about 12 inches). Lightly stuff the frond with fiberfill before closing. Thread the tail through a yarn needle and weave it through the front loops of the remaining 6 stitches. Pull tight to cinch the opening closed. Weave the tail inside the frond to hide it.
Part 2: The Leaflets (Make 5 per Frond, 15 Total)
These small, pointed leaflets are worked flat in rows and sewn onto the fronds. They give the fern its characteristic feathery look.
With MC, chain (ch) 6.
- Row 1: Sc in the 2nd ch from the hook and in each ch across. (5 stitches) Turn your work.
- Row 2: Ch 1, sc2tog, sc in next stitch, sc2tog. (3 stitches) Turn.
- Row 3: Ch 1, sc3tog. (1 stitch) Fasten off, leaving a long tail for sewing.
Attaching the Leaflets: Using the yarn needle and the tail, sew the leaflets along the sides of each frond. Space them evenly, starting near the base and working up. Angle them slightly upward for a natural look. Secure them firmly with a few small stitches.
Part 3: The Snowflake Accents (Make 6)
These tiny, lacy snowflakes add the "frosted" touch. They are quick to make and add a beautiful contrast to the deep green.
With CC, make a magic ring.
- Round 1: Ch 3 (counts as a double crochet, dc), 2 dc into the ring, ch 3, slip stitch (sl st) into the ring. Repeat this sequence 5 more times to create 6 petals total. Fasten off, leaving a tail for sewing.
Adding Sparkle (Optional): Sew a small seed bead to the center of each snowflake for a subtle shimmer.
Part 4: Assembly
Now we bring all the pieces together to form your beautiful fern sprig.
- Arrange the Fronds: Place the three finished fronds together, overlapping their bases slightly to form a natural, clustered sprig.
- Sew the Fronds Together: Using a yarn needle and a length of MC yarn, sew the fronds together securely at the base. Make several passes through all three to ensure they are firmly attached.
- Attach the Snowflakes: Sew 2 snowflake accents onto each frond. Place one near the base and one mid-stem for a balanced, frosted look.
- Weave in Ends: Carefully weave in all remaining yarn tails to give your project a clean, professional finish.
- Add a Hanging Loop (Optional): If you'd like to hang your fern sprig as an ornament, attach a small loop of yarn at the top of the cluster.
And there you have it—a gorgeous, frosted fern sprig that captures the quiet beauty of a winter woodland. This project works up quickly, making it ideal for last-minute gifts or a cozy afternoon of crafting. Display it on your tree, tie it to a gift, or tuck it into a wreath for a touch of handmade charm. Happy crocheting!


