Sunny Side Up Chick Egg Cozy Free Pattern – A Knitted Breakfast Buddy
Sunny Side Up Chick Egg Cozy Free Pattern – A Knitted Breakfast Buddy
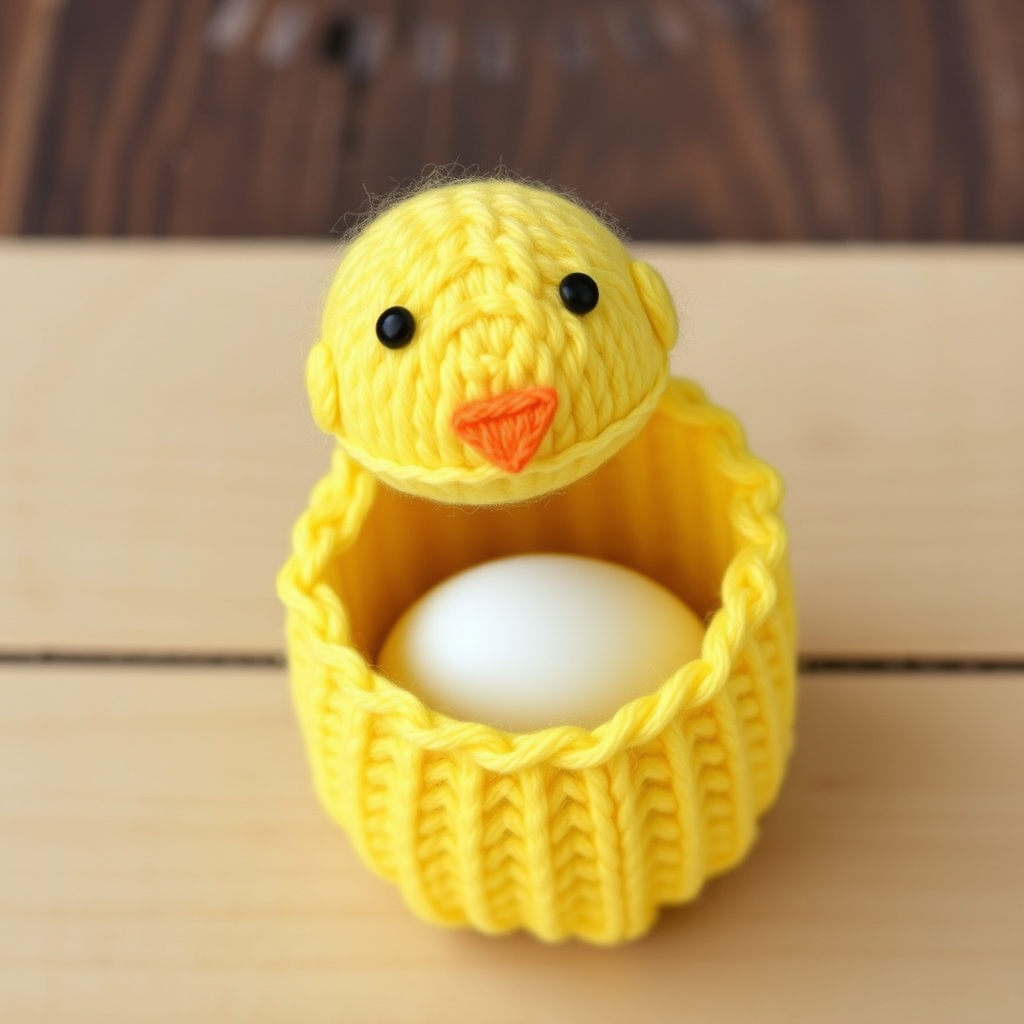
Wake up your breakfast table with this adorable knitted chick egg cozy, designed to perch right on top of your morning egg. This quick, whimsical project brings a smile to any plate and is the perfect handmade gift for Easter, brunch hosts, or anyone who loves a touch of charm with their meal. Whether you're a seasoned knitter or just starting out, this pattern is a delightful way to practice basic increases, decreases, and seaming—all while creating something utterly adorable.
This cozy is knitted flat in one piece and then seamed, making it a perfect beginner-friendly project. The finished result is a thick, soft cone of cheerful yellow yarn with a gathered top that forms the chick's head, a tiny orange beak, and two embroidered eyes. It's designed to sit snugly over a standard boiled egg, with the bottom edge slightly flaring out for a perfect fit.
Materials Needed
Before you begin, gather the following materials. All items are readily available at your local craft store or online.
Yarn
- Worsted weight cotton yarn in yellow (main color) – approximately 30-40 yards
- Worsted weight cotton yarn in orange (for the beak) – small amount
- Worsted weight cotton yarn in black (for the eyes) – small amount
Note: Cotton yarn is recommended because it holds its shape well and is durable for repeated use. However, any worsted weight yarn will work if you match the gauge.
Needles & Notions
- US Size 5 (3.75 mm) knitting needles (or size needed to obtain gauge)
- Tapestry needle (for seaming and weaving in ends)
- Scissors
- Stitch markers (optional, but helpful for tracking rows)
Gauge
22 stitches and 30 rows = 4 inches in stockinette stitch. Gauge is important for achieving the correct finished size. If your gauge is off, adjust your needle size accordingly. A swatch is always a good idea before starting any project.
Finished Size: Fits a standard large egg (approx. 2 inches wide, 2.5 inches tall).
Step-by-Step Instructions
This pattern is worked flat in two identical body pieces, then seamed together. The beak is knitted separately and sewn on. Follow along carefully, and you'll have your chick cozy finished in no time.
Abbreviations
- K = knit
- P = purl
- K2tog = knit two together (decrease)
- M1 = make one (increase)
- St(s) = stitch(es)
- RS = right side
- WS = wrong side
Body (Make 2 Pieces)
Step 1: Cast On
With yellow yarn, cast on 20 stitches. Leave a tail of about 6 inches for seaming later.
Step 2: Knit the Main Body
Row 1 (RS): K all 20 stitches.
Row 2 (WS): P all 20 stitches.
Repeat Rows 1-2 until the piece measures 2 inches from the cast-on edge, ending with a WS row. This creates a smooth stockinette stitch fabric. Count your rows to ensure consistency—you should have approximately 15 rows completed.
Step 3: Shape the Top (Crown)
Now you'll begin decreasing to form the gathered top of the chick's head. Work the following rows exactly as written:
Row 1 (RS): K2tog, K16, K2tog. (18 sts)
Row 2 (WS): P all 18 stitches.
Row 3 (RS): K2tog, K14, K2tog. (16 sts)
Row 4 (WS): P all 16 stitches.
Row 5 (RS): K2tog, K12, K2tog. (14 sts)
Row 6 (WS): P all 14 stitches.
Row 7 (RS): K2tog, K10, K2tog. (12 sts)
Row 8 (WS): P all 12 stitches.
Row 9 (RS): K2tog, K8, K2tog. (10 sts)
Row 10 (WS): P all 10 stitches.
Row 11 (RS): K2tog, K6, K2tog. (8 sts)
Row 12 (WS): P all 8 stitches.
Row 13 (RS): K2tog, K4, K2tog. (6 sts)
Row 14 (WS): P all 6 stitches.
Row 15 (RS): K2tog, K2, K2tog. (4 sts)
Row 16 (WS): P all 4 stitches.
Step 4: Finish the Top
Cut the yarn, leaving a long tail (at least 10 inches). Thread the tail through a tapestry needle, then pass it through the remaining 4 stitches on your knitting needle. Slide the stitches off the needle and pull the yarn tight to gather the top of the chick's head. Secure with a knot. This gathered point will be the top of the chick's head.
Repeat Steps 1-4 to make a second identical body piece.
Beak (Make 1)
Step 1: Cast On
With orange yarn, cast on 4 stitches. Leave a short tail for weaving in.
Step 2: Knit the Beak
Row 1 (RS): K all 4 stitches.
Row 2 (WS): P all 4 stitches.
Row 3 (RS): K2tog, K2tog. (2 sts)
Row 4 (WS): K2tog. (1 st)
Step 3: Finish
Cut the yarn, leaving a 4-inch tail. Pull the tail through the last stitch to secure. Weave in the ends on the wrong side of the beak. The beak will naturally form a small triangle shape.
Finishing & Assembly
Step 1: Seam the Body
Place the two body pieces together with right sides facing each other. Using the long tail from the cast-on edge, sew the two pieces together along the side seams using a whip stitch or mattress stitch. Important: Leave the bottom edge open—this is where the egg will slide in. Turn the cozy right side out. The gathered top should now form the chick's head.
Step 2: Attach the Beak
Position the beak on the front of the chick, about 1 inch down from the top point. Use the orange yarn tail to sew the beak securely in place. Make sure the point of the triangle faces downward or slightly outward for a cute look.
Step 3: Embroider the Eyes
Using black yarn and a tapestry needle, embroider two small French knots or straight stitches for the eyes. Place them just above the beak, about 0.25 inches apart. For French knots: bring the needle up through the fabric, wrap the yarn around the needle twice, then insert the needle back down close to where it came up. Pull gently to form a small knot. Repeat for the second eye.
Step 4: Weave in All Ends
Using your tapestry needle, weave in any remaining yarn tails on the inside of the cozy. Trim any excess yarn.
Step 5: Serve & Enjoy
Place your finished chick cozy over a boiled egg and serve immediately. The cozy will keep the egg warm while adding a delightful touch to your breakfast table.
Tips for Success
- Count your stitches after each decrease row to ensure accuracy. It's easy to lose track, but a quick count prevents mistakes.
- Use a stitch marker on the right side of your work to easily identify RS vs. WS rows.
- Block your pieces before seaming if you want a perfectly flat finish. Simply wet the pieces, gently press out excess water, and lay flat to dry.
- Experiment with colors—try pastel yellow for Easter, white for a snowbird, or even pink for a Valentine's treat!
This Sunny Side Up Chick Egg Cozy is a charming, quick project that's perfect for using up small amounts of yarn. It makes a wonderful handmade gift, a fun addition to an Easter basket, or a delightful way to brighten your own morning routine. Happy knitting!


