Sunny Side Up Chick Coaster Free Pattern – Crochet Egg-cellent Spring Decor
Sunny Side Up Chick Coaster Free Pattern – Crochet Egg-cellent Spring Decor
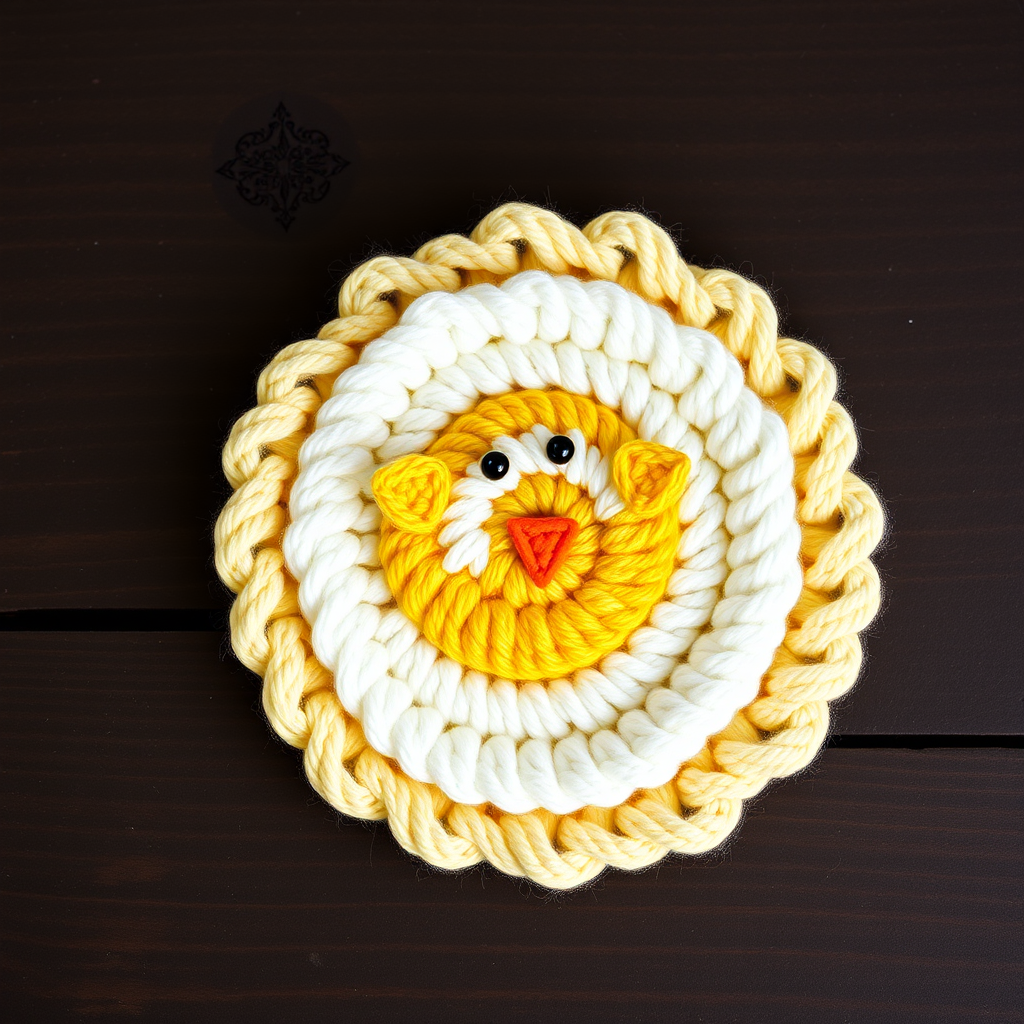
Bring a burst of spring cheer to your table with this adorable crochet chick coaster that looks just like a sunny-side-up egg. It's a quick, fun project that makes a delightful gift or a whimsical addition to your Easter brunch setting. This beginner-friendly pattern uses basic crochet stitches and works up in just a couple of hours, making it the perfect weekend project. The two-layer design—a fluffy white "egg white" base topped with a sunny yellow chick—is both charming and practical, protecting your surfaces in style.
Materials Needed
Before you begin, gather the following supplies. All materials are readily available at craft stores or online.
- Yarn: Worsted weight cotton yarn in three colors:
- Yellow (for the chick body) – approximately 50 yards
- White (for the egg white) – approximately 50 yards
- Orange (for the beak) – small amount
- Black (for the eyes) – small amount
- Crochet Hook: US Size G/6 (4.0 mm) crochet hook
- Stitch Marker: To keep track of rounds (or use a scrap piece of yarn)
- Yarn Needle: For sewing pieces together and weaving in ends
- Polyester Fiberfill: A small amount for light stuffing (optional but recommended)
- Scissors: For cutting yarn
Gauge: Gauge is not critical for this project; aim for a tight tension to prevent gaps. The finished coaster should be approximately 4-5 inches in diameter.
Step-by-Step Instructions
This pattern is worked in continuous spirals unless otherwise noted. Use a stitch marker to keep track of rounds. Work all stitches into both loops unless specified otherwise.
Chick Body (Yellow Yarn)
This creates the perfectly round, sunny yellow circle that forms the chick's body.
- Round 1: Make a magic ring, work 6 single crochet (sc) into the ring. Pull the tail to close the ring tightly. (6 stitches)
- Round 2: Work 2 sc in each stitch around. (12 stitches)
- Round 3: *Sc in next stitch, 2 sc in next stitch* repeat from * to * around. (18 stitches)
- Round 4: *Sc in next 2 stitches, 2 sc in next stitch* repeat from * to * around. (24 stitches)
- Round 5: *Sc in next 3 stitches, 2 sc in next stitch* repeat from * to * around. (30 stitches)
- Round 6: *Sc in next 4 stitches, 2 sc in next stitch* repeat from * to * around. (36 stitches)
- Round 7: *Sc in next 5 stitches, 2 sc in next stitch* repeat from * to * around. (42 stitches)
- Round 8: *Sc in next 6 stitches, 2 sc in next stitch* repeat from * to * around. (48 stitches)
- Round 9: *Sc in next 7 stitches, 2 sc in next stitch* repeat from * to * around. (54 stitches)
- Round 10: *Sc in next 8 stitches, 2 sc in next stitch* repeat from * to * around. (60 stitches)
- Rounds 11-12: Sc in each stitch around. (60 stitches each round)
- Fasten off and weave in the yarn tail securely. Set aside.
Egg White (White Yarn)
This forms the slightly larger, organic-shaped base that resembles a fried egg white.
- Round 1: Make a magic ring, work 6 sc into the ring. Pull the tail to close. (6 stitches)
- Round 2: Work 2 sc in each stitch around. (12 stitches)
- Round 3: *Sc in next stitch, 2 sc in next stitch* repeat from * to * around. (18 stitches)
- Round 4: *Sc in next 2 stitches, 2 sc in next stitch* repeat from * to * around. (24 stitches)
- Round 5: *Sc in next 3 stitches, 2 sc in next stitch* repeat from * to * around. (30 stitches)
- Round 6: *Sc in next 4 stitches, 2 sc in next stitch* repeat from * to * around. (36 stitches)
- Round 7: *Sc in next 5 stitches, 2 sc in next stitch* repeat from * to * around. (42 stitches)
- Round 8: *Sc in next 6 stitches, 2 sc in next stitch* repeat from * to * around. (48 stitches)
- Round 9: *Sc in next 7 stitches, 2 sc in next stitch* repeat from * to * around. (54 stitches)
- Rounds 10-11: Sc in each stitch around. (54 stitches each round)
- Fasten off, leaving a long tail (approximately 18-20 inches) for sewing the pieces together.
Assembly
Now it's time to bring your chick to life by combining the pieces.
- Positioning: Place the chick body (yellow circle) centered on top of the egg white (white circle). The yellow circle should sit neatly in the middle, with the white circle visible around the edges to create the "egg white" effect.
- Sewing: Thread the long tail from the egg white onto your yarn needle. Using a whip stitch, sew the two pieces together, going through both layers. Work your way around the entire circumference of the yellow circle.
- Stuffing: When you have about 2 inches left to sew, pause. Insert small amounts of polyester fiberfill through the opening, distributing it evenly to create a plush, slightly padded feel. Be careful not to overstuff—you want the coaster to remain relatively flat. Continue sewing the remaining opening closed.
- Weave in ends: Secure the yarn and weave the tail into the back of the work. Trim any excess.
Facial Features
Add personality to your chick with these simple embroidery details.
- Beak: With orange yarn, embroider a small triangle beak in the center of the chick's face. Use a satin stitch (working parallel stitches close together to fill the shape) or surface crochet. Alternative method: Crochet a tiny triangle (chain 3, sc in 2nd chain from hook, sc in last chain), then sew it onto the chick's face.
- Eyes: With black yarn, embroider two French knots or small straight stitches for eyes. Position them symmetrically on either side of the beak, approximately 1-2 rows above the beak. For a cuter look, place them slightly closer together and higher up on the face.
Wings (Optional Detail)
Add these adorable little wings to give your chick extra charm.
- Make two wings: With yellow yarn, chain 4. Sc in 2nd chain from hook, half double crochet (hdc) in next chain, double crochet (dc) in last chain. Fasten off, leaving a tail for sewing.
- Attach wings: Position one wing on each side of the chick body, approximately halfway down the sides. Sew them securely using the yarn needle and weave in all ends.
Finishing Touches
- Weave in all remaining yarn ends securely using your yarn needle. Trim any excess yarn close to the work.
- Gently shape the coaster by pressing it flat. If desired, lightly steam block (hold a steam iron slightly above the surface without touching) to even out the stitches.
- Your Sunny Side Up Chick Coaster is complete! Make a set of four for your Easter table or give them as thoughtful handmade gifts.
Pro Tip: This pattern is easily customizable! Try making a larger version by adding more increase rounds, or create a whole flock of chicks in different pastel colors. The possibilities are endless—happy crocheting!


