Starlight Sloth Amigurumi Free Pattern – Crochet a Dreamy Hanging Sleepyhead
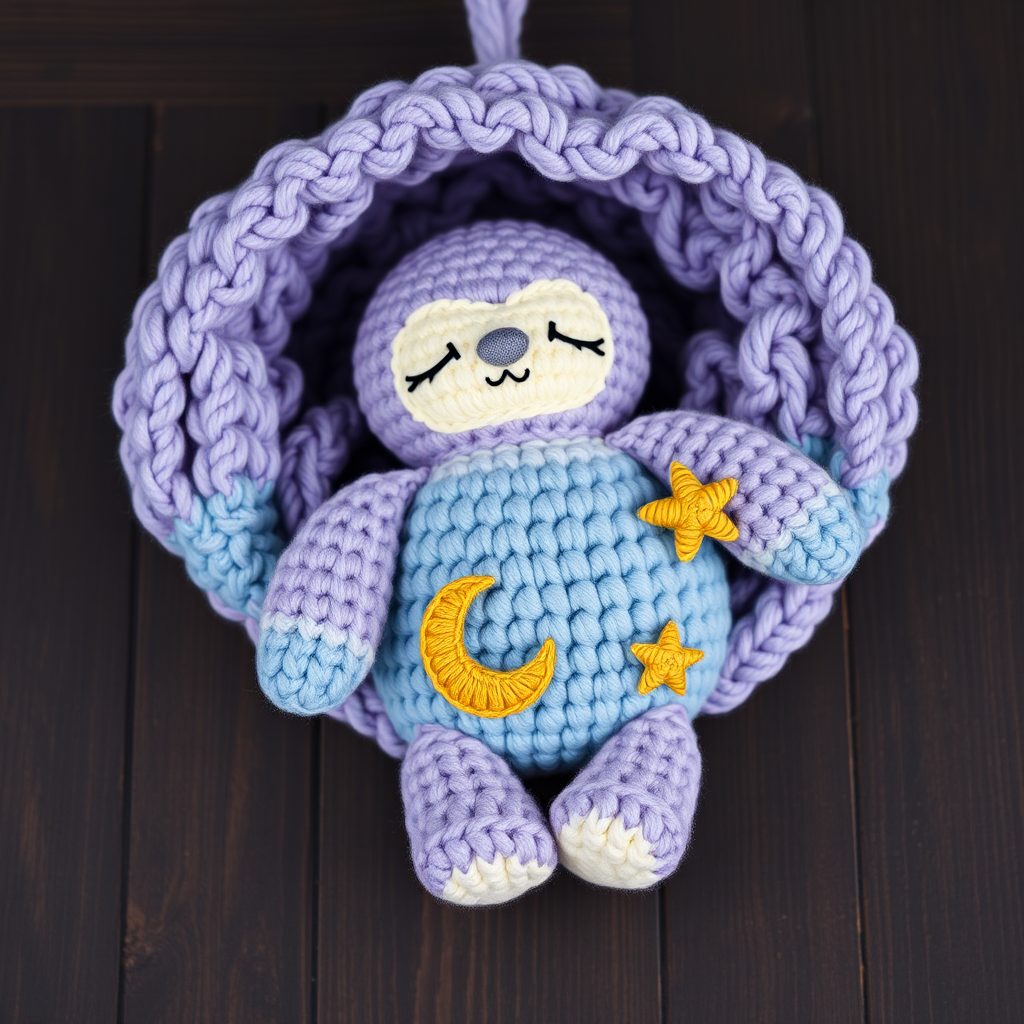
Starlight Sloth Amigurumi Free Pattern – Crochet a Dreamy Hanging Sleepyhead
Imagine a soft, huggable sloth drifting through a starry night, clutching a golden crescent moon and tiny stars. This Starlight Sloth amigurumi pattern is the perfect project for crocheters of all levels—especially beginners looking to create a magical, handmade gift. Whether you're decorating a nursery, crafting a whimsical present, or simply adding cozy charm to your home, this sleepy sloth with its gentle, closed-eyed smile will capture hearts instantly.
Using soft gradient yarn in lavender, dusty blue, cream, and gold, this pattern creates a dense, plush toy that's both beautiful and durable. The step-by-step instructions below are detailed and beginner-friendly, ensuring you can recreate this dreamy sloth with confidence. Let's dive into the magic!
Materials Needed
Before you begin, gather the following supplies. All materials are standard and easy to find at any craft store.
- Yarn: Worsted weight cotton or acrylic blend in:
- Soft lavender (main body)
- Dusty blue (accents)
- Cream (face patch)
- Gold (moon and stars)
- Crochet Hook: 3.5mm (E) hook
- Stuffing: Polyester fiberfill or any soft toy stuffing
- Tapestry needle: For sewing parts and embroidering facial features
- Stitch markers: To keep track of rounds (optional but helpful)
- Black yarn: For embroidering sleepy eyes
- Dark brown yarn: For embroidering the nose and smile
Gauge: Not critical for amigurumi, but aim for tight stitches to prevent stuffing from showing through. If your stitches are loose, use a smaller hook.
Step-by-Step Instructions
This pattern uses standard amigurumi techniques: magic ring, single crochet (sc), increase (inc), and decrease (dec). Follow each section carefully, and don't forget to stuff firmly for a plump, huggable finish.
Head
Using lavender yarn:
- Round 1: Magic ring, 6 sc in ring. (6)
- Round 2: Inc in each st around. (12)
- Round 3: (Sc in next st, inc) around. (18)
- Round 4: (Sc in next 2 sts, inc) around. (24)
- Round 5: (Sc in next 3 sts, inc) around. (30)
- Round 6: (Sc in next 4 sts, inc) around. (36)
- Rounds 7-12: Sc in each st around. (36)
- Round 13: (Sc in next 4 sts, dec) around. (30)
- Round 14: (Sc in next 3 sts, dec) around. (24)
- Round 15: (Sc in next 2 sts, dec) around. (18)
- Stuff the head firmly with fiberfill, shaping it into a round ball.
- Round 16: (Sc in next st, dec) around. (12)
- Round 17: Dec around. (6)
- Fasten off and weave in the end securely.
Body
Using lavender yarn:
- Round 1: Magic ring, 6 sc in ring. (6)
- Round 2: Inc in each st around. (12)
- Round 3: (Sc in next st, inc) around. (18)
- Round 4: (Sc in next 2 sts, inc) around. (24)
- Rounds 5-8: Sc in each st around. (24)
- Round 9: (Sc in next 2 sts, dec) around. (18)
- Round 10: (Sc in next st, dec) around. (12)
- Stuff the body firmly, making sure it's plump but not overstuffed.
- Round 11: Dec around. (6)
- Fasten off, leaving a long tail for sewing to the head.
Arms (Make 2)
Using lavender yarn:
- Round 1: Magic ring, 6 sc in ring. (6)
- Rounds 2-6: Sc in each st around. (6)
- Stuff lightly—just enough to give shape without making them stiff.
- Flatten the opening and sew the arms to the sides of the body, positioning them slightly upward as if reaching for the stars.
Legs (Make 2)
Using lavender yarn:
- Round 1: Magic ring, 6 sc in ring. (6)
- Rounds 2-4: Sc in each st around. (6)
- Stuff lightly and flatten.
- Sew the legs to the bottom of the body, spacing them evenly for a stable sitting position.
Face Patch (Cream Yarn)
- Round 1: Magic ring, 6 sc in ring. (6)
- Round 2: Inc in each st around. (12)
- Round 3: (Sc in next st, inc) around. (18)
- Fasten off, leaving a long tail. Sew the patch onto the center of the head, positioning it slightly lower for a cute, sleepy look.
Eyes (Embroider with Black Yarn)
Using a tapestry needle and black yarn, embroider two small, closed sleepy eyes. Each eye should be a gentle curved line (like a "U" turned on its side) placed on the face patch, about 4 stitches apart. Keep the curves soft and relaxed to capture the dreamy expression.
Nose and Smile (Embroider with Dark Brown Yarn)
Embroider a small triangle nose between the eyes, pointing downward. Below the nose, add a tiny smile line—just a small curved stitch to give the sloth a peaceful, content expression.
Moon (Gold Yarn)
- Round 1: Magic ring, 6 sc in ring. (6)
- Round 2: Inc in each st around. (12)
- Round 3: (Sc in next st, inc) around. (18)
- Round 4: (Sc in next 2 sts, inc) around. (24)
- Round 5: (Sc in next 3 sts, inc) around. (30)
- Round 6: Sc in each st around. (30)
- Fasten off, leaving a long tail. Fold the circle in half and sew the straight edge together to create a crescent moon shape. Attach the moon to the sloth's hands or belly, as if it's being hugged.
Stars (Make 3, Gold Yarn)
- Round 1: Magic ring, 5 sc in ring. (5)
- Round 2: Inc in each st around. (10)
- Round 3: (Sc in next st, inc) around. (15)
- Fasten off, leaving a tail. Sew the stars around the moon or onto the sloth's body for a scattered, starry-night effect.
Assembly
- Sew the head to the body using the long tail left on the body. Position the head slightly tilted for a sleepy, relaxed posture.
- Attach the arms and legs as described above, ensuring they're securely sewn.
- Sew the moon and stars onto the sloth's belly or hands. For a charming touch, position one star in the sloth's hand and the moon cradled against its chest.
- Weave in all ends carefully to keep the toy neat and durable.
Final Thoughts
Your Starlight Sloth is now complete! This dreamy amigurumi makes a wonderful nursery decoration, a heartfelt handmade gift, or a cozy companion for anyone who loves whimsical crafts. The soft gradient colors and gentle expression bring a sense of calm and magic to any space.
Feel free to customize your sloth—try different color combinations, add a hanging loop for a mobile, or embroider extra stars. The possibilities are endless, and each creation will be uniquely yours. Happy crocheting!


