Starlight Sleigh Bell Garland Free Pattern – A Knitted Nordic Holiday Decoration
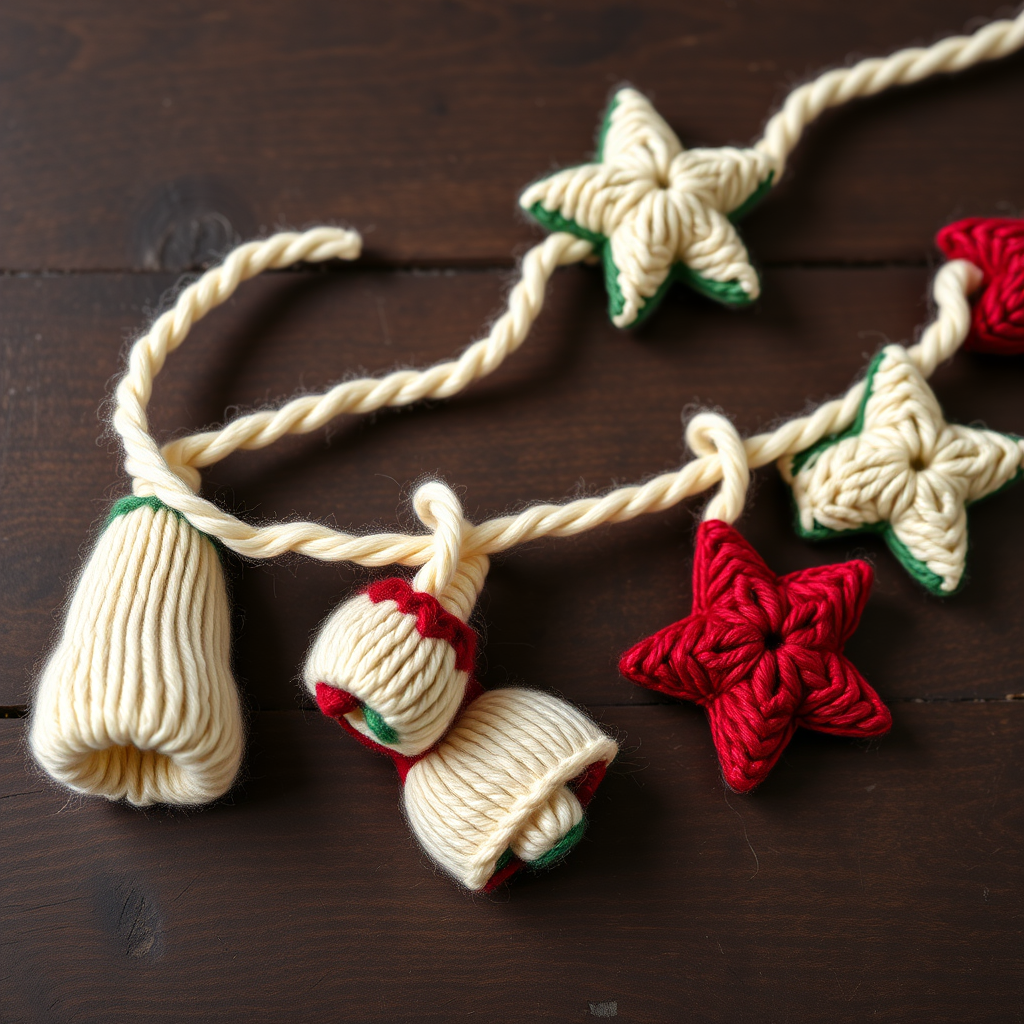
Starlight Sleigh Bell Garland Free Pattern – A Knitted Nordic Holiday Decoration
Bring the cozy charm of a Nordic winter into your home this holiday season with our Starlight Sleigh Bell Garland. This delightful knitted decoration features tiny sleigh bells and star-shaped ornaments, all worked in soft, chunky worsted weight yarn. The rustic palette of cream, forest green, and cranberry red creates a warm, handmade touch that will look beautiful draped across a mantel, woven through a Christmas tree, or hung in a doorway. Whether you're a seasoned knitter or just starting your crafting journey, this pattern is simple, rewarding, and perfect for adding a personal, heartfelt touch to your holiday décor.
Materials Needed
Before you begin, gather the following supplies. This project is wonderfully portable and uses minimal materials, making it perfect for cozy evenings by the fire.
- Yarn: Worsted weight yarn in three colors – cream, forest green, and cranberry red (approximately 50g of each color). The cream is used for the string, while the green and red are perfect for alternating the ornaments.
- Knitting Needles: US 7 (4.5mm) knitting needles. A standard pair of straight needles is ideal.
- Other Tools: A yarn needle for weaving in ends and sewing the shapes, and a pair of scissors.
Gauge: 20 stitches and 26 rows = 4 inches in stockinette stitch. While gauge isn't critical for this decorative project, matching it will ensure your ornaments are the perfect size for a garland.
Step-by-Step Instructions
This garland is made up of two types of knitted ornaments: a sleigh bell and a star. You will knit each piece separately and then string them together with yarn. The entire project is worked in a simple stockinette stitch (knit one row, purl one row), making it an excellent project for beginners.
Knitting the Sleigh Bell (Make 5)
These charming little bells are quick to knit and shape beautifully with a simple fold and stitch. Follow these steps carefully to create each bell.
- Cast On: Cast on 6 stitches using your chosen color (forest green or cranberry red).
- Row 1: Knit all stitches.
- Row 2: Purl all stitches.
- Row 3 (Decrease Row): K1, k2tog (knit two together), k1, k2tog. You will now have 4 stitches on your needle.
- Row 4: Purl all stitches.
- Row 5 (Decrease Row): K2tog twice. You will now have 2 stitches on your needle.
- Row 6 (Final Decrease): K2tog. You will now have 1 stitch remaining.
- Finishing: Cut the yarn, leaving a 6-inch tail. Pull the tail through the remaining stitch and weave in the end.
- Shaping the Bell: To create the rounded bell shape, fold the bottom edge (the cast-on edge) up slightly. Using your yarn needle and the tail, sew a small stitch at the bottom to cinch it slightly, creating a rounded bulge. This gives the bell its characteristic silhouette.
- Hanging Loop: Cut a 6-inch piece of cream yarn. Fold it in half and thread the folded end through the top point of the bell. Pull the two loose ends through the loop and tighten to create a secure hanging loop.
Knitting the Star (Make 5)
These geometric stars are created by knitting a diamond shape, then folding and sewing it to form the classic five-pointed star. It's a clever and satisfying technique.
- Cast On: Cast on 10 stitches using your chosen color (the opposite of your bells).
- Row 1: Knit all stitches.
- Row 2: Purl all stitches.
- Row 3 (Decrease Row): K1, k2tog, k4, k2tog, k1. You will now have 8 stitches.
- Row 4: Purl all stitches.
- Row 5 (Decrease Row): K1, k2tog, k2, k2tog, k1. You will now have 6 stitches.
- Row 6: Purl all stitches.
- Row 7 (Decrease Row): K1, k2tog, k1, k2tog. You will now have 4 stitches.
- Row 8: Purl all stitches.
- Row 9 (Decrease Row): K2tog twice. You will now have 2 stitches.
- Row 10 (Final Decrease): K2tog. You will now have 1 stitch.
- Finishing: Cut the yarn, leaving a 6-inch tail. Pull through the remaining stitch and weave in the end. You now have a flat diamond shape.
- Shaping the Star: Fold the diamond in half lengthwise, bringing the two long edges together. Using your yarn needle and the tail, sew the two long edges together, leaving the top point open. This creates a cone-like shape.
- Forming the Points: Pinch the bottom point of the cone and sew it to the back of the shape. This creates the bottom point of the star. The top opening will naturally form the two top points, and the side edges will form the left and right points, giving you a beautiful five-pointed star.
- Hanging Loop: Attach a loop of cream yarn at the top point, using the same method as the sleigh bell.
Assembling the Garland
Once you have all ten ornaments knitted and shaped, it's time to string them together into a beautiful garland.
- Prepare the Cord: Cut a long piece of cream yarn, approximately 36 inches long. This will give you plenty of length to drape and hang.
- Thread the Ornaments: Thread the yarn through the hanging loops of your ornaments. Alternate between a sleigh bell and a star, creating a balanced and rhythmic pattern. For example: Bell, Star, Bell, Star, Bell, Star, Bell, Star, Bell, Star.
- Spacing: Slide the ornaments along the yarn to space them evenly. A spacing of about 3-4 inches between each ornament looks lovely and balanced.
- Secure the Ends: Tie a secure knot at each end of the yarn to prevent the ornaments from sliding off. You can also add a small bead or tassel to the ends for extra decoration.
- Hang and Enjoy: Your Starlight Sleigh Bell Garland is complete! Drape it across your mantel, weave it through the branches of your Christmas tree, or hang it in a doorway to add a cozy, handmade Nordic touch to your holiday home.
This pattern is a wonderful way to use up small amounts of worsted weight yarn and create a lasting, personalized decoration. The repetitive knitting is meditative, and the shaping techniques are simple enough for any beginner to master. We hope this garland brings warmth and joy to your holiday season for years to come. Happy knitting!


