Wall Hanging Crochet Patterns
Serenity Garden Wall Hanging Free Pattern
Anonymous
•
July 18, 2026
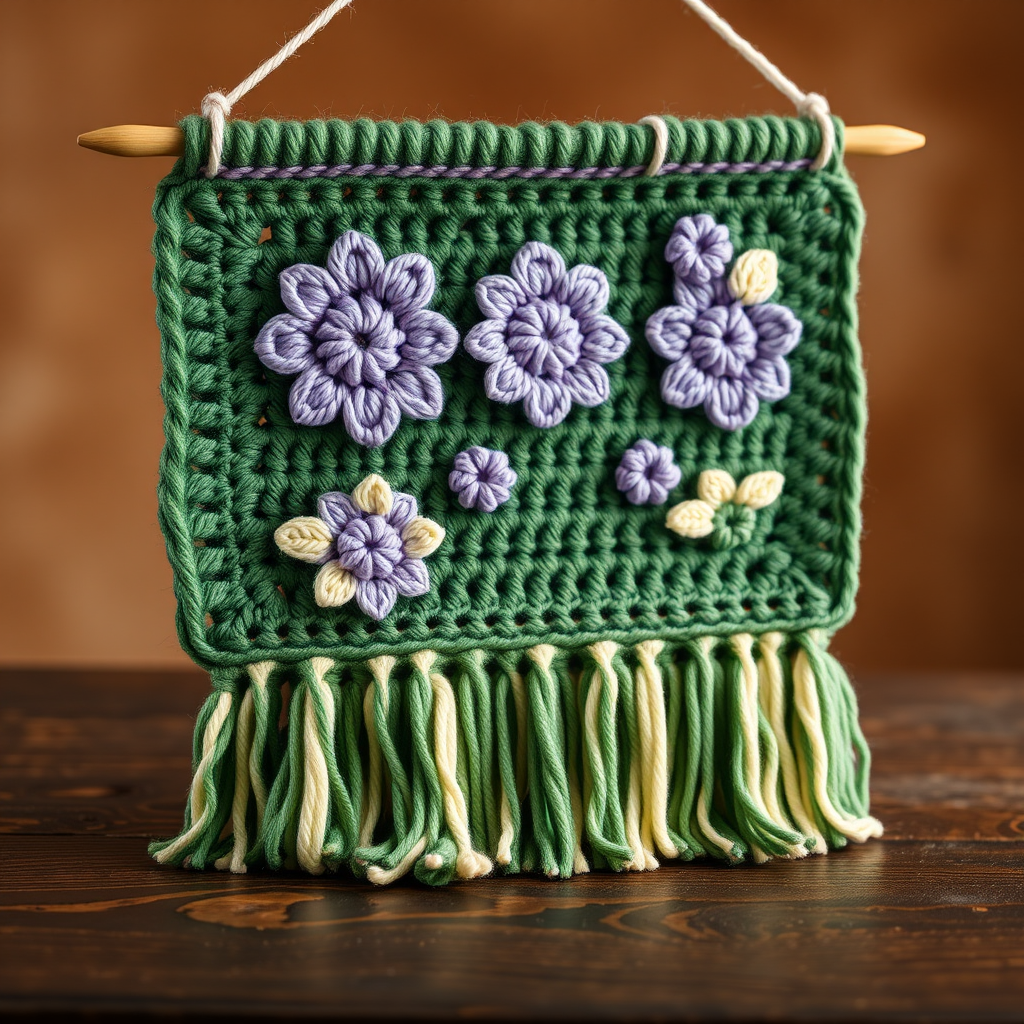
Serenity Garden Wall Hanging Free Pattern
Introduction
Bring the tranquility of a serene garden into your home with this beautiful crocheted wall hanging. Featuring intricate floral motifs and lush greenery, this piece adds a touch of nature-inspired elegance to any space. Perfect for beginners, this pattern will guide you through each step to create a stunning wall decoration that showcases your crochet skills.
Materials Needed
- Yarn: Worsted weight cotton yarn in forest green, lavender, and cream
- Hook: Size H/8 (5.0 mm) crochet hook
- Gauge: 14 sts and 16 rows = 4 inches in double crochet
- Other Supplies: Wooden dowel for hanging, scissors, tapestry needle for weaving in ends and sewing pieces together
Step-by-Step Instructions
1. Base Panel
- With the forest green yarn, make a slip knot and chain (ch) 60.
- Row 1: Double crochet (dc) in the 4th chain from the hook and in each chain across. You should have 57 dc at the end of this row.
- Rows 2-30: Chain 3 (this counts as your first dc), turn your work, and dc in each stitch across the row. Repeat this for a total of 29 rows.
- Once you complete Row 30, fasten off the yarn and weave in any loose ends using a tapestry needle.
2. Floral Motifs
- Using the lavender yarn, create a magic ring.
- Round 1: Chain 3 (counts as dc), then work 11 dc into the magic ring. Join with a slip stitch (sl st) to the top of the chain-3. You should have a total of 12 dc.
- Round 2: Chain 2, then *dc, chain 1, dc in the next stitch; repeat from * around. Join with a sl st to complete the round.
- Fasten off the lavender yarn, leaving a long tail for sewing. Make a total of 5 floral motifs.
3. Leafy Accents
- With the cream yarn, chain 10.
- Row 1: Single crochet (sc) in the 2nd chain from the hook, half double crochet (hdc) in the next chain, then dc in the next 5 chains, hdc in the next chain, and sc in the last chain.
- Fasten off and leave a long tail for sewing. Make a total of 10 leafy accents.
4. Assembly
- Arrange the floral motifs evenly across the base panel. You can place them in a straight line or in a staggered pattern for a more organic look.
- Using the long tails from each floral motif, sew each one onto the base panel securely.
- Position the leafy accents around each floral motif and sew them in place using the long tails as well.
5. Finishing Touches
- Take a wooden dowel and attach it to the top of the base panel for hanging. You can sew or tie the top edge of the panel to the dowel.
- For a decorative fringe, cut lengths of yarn in all three colors (forest green, lavender, and cream) and attach them to the bottom edge of the panel. Vary the lengths for a cascading effect.
- Trim the fringe to your desired length to complete the look.
6. Hanging
- Cut a length of yarn and tie each end to the dowel for hanging.
- Find the perfect spot in your home to display your beautiful wall hanging and enjoy the serene beauty it brings to your space!


