Mossy Glen Highland Bull Amigurumi Free Pattern – Knit a Plush Meadow Guardian
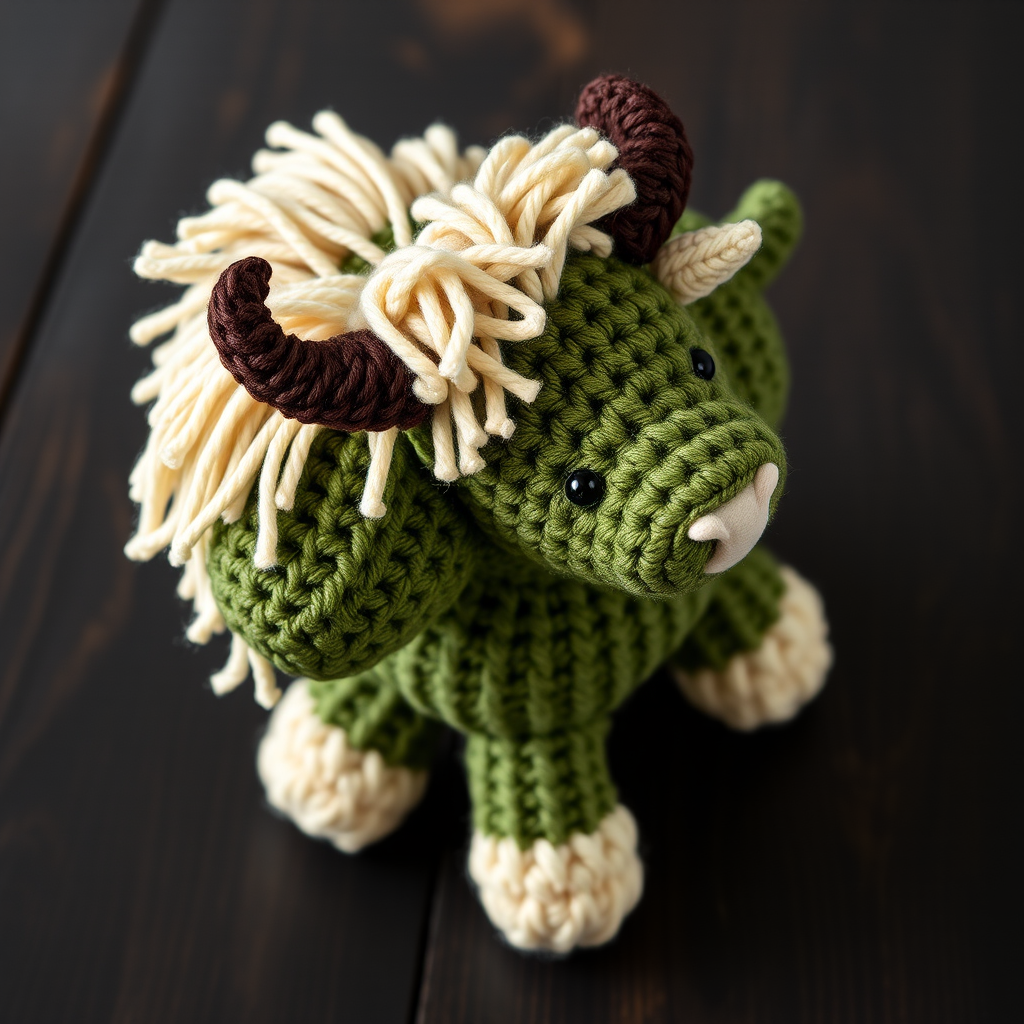
Introducing the Mossy Glen Highland Bull Amigurumi
Bring a touch of the Scottish highlands into your home with this enchanting Mossy Glen Highland Bull amigurumi! This plush, textured knit pattern features a serene expression, shaggy cream fringe, and deep moss green body that evokes the rugged, peaceful landscapes of the glens. Perfect for nature-loving decor, a cozy nursery accent, or a heartfelt handmade gift, this gentle bull stands about 6 inches tall and exudes a guardian-like warmth. Even if you're new to amigurumi, this pattern is approachable—using simple knit stitches, basic shaping, and a few crochet details to create a truly special keepsake.
This pattern is worked flat in pieces and seamed together, making it easy to manage. The stockinette stitch creates a soft, smooth surface, while the crocheted fringe and horns add delightful texture and character. Let’s gather your materials and get started on crafting your very own meadow guardian!
Materials Needed
Before you begin, collect the following supplies to ensure a smooth crafting experience:
- Yarn: Worsted weight yarn in three colors:
- Moss green (main body) – approx. 100g
- Cream (fringe and muzzle) – approx. 40g
- Dark brown (horns and eyes) – approx. 10g
- Knitting Needles: US 5 (3.75 mm) for all body pieces
- Crochet Hook: US 4 (3.5 mm) for horns and fringe attachment
- Gauge: 20 stitches and 28 rows = 4 inches in stockinette stitch (gauge is not critical, but consistent tension helps achieve a neat finish)
- Other Tools: Yarn needle for seaming and embroidery, stitch markers, polyester fiberfill stuffing, scissors
Step-by-Step Instructions
This pattern is knitted flat in pieces and seamed, with crochet details for the horns and fringe. Work in stockinette stitch (knit one row, purl one row) unless otherwise noted. All pieces are worked from the bottom up or top down as indicated.
Head (Knit – Make 1)
- Cast on 6 stitches.
- Row 1: Knit all stitches.
- Row 2: Increase in every stitch (12 stitches).
- Row 3: Knit all stitches.
- Row 4: *K1, increase in next stitch* repeat to end (18 stitches).
- Row 5: Knit all stitches.
- Row 6: *K2, increase in next stitch* repeat to end (24 stitches).
- Rows 7–12: Knit even (no increases or decreases) for 6 rows.
- Row 13: *K2, knit 2 together (k2tog)* repeat to end (18 stitches).
- Row 14: Knit all stitches.
- Row 15: *K1, k2tog* repeat to end (12 stitches).
- Stuff the head firmly with fiberfill.
- Row 16: K2tog across all stitches (6 stitches).
- Cut yarn, leaving a long tail. Thread the tail through the remaining stitches, pull tight to close, and seam the opening closed. Set aside.
Body (Knit – Make 1)
- Cast on 8 stitches.
- Row 1: Knit all stitches.
- Row 2: Increase in every stitch (16 stitches).
- Row 3: Knit all stitches.
- Row 4: *K1, increase in next stitch* repeat to end (24 stitches).
- Row 5: Knit all stitches.
- Row 6: *K2, increase in next stitch* repeat to end (32 stitches).
- Rows 7–18: Knit even for 12 rows.
- Row 19: *K2, k2tog* repeat to end (24 stitches).
- Row 20: Knit all stitches.
- Row 21: *K1, k2tog* repeat to end (16 stitches).
- Stuff the body firmly with fiberfill.
- Row 22: K2tog across all stitches (8 stitches).
- Cut yarn, thread through remaining stitches, pull tight, and seam closed. Set aside.
Legs (Knit – Make 4)
- Cast on 6 stitches.
- Row 1: Knit all stitches.
- Row 2: Increase in every stitch (12 stitches).
- Rows 3–8: Knit even for 6 rows.
- Row 9: K2tog across all stitches (6 stitches).
- Stuff lightly with fiberfill.
- Cut yarn, thread through remaining stitches, pull tight, and seam. Leave a long tail (about 12 inches) for sewing the leg to the body.
Ears (Knit – Make 2)
- Cast on 4 stitches.
- Row 1: Knit all stitches.
- Row 2: Increase in every stitch (8 stitches).
- Rows 3–4: Knit even for 2 rows.
- Row 5: K2tog across all stitches (4 stitches).
- Bind off all stitches. Fold each ear in half (right sides together) and sew the side edges to form a small triangle. Leave a tail for sewing to the head.
Horns (Crochet – Make 2)
- With dark brown yarn, make a magic ring.
- Round 1: Work 4 single crochet (sc) into the ring. Pull tight to close.
- Round 2: *Sc in next stitch, 2 sc in next stitch* repeat to end (6 stitches).
- Rounds 3–5: Sc in each stitch around (6 stitches per round).
- Fasten off, leaving a long tail. Stuff lightly with a small amount of fiberfill. Set aside.
Shaggy Fringe (Crochet Attachment)
- Cut 20 strands of cream yarn, each 6 inches long.
- Using a crochet hook, fold one strand in half to form a loop.
- Insert the hook into a stitch on the head or body (where you want fringe), pull the loop through, then pull the yarn ends through the loop and tighten to secure.
- Repeat this process to attach fringe along the top of the head, down the back, and on the chest to mimic the Highland bull's long, shaggy hair. Space the strands evenly for a full, natural look.
Assembly
- Attach Head to Body: Using a yarn needle and the tail from the head, sew the head to the top of the body, aligning the seams. Make sure it's centered and secure.
- Attach Legs: Position the four legs evenly on the bottom of the body. Using the long tails left on the legs, sew each leg firmly to the body. Ensure the bull stands upright and balanced.
- Attach Ears: Sew the ears to the sides of the head, just below where the horns will be placed. Position them so they stick out slightly.
- Attach Horns: Sew the horns to the top of the head, slightly forward of the ears. Angle them gently outward and upward for a natural look.
- Embroider Eyes: Using dark brown yarn and a yarn needle, embroider two small French knots or cross-stitches on the face, positioned about 1 inch apart and 1 inch down from the top of the head. Place them symmetrically for a serene expression.
- Add Muzzle: Using cream yarn, embroider a small oval or circle at the center of the face, just below the eyes, using a satin stitch. This creates a subtle, soft muzzle.
- Weave in All Ends: Use the yarn needle to hide any remaining yarn tails inside the body or head.
Finishing Touches
- Trim the fringe to an even length, leaving it slightly longer on the forehead for a shaggy, windswept look.
- Optional: Add a small bell or a ribbon around the neck for extra charm and a personalized touch.
- Gently shape the bull, fluffing the fringe and adjusting the ears and horns as needed.
Your Mossy Glen Highland Bull is now complete! Display it on a shelf, bedside table, or gift it to someone who loves cozy, handmade treasures. The soft texture and gentle expression make it a comforting companion for any space. Enjoy your new plush meadow guardian!


